
Introduction
Professional Landscape Design Drawings That Sell Your Vision help you clearly show your ideas for outdoor spaces. These drawings serve as a bridge between your vision and the actual implementation. They include detailed plans that guide the team on what plants, structures, and features to include and where to place them for the best effect. Good drawings capture both the art and function of a garden or landscape project.
In the following chapters, you’ll learn what makes an effective landscape design drawing. You’ll discover the tools and methods to create accurate and persuasive plans. We will also explore how to avoid common mistakes and present your design so clients see the full potential of your vision.
What Landscape Design Drawings Include

Landscape design drawings typically have several main components that work together to show your vision clearly. The first one you’ll often see is the site plan. It lays out the basic footprint — boundaries, existing buildings, paths, and major features on the property. Think of it as the foundation for everything else. This lets you understand where things sit in relation to one another.
Next up are planting plans. These focus on what plants go where. They show types of plants, their spacing, and sometimes even growth patterns. Picture a map dotted with symbols representing trees, shrubs, and flowers. It’s meant to guide both aesthetics and practicality—like sunlight needs or seasonal changes.
Hardscape layouts come into play too. They mark built features: patios, walls, decks, paths, and such. These elements often have distinct textures or shading in drawings to separate them from planting areas. Their job is to clarify the structure and flow of outdoor spaces.
Finally, elevations offer side views. These sketches reveal heights and relationships between different landscape elements, like terraces or retaining walls. They complement flat plans by giving a sense of depth and dimension.
Imagine a site plan as a bird’s-eye snapshot, planting plans like a color-coded garden guide, and hardscape layouts mapping out your outdoor rooms. Elevations then show the rise and fall of these spaces. Each piece plays its role to tell a fuller story.
Site Plans and Their Role
Site plans are the backbone of landscape design drawings. They show a property as if you were looking down from above. Boundaries are drawn boldly, buildings appear in solid shapes, paths snake through the property, and big features—say, pools or ponds—stand out clearly.
This bird’s-eye view frames all the work you want to do. Why is this so crucial? Because it helps you see where existing elements sit and where new things might fit. It allows you to avoid overlapping features or awkward layouts. Without a solid site plan, it’s easy for designs to become jumbled or impractical.
Picture you’re trying to add a patio and a garden bed but don’t know how close they can go. A site plan sorts out these spatial questions. It sets a clear boundary for creativity while keeping things realistic.
Planting Plans and Hardscape Layouts
Planting plans specifically lay out the selections and precise spots for all plants. They tell you which tree is this and where this shrub needs to live. You can see spacing, too, ensuring plants have room to thrive rather than crowd each other. These plans often include symbols or simple labels that distinguish varieties and sizes.
Hardscape layouts, on the other hand, focus wholly on man-made features. Paths, patios, fences, walls, decks — you name it — show up here. They help in visualizing movement and use of space. What might feel abstract when talked about becomes concrete when drawn.
For example, a hardscape drawing could illustrate a meandering stone path leading from the house to a cozy seating area. Meanwhile, the planting plan indicates flowering shrubs lining that path. Both plans together let you imagine how the space will feel and function.
How to Read Landscape Drawings

Landscape design drawings can feel like a foreign language at first glance. But once you get a handle on the basics—scales, symbols, lines, and notations—they become much clearer. Let’s start with scale, which is simply the ratio between the drawing and real life. If you see “1 inch = 10 feet,” it means every inch on the paper equals ten feet in reality. Common scales include 1:100 or 1:50, depending on how much detail the drawing shows. Thinking of scale as a shrinking tool helps—it’s just making the whole project fit on paper.

Next, symbols represent elements like plants, trees, or furniture. For example:
- Circles with squiggly lines often show tree canopies.
- Small leaf shapes or clusters mark shrubs or ground covers.
- Blue wavy lines or shapes indicate water features, like ponds or fountains.
- Rectangles or squares can depict benches, tables, or patios.
Lines also differ in style and thickness. Dotted lines might show pathways you can walk on, while bold, continuous lines usually outline walls or structures. Notations clarify what everything means, sometimes with a legend or key—don’t skip these. You might find labels like “existing tree” or “new plant,” which help you track changes. When starting out, it helps to cross-reference all these parts slowly, maybe picking one element at a time and tracing it through the drawing. It’s a bit like solving a puzzle, and yes, it takes practice. But after a few tries, you’ll start to see the design beneath the paper’s surface.
Tools for Creating Design Drawings

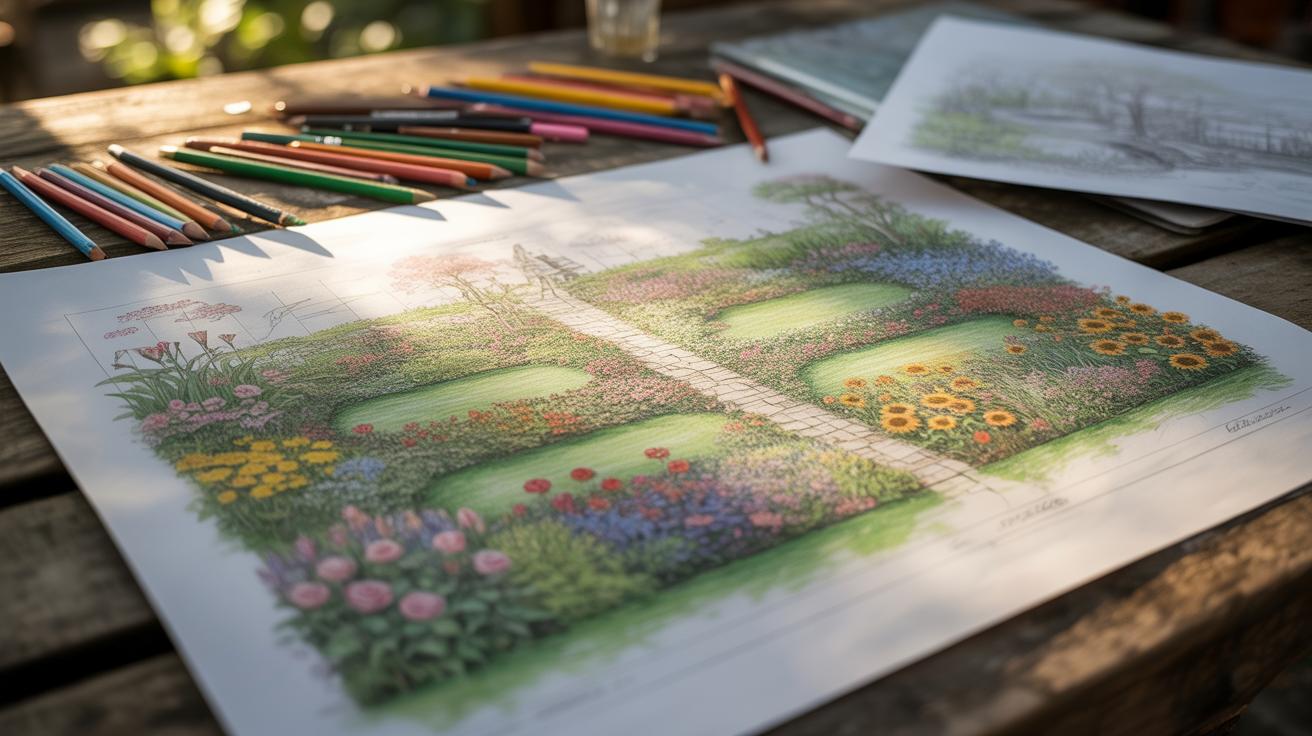
When it comes to creating landscape design drawings, professionals often balance between traditional hand tools and digital software. Both have their place, depending on the stage of the project and personal preference. You might find yourself sketching initial ideas with pencil and paper, then moving to computer-aided design for precision and edits.
Manual Drawing Tools Checklist
If you’re leaning toward hand drawing, here’s a quick checklist of what you’ll want on hand:
- Pencils of varying hardness – soft for shading, harder for fine lines
- Erasers – kneaded types work well for subtle corrections
- Rulers and scale rulers – for keeping proportions accurate
- Tracing paper – useful for layering ideas or tracing site plans
- Templates – circles, ellipses, and plant symbols help speed up repeated elements
- Drafting pens – for clear, consistent ink lines
- T-square and set squares – to maintain consistent angles and straight edges

Honestly, I often go back to these basics because they offer a certain control that digital tools can sometimes lack. It’s tactile, immediate – no menus or commands involved.
Popular Software for Digital Designs
On the digital side, there’s a handful of software that really stand out:
- AutoCAD: Great for precise line work and detailed plans. It’s widely used and supports layering, which helps manage complex projects.
- SketchUp: Offers 3D modeling that’s surprisingly intuitive. You can view your design from different angles, which can clarify spatial relationships.
- Landscaping-specific apps: Programs like Vectorworks Landmark or Realtime Landscaping let you work with plant libraries and terrain modeling, tailoring tools specifically to outdoor designs.
Each software has pros and cons. For example, AutoCAD’s learning curve might slow you down initially, yet the accuracy can’t be beaten for construction documents. SketchUp, on the other hand, sometimes feels a bit clunky with intricate details but gives you such a clear visual. Maybe you’ll find yourself switching depending on the project’s needs.
Common Mistakes in Landscape Drawings

We often see drawings that miss the mark because of a few common slip-ups, and yes, even experienced designers can fall into these traps. One big misstep is skipping the scale or picking the wrong one. Without a proper scale, your drawing becomes a guessing game. Builders might end up installing a pathway too wide or planting beds that don’t fit the space. It feels like trying to follow a recipe without measurements—things simply don’t turn out as expected.

Another frequent error is ignoring critical site features such as slopes, drainage, or existing plants. If these details don’t show up on the drawing, the design risks being impractical. Imagine planting trees where water pools every rainy season or placing structures without considering the slope’s impact. The result? Costly fixes on-site, frustrated clients, and a loss of trust in your vision. Why does this happen? Maybe it’s a rush to finish or a belief that these details aren’t that important. But they are.
When you overlook these elements, the drawing loses much of its usability. Sometimes people think a pretty sketch is enough, but without accurate representation of the land’s quirks, contractors hit roadblocks. Have you ever wondered how much smoother construction would go if a drawing showed those site conditions clearly? Probably a lot smoother, yes.
Presenting Drawings to Clients Effectively

Your drawings won’t do much good if clients can’t grasp what you’re showing. Organizing and presenting these visuals clearly matters a lot. Start by grouping your drawings logically – maybe by section or by phases of the project. This way, clients won’t feel overwhelmed jumping between details without context.
Use printed copies or digital screens thoughtfully. When you present, walk clients through the drawings step-by-step, pausing often to check if they’re following. It helps to keep a pointer or highlight tool handy, to direct attention without shuffling pages endlessly. Silence can be awkward, but letting a moment sink in might encourage questions.

Visual aids come to the rescue here. For example:
- Comparison overlays to reveal before and after views
- Simple 3D renderings to give spatial sense
- Physical samples or material palettes alongside drawings
These elements anchor the design in reality, making abstract lines feel more tangible.
Using Color and Labels Clearly
Color coding transforms a dull black-and-white plan into something you can quickly read and understand. When each plant type, pathway, or structure has a distinct color, clients follow the design thread more naturally. But be cautious—too many colors can confuse or tire the eye. Stick to a limited palette that feels balanced.
Labels are your silent narrators. Clear, concise text next to features can clarify intent—like “shade tree here” or “outdoor seating.” Avoid jargon or abbreviations unless you explain them first. I once saw a client’s eyes glaze over at “HDPE piping”; “water line” worked better.
Make sure labels don’t clutter the drawing. Use callouts or legends, so the main design remains clean. It’s a tightrope walk between enough info and too much—feel out your audience.
Creating Simple, Visual Summaries

Sometimes, skimming a 20-page set of plans isn’t viable for clients. That’s where summaries shine. An overview diagram, laid out big and bold, can show the entire design footprint at a glance. Think of it as the map before the details.
Attach small boxes or bubbles with brief explanations pointing out highlights: “Fire pit area,” “Native shrubs for low maintenance,” or “Rain garden for drainage.” This breaks down complex ideas into digestible bites. You might find clients latch onto a feature they hadn’t considered important before.
Also, try a simple checklist or quick reference guide with images embedded. People remember visuals more than words alone. By mixing diagrams and tiny narratives, you create a more engaging experience that helps clients say “yes” with more confidence.
Comparing Hand Drawing Versus Digital Drawing

You might find yourself torn between the charm of hand drawing and the precision of digital drawing when creating your landscape design drawings. Each method has its own perks and drawbacks, and honestly, what suits you depends on your style, tools, and goals.
Benefits of Hand Drawing

Hand drawing feels immediate and tactile. You can quickly sketch out ideas without worrying about layers or software glitches. It encourages spontaneity, letting your creativity flow directly from mind to paper. Sometimes, those rough pencil lines capture a mood or concept better than perfect computer lines. Also, you don’t need to fuss with devices or power—just a pen and paper. That makes it ideal for initial brainstorming or fieldwork.
But it’s not all smooth sailing. Changes can be a pain, and neatness suffers as you erase and redraw. It lacks the scalability of digital files, which you might miss when sharing or storing your work.
Strengths of Digital Drawing
Digital drawing tools offer precision that’s hard to match. Grids, snap-to guides, and zoom functions help you refine every detail. Editing’s a breeze—move elements around, change colors, or add layers without redrawing everything. Plus, you can easily share files with clients or collaborators, speeding up feedback and approval processes.
Still, working digitally sometimes feels less personal or fluid. There’s a learning curve for software, and the creative flow might get interrupted by technical distractions. Some designers miss the unpredictable beauty of a hand-drawn line. In the end, your choice might depend on whether you value flexibility and immediacy more, or accuracy and ease of modification.
Step by Step to Create a Landscape Drawing

Starting your drawing means first knowing the site well. Begin with a thorough site survey—measurements, slopes, existing features, and anything that sticks out. Jot down notes, take photos, and maybe make a quick sketch on-site. This raw data lays the groundwork for everything else. It might seem tedious, but skipping this step can cause more trouble later.
Once you have your info, try rough sketches. Don’t aim for perfection here; just get your ideas out. Use simple shapes and lines to explore how elements could fit together. Play around with different layouts. Sometimes, what looks good on paper surprises you in person. This phase is your creative playground.
Next, add more detail. Start defining plant types, paths, seating areas, or water features. Draw with clearer lines. Use symbols consistently—for example, circles for trees, dotted lines for pathways. Label everything carefully. This makes your intentions easier to understand, especially if clients or contractors review the drawing.
Finally, finish with clean lines and accurate scaling. Double-check labels and elements for clarity. Sometimes, subtle shading or color hints help distinguish areas but keep it minimal. The goal is a drawing that clearly communicates your vision without overwhelming. It’s a balance between detail and simplicity you’ll find changes with each project.
How Design Drawings Help Construction

Landscape design drawings act like a detailed map for the construction team, showing exactly what should be built and where. Without these drawings, workers might rely on guesswork or vague instructions, which can lead to misplaced plants or structures that don’t fit right.
Think about situations where a large tree was planted too close to a patio, causing roots to disrupt the paving later. That happens when drawings don’t clearly mark the exact spots for each element. A well-crafted drawing prevents these errors by pinpointing precise locations, even down to inches.
For example, when installing irrigation, drawings specify pipe routes and sprinkler heads, avoiding overlaps or missed areas. Without this clarity, crews may waste time digging trenches twice or miss watering some plants entirely.
Clear drawings save more than just frustration—they cut down on costly mistakes too. Fixing errors on-site can delay schedules and increase expenses. Mistakes like wrong measurements or misplaced walls often stem from unclear or incomplete plans. Having a solid, accurate drawing means crews know what to do straight away, saving time and money. It’s surprising how often simple oversights cause big headaches, and most of those are avoidable with good drawings.
Communicating Exact Placements
Good design drawings go beyond rough ideas and actually guide where everything belongs. Instead of saying “plant here” or “build there,” they show exact coordinates or dimensions within the site. This removes any need for guesswork on the ground.
For example, a drawing might indicate a tree’s location by distance from property lines or nearby features. That way, landscapers and builders can stake out spots precisely. It also helps with relationships between different elements—knowing how far a bench should be from a path or where to locate lighting fixtures so they highlight features without glare.
Without this level of detail, construction workers might interpret placement differently, leading to uneven spacing or awkward layouts. You might think it’s a minor detail, but when plants or structures aren’t exactly where they should be, the design’s impact fades.
Avoiding Costly Errors and Delays
Clear drawings reduce confusion on site. They provide each contractor or worker a reliable reference to follow, so changes or fixes are minimal during construction. This lowers the chances of errors and prevents the domino effect of delays.
Consider a project where a retaining wall’s height or location was misunderstood because the drawings were unclear. Not only did it slow progress, but crews had to demolish and rebuild sections, pushing the timeline back weeks.
By contrast, when drawings show everything—dimensions, materials, slopes, and planting details—the work moves smoothly. Crews spend less time asking questions or waiting on decisions, which keeps the project on schedule and within budget.
So, as you look at your design drawings, think about them as your team’s guidebook. The clearer and more precise they are, the fewer costly errors and delays you’ll face. It might sound obvious, but the amount you can save by investing in thorough drawings often surprises even seasoned professionals.
Estimating Cost and Time From Drawings

When you look at a landscape design drawing, it can feel like just a nice picture. But if you examine it closely, it’s actually a roadmap for what materials and work you’ll need. Start by scanning every detail—the types of plants, paving, lighting, irrigation, and any structures. These elements tell you what supplies to order.
Breaking down the materials is a bit like piecing together a puzzle. Note quantities and specifics: square footage of turf, lengths of edging, volume of mulch. Labor demands come from these too. For instance, installing stone steps takes longer than spreading seed. Ask yourself which parts require specialized skills or heavy equipment. That can affect costs and schedules.
Timelines can be tricky. Design drawings usually hint at phases—grading first, then planting, followed by finishing touches. Gauge how weather or site restrictions might slow things down. It’s okay if your initial estimate is rough; you’ll refine it with on-site experience. Keeping a checklist and updating it helps you track progress and spot potential delays before they hit.
Examples of Effective Landscape Drawings
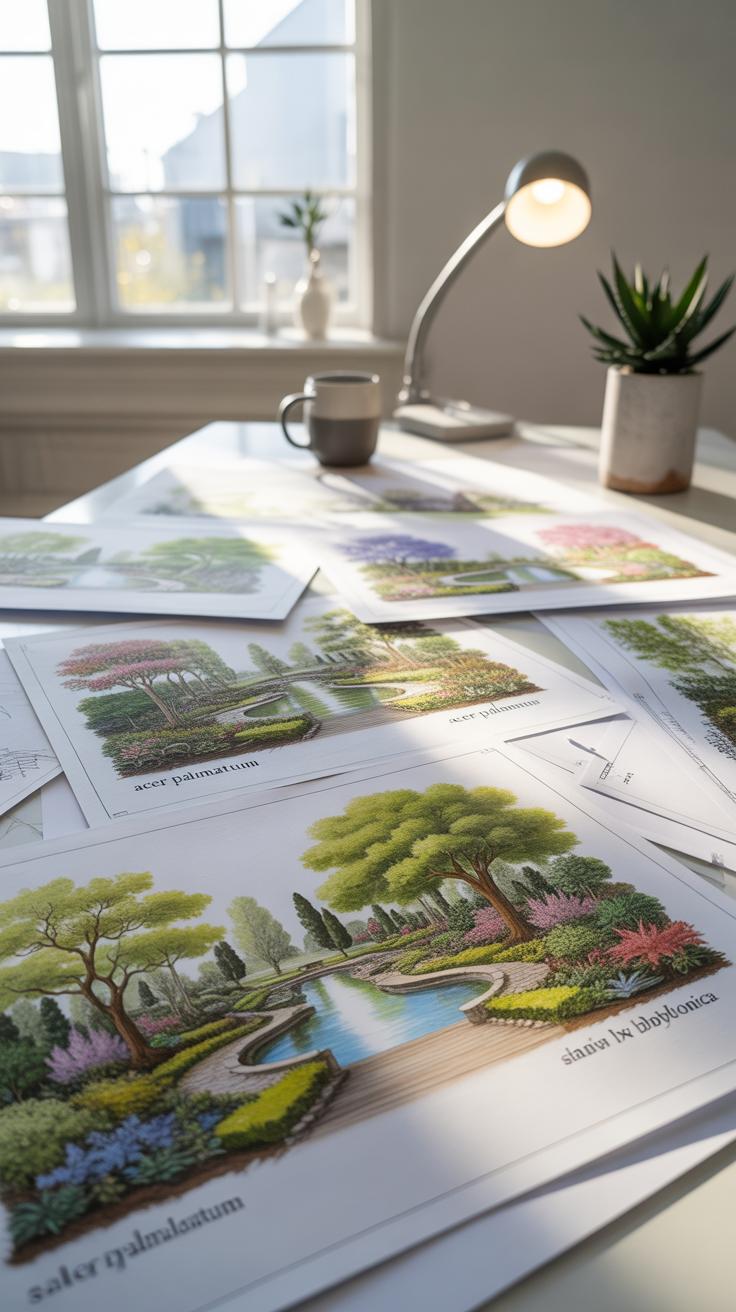
When you look at a clear design drawing, it’s like the whole plan suddenly makes sense. Take a simple residential yard plan, for example. Imagine a straightforward garden layout where each plant bed, walkway, and lawn area is clearly labeled. The drawing uses clean lines, basic symbols, and just enough detail to avoid confusion. It shows patios as solid shapes, paths as dashed lines, and plants as easy-to-recognize circles or icons. What stands out is the balance between simplicity and information—you don’t feel overwhelmed, yet you instantly grasp the spacing and flow.
Now, think about a complex public park design. These drawings layer many elements: playgrounds, seating areas, fountains, trees, and walking trails. What makes these effective is how they organize this chaos. They break the plan into zones, often using color codes or varied textures to separate spaces visually. The details tell a story—the paths direct movement, the clusters of trees offer shade, and open fields invite gatherings. These drawings must avoid crowding too many details in one spot, or else you lose clarity. Instead, they gently guide the eye across multiple components, making it possible to imagine the park coming to life.
When reviewing examples like these, ask yourself: does the drawing show the relationship between elements? Can you picture standing inside that space? If yes, the design does its job well. Good drawings don’t just inform; they invite you in.
Conclusions
Landscape design drawings turn your ideas into actionable plans. When you understand the key elements and use clear symbols, your drawings communicate well to builders and clients. This ensures your vision is faithfully brought to life.
Taking time to prepare, revise, and present your drawings carefully puts you in control of the project. The more precise your drawings are, the easier construction and planting will be. Use the tips here to improve your drawings and win over clients with clear, professional presentations.


