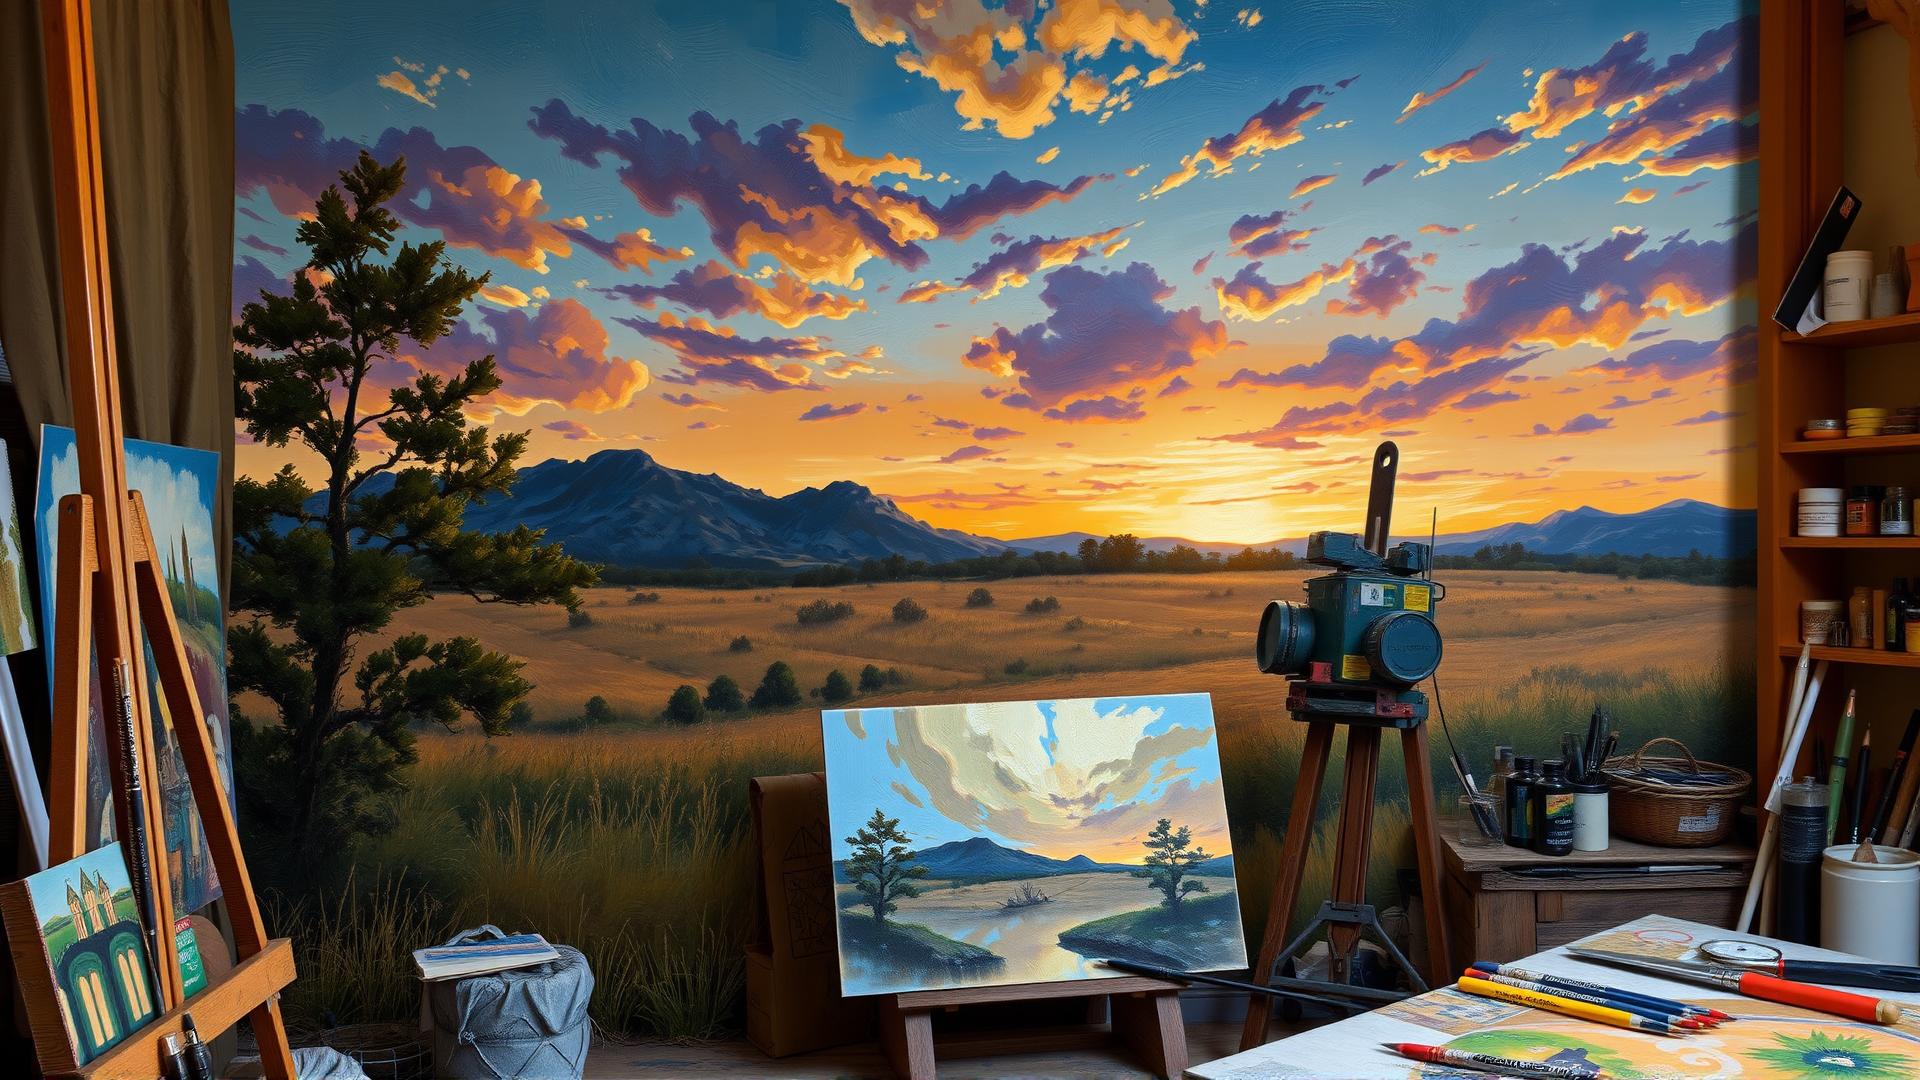
Introduction To High Relief Spray Foam Art Eruptions
Visual Impact
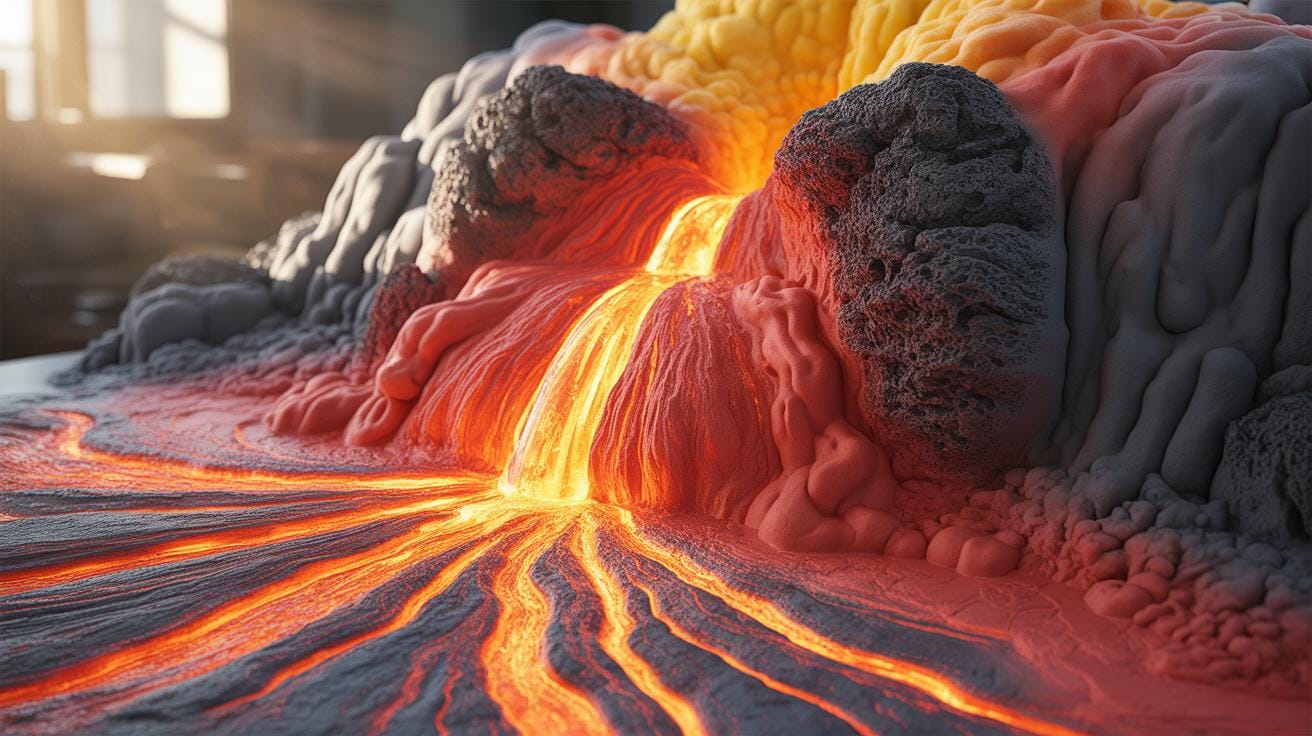
High-relief art pieces jump away from the wall to grab your attention instantly. These thick layers create deep shadows and bright peaks that mimic natural stone. You can use these expanding foam craft ideas to build ridges that look like cooling lava from a volcano. The physical depth makes the artwork feel alive as you walk past it. Every angle shows a new perspective of the craggy surface.
Artists use spray foam art to create heavy textures without the weight of real rock. This style follows the tradition of bas-relief sculpture but adds a modern twist with bold dimensions. These expanding foam ideas turn flat boards into rugged landscapes. You can control the height of each eruption to build a sense of power. The finished look brings the raw energy of nature into any room indoors.
Foam Benefits
Polyurethane foam is a special material that grows much larger once it leaves the can. It acts like liquid rock that freezes in place quickly. This makes it perfect for an abstract foam sculpture where you want organic shapes. The material is very light so you can hang large pieces easily. It sticks to many surfaces and holds its shape well after it cures and hardens.
You can try an expanding foam diy project to learn how the bubbles expand into ridges. This expanding foam craft is simple because it does not require heavy tools or heat. If you have foam core sculpture ideas, adding the spray layer adds strength and volume. Expanding foam art sculpture techniques allow you to carve or paint the surface later. It provides a durable base for any expanding foam art project you want to start.
Essential Expanding Foam Craft Materials And Safety
Material Checklist
Building a volcanic structure requires specific items to manage the wild growth of the polyurethane. Expanding Foam Craft Ideas often start with a sturdy base like cardboard or plywood to support the heavy texture. You need a pressurized can of spray foam and a pair of sturdy gloves to keep your hands clean. These supplies turn a simple base into a realistic geological form with deep ridges and valleys.
- Polyurethane Foam Cans: This is the core of Spray Foam Art. Choose a gap-and-crack version for high-relief textures or a large-gap filler for massive volcanic mounds. These cans provide the volume needed for peaks.
- Sturdy Support Base: An Expanding Foam Art Sculpture needs a solid foundation. Use scrap wood, thick cardboard, or wire mesh to create the shape of the mountain before applying any foam to the surface.
- Release Agents: Use plastic sheeting or wax paper if you want to remove the foam from the surface later. This helps when creating an Abstract Foam Sculpture that stands alone without a permanent backer.
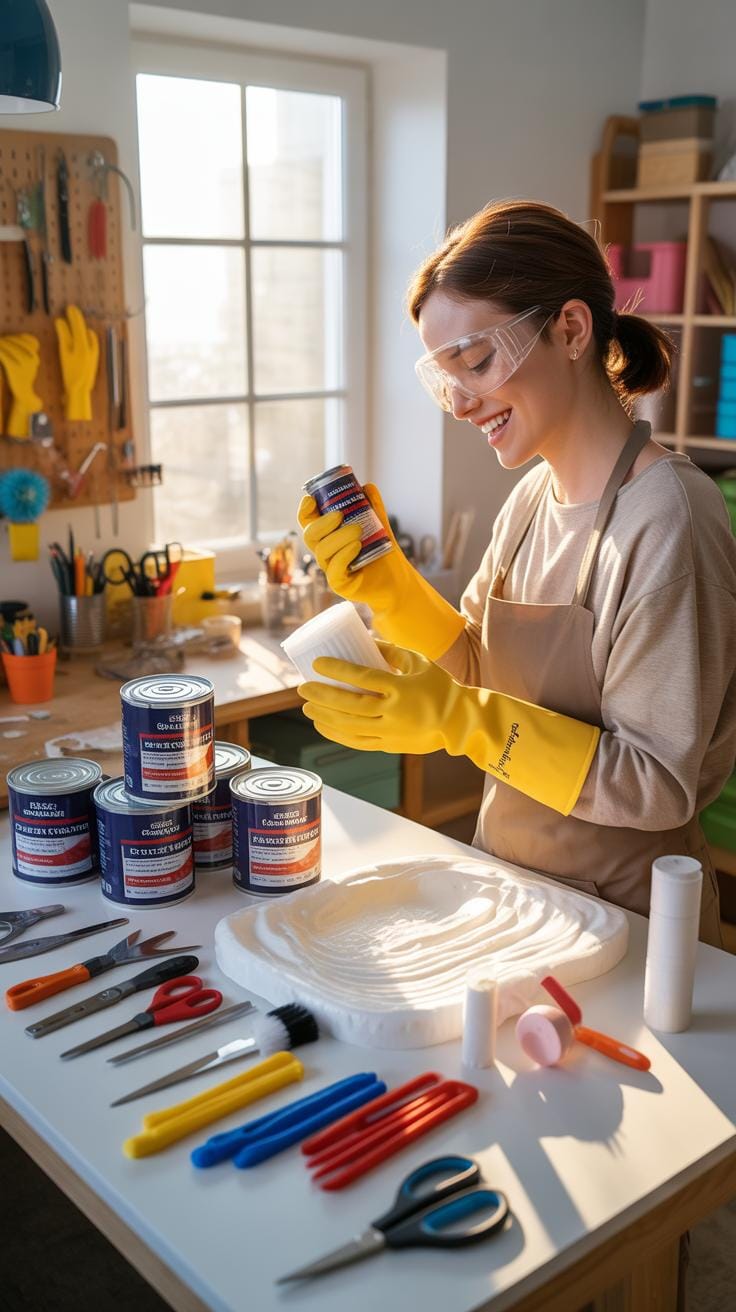
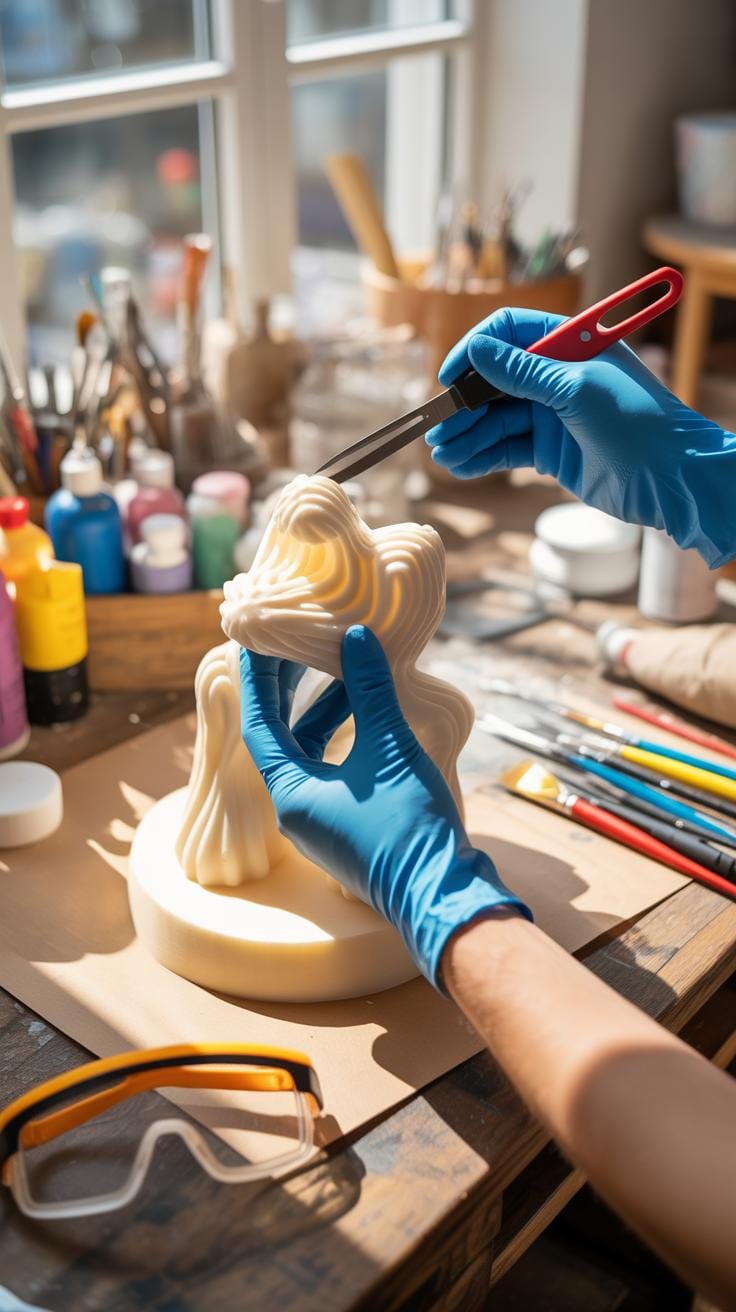
- Protective Apparel: Safety is a priority for any Expanding Foam Diy project. You need nitrile gloves, long sleeves, and clear eye protection. The foam sticks to skin instantly and is very difficult to remove.
- Carving Tools: Once the foam cures, use a serrated knife or a wire brush to refine your work. These tools help you shape the craggy exterior of your volcano for more realistic Expanding Foam Crafts.
Organizing your space helps you focus on the creative flow of the project. Expanding Foam Craft requires quick movements because the material hardens fast once it leaves the nozzle. Have your Foam Core Sculpture Ideas sketched out on paper so you know exactly where to apply the spray. Keeping your tools within reach prevents messy accidents and ensures your volcanic eruption looks powerful and authentic.
Safety Protocols
Safe handling of chemicals is the most important part of Expanding Foam Ideas. This material releases fumes while it cures, so you must work in a garage with the door open or outside. Fresh air movement prevents the buildup of vapors that can irritate your nose and throat. Always keep a trash can nearby to discard used nozzles and wet wipes immediately to maintain a tidy and safe workspace.
Proper clothing protects you from the permanent stickiness of an Expanding Foam Art Sculpture. Wear old clothes that you do not mind ruining because the foam does not wash out of fabric. If the foam touches your skin, let it dry and then gently scrub it off with an abrasive pad. Never use harsh solvents on your skin. These simple steps ensure your Expanding Foam Craft experience remains fun and injury free.
Mastering The Expanding Foam Art Sculpture Framework
Armature Design
Building a solid foundation is the first step for successful Expanding Foam Crafts. You should use chicken wire or stiff wire mesh to create the primary shape of your mountain. Cardboard tubes and scraps also work well to define the height of the peak. These materials provide a stable surface for the liquid product to grip. A steady base ensures your Expanding Foam Art Sculpture remains balanced and upright.
Expanding Foam Ideas often start with these basic household items. Attach your mesh or cardboard to a heavy wooden board using staples or strong glue. This prevents the sculpture from moving while you work. Taking time to refine the armature helps you achieve a realistic volcanic profile. Good preparation leads to better Spray Foam Art results. Clear planning makes your Expanding Foam Craft look professional and organized.
Structural Support
A strong internal core keeps your Abstract Foam Sculpture from sinking during the drying process. High-relief projects involve many heavy layers that put pressure on the base. Without a sturdy frame, the hardening material might sag or lose its intended form. You must reinforce the center of the volcano to handle the weight of the cooling foam. Proper support creates a lasting Expanding Foam Diy project that stays strong.

Expanding Foam Craft Ideas require patience during the curing phase. The chemical reaction generates heat and pressure that can warp thin materials. Reinforcing your Foam Core Sculpture Ideas with internal struts or wooden dowels provides extra security. This step is vital for large pieces that need to stand on their own. Following these structural steps ensures your Expanding Foam Craft remains a durable piece of high-relief art for many years.
Unique Expanding Foam Ideas For Realistic Lava Textures
Viscosity Control
Mastering the timing of your application helps you create realistic Expanding Foam Crafts. Apply the material in thin layers to mimic the smooth and ropy pahoehoe lava flows seen in Hawaii. Waiting for the first layer to skin over before adding more creates distinct ridges. This technique adds depth to any Expanding Foam Art Sculpture by repeating the natural cooling process of volcanic rock.
For the rougher and jagged ‘a’a style flows, wait until the Expanding Foam Ideas begin to cure. Piling fresh foam onto a semi-firm base causes the material to slump and crack. This method works perfectly for an Abstract Foam Sculpture representing active geological sites. You can build height quickly with this Expanding Foam Craft to make your mountain look powerful and ancient.
Surface Manipulation
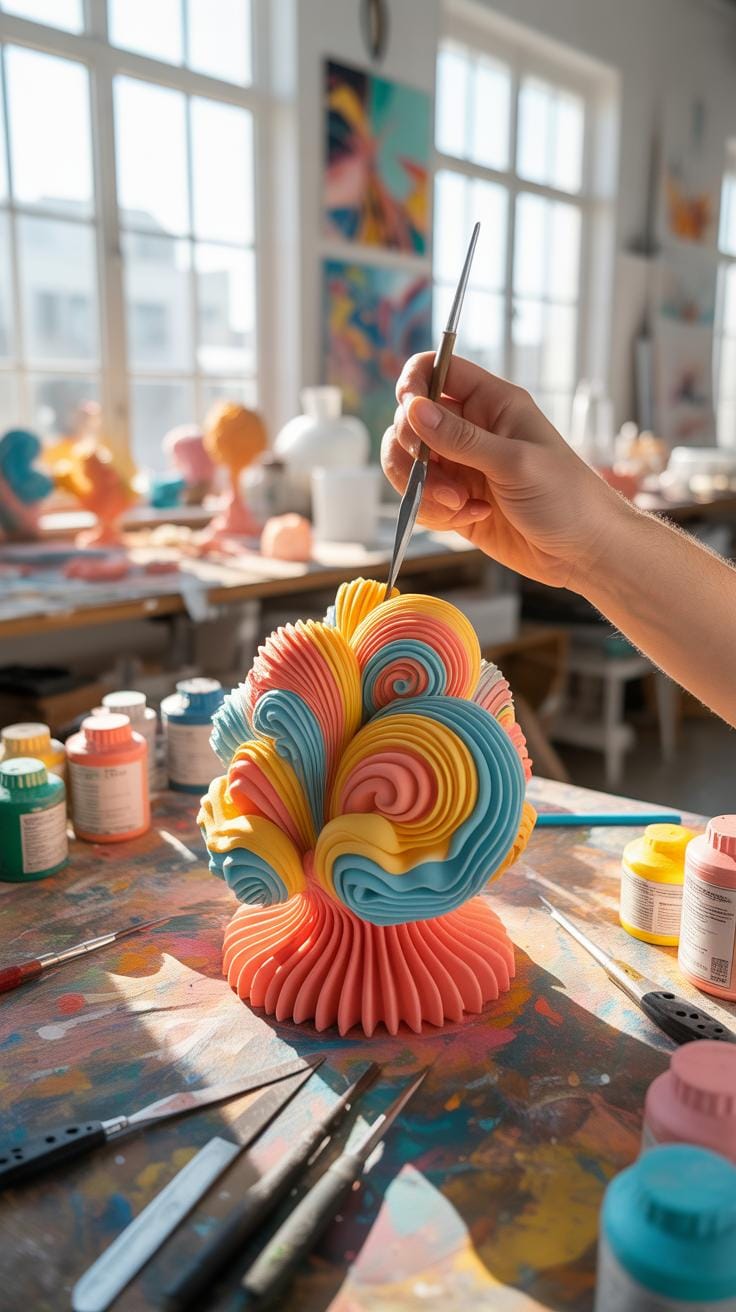
Creating realistic volcanic pumice requires active hands-on work with your Expanding Foam Craft Ideas. Use a wooden dowel or a toothpick to poke the Spray Foam Art while it stays tacky. This action forms the small holes, called vesicles, found in real basalt. These tiny details make an Expanding Foam Diy project look like a specimen from a natural history museum or a park.
Pulling at the drying surface with a glove or tool creates jagged peaks common in cool lava. Every Expanding Foam Core Sculpture Ideas project benefits from this tactile approach to design. The foam stretches and tears to create a porous texture that catches paint beautifully. Use these Foam Core Sculpture Ideas to ensure your landscape looks gritty and authentic for your next science or art project.
Innovative Expanding Foam Craft Ideas For Peak Detail

Summit Shaping
Building a realistic volcano requires focus on the summit area. Apply concentrated bursts of Spray Foam Art to form a jagged rim around the central caldera. These Expanding Foam Ideas work best when you pile the material in layers. The wet foam naturally slumps slightly to mimic real geological formations. This technique helps you build a sturdy base for an Expanding Foam Art Sculpture project.
Once the material cures, use a serrated knife to carve sharp edges into the dried foam. Expanding Foam Craft Ideas often rely on this subtractive method to achieve rocky textures. You can shape steep internal walls inside the crater to show where the mountain collapsed. This Expanding Foam Diy approach creates a high-relief effect that looks like real basalt or obsidian found on volcanic peaks.
Ash Plume Sim

Creating a realistic eruption involves more than just the mountain base. Use spray filler to form large rounded masses that look like rising clouds. These Expanding Foam Crafts mimic the heavy volume of ash and gas. You can attach these shapes to wire armatures to make an Abstract Foam Sculpture that floats above the crater. This method adds vertical height to your Foam Core Sculpture Ideas.
Control the trigger to create small gaps and textures within the plumes. These air pockets suggest the movement of a pyroclastic surge moving down the slope. Every Expanding Foam Craft needs these fine details to look convincing to viewers. You can paint the cured surface with matte grey tones to finish your Expanding Foam Idea. Regular builders use these simple steps to make dramatic and lifelike volcano displays.
The Technical Side Of Expanding Foam Diy Sculpting
Curing Times
Temperature and moisture levels change how quickly your Expanding Foam Craft Ideas work. High humidity makes the material expand faster and larger. In dry air, the foam might take longer to stop Growing. You should wait at least twenty-four hours for a thick Abstract Foam Sculpture to dry completely. A solid core prevents the center from staying soft or collapsing later.
Airflow also helps the foam set properly during Expanding Foam Diy projects. If you layer the material too thick at once, the inner layers lack oxygen. This slow drying can warp the shape of your Expanding Foam Art Sculpture. Plan your time based on the room environment. Sticking to a steady pace ensures the Expanding Foam Craft stays firm and holds its volcanic texture.
Carving Techniques
Once the Expanding Foam Art Sculpture feels hard, you can begin shaping the surface. Use a serrated bread knife to cut away large chunks of Spray Foam Art. This reveals the porous cells inside the material. These holes look like real volcanic rock. Moving the blade in short strokes helps you control the depth of every cut. It makes Foam Core Sculpture Ideas look more realistic.
Sandpaper helps smooth out the sharp edges of your Expanding Foam Ideas. Coarse grit paper works best for grinding down rough spots. Use a lighter touch to create small details or cracks in the Expanding Foam Craft. This process turns a blob into a refined work of art. Wear a mask to avoid breathing in the small dust particles. Final carving steps give your project a professional and clean finish.
Creating Abstract Foam Sculpture Through Volcanic Forms
Creative Distortion
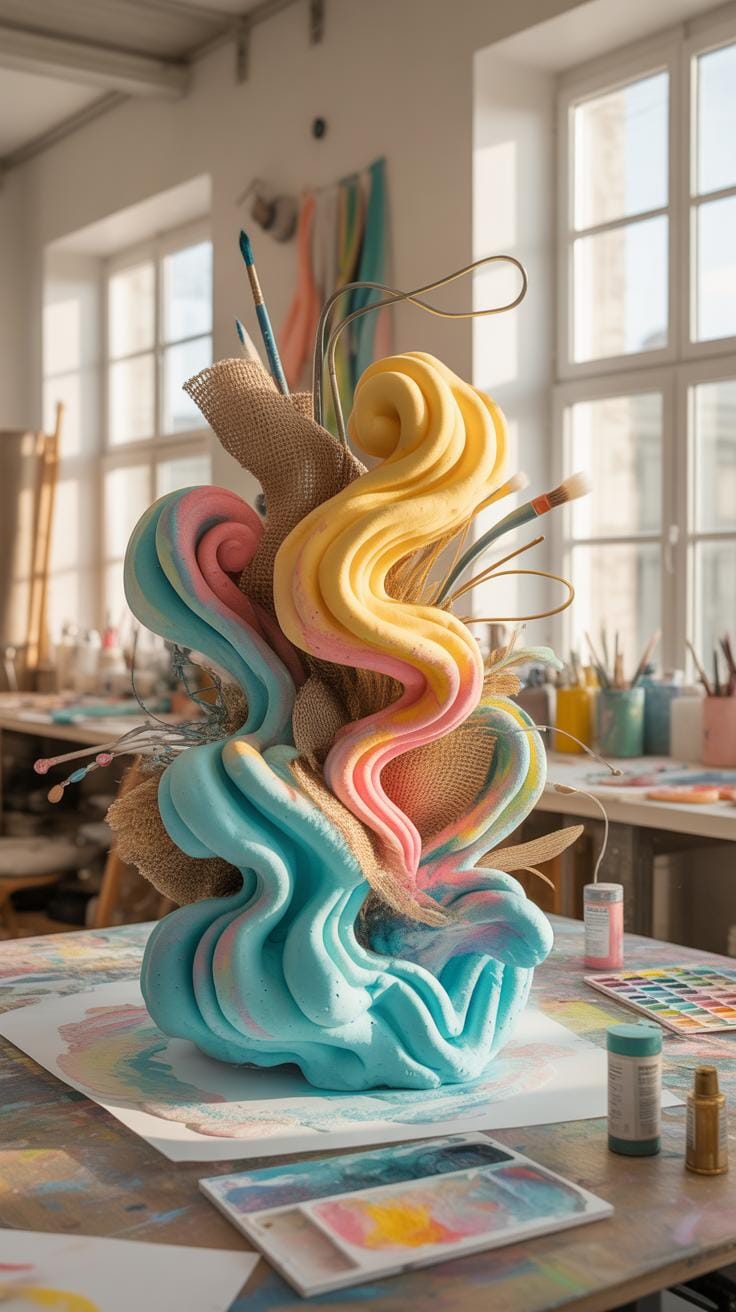
Working with expanding foam crafts allows you to see textures change in real time. The chemical reaction forces the material to swell and bubble like a growing mountain. You can use these movements to build an abstract foam sculpture that looks like shifted earth. These pieces capture the raw power of nature. Each layer forms unique ridges and valleys without much effort from your hands.
Your expanding foam art sculpture gains character when you let the material move freely. Traditional art often requires rigid control but expanding foam ideas work best with loose guidance. You can layer the foam onto a steady base to build height and depth quickly. This spray foam art style mimics tectonic plates pushing against each other. It creates a bold look that reminds people of old volcanic landscapes.
Fluid Dynamics
Natural flow determines the final shape of any expanding foam diy project. The liquid starts thin and thickens as it reacts with air to form magma-like tubes. This process turns simple expanding foam craft ideas into complex works of art. You can watch the material drip and pool to create soft curves. These shapes look like flowing lava cooling on a cold rock surface during an eruption.
The heavy weight of the wet foam helps you shape a foam core sculpture ideas framework. Support the expanding foam craft with wire or wood until it hardens into a solid mass. Solid foam holds its shape and provides a great surface for paint or sand finishes. Most expanding foam ideas rely on this physical change to create motion. You produce a piece that feels alive and energetic through these simple chemical reactions.
Painting And Finishing Your Foam Core Sculpture Ideas
Painting Steps
Expanding foam art requires a solid base before you apply color. The porous surface of your spray foam art needs a primer to help the paint stick properly. You can use a mix of white glue and water or a specialized plastic primer. This layer seals the holes and creates a smooth foundation. Once dry, your expanding foam diy project becomes much easier to paint with acrylics.
- Seal the Surface: Apply a thick coat of gesso or a PVA glue mixture to the entire abstract foam sculpture. This step prevents the paint from soaking into the foam bubbles and ensures an even finish across the piece.
- Base Coating: Use a large brush to cover your expanding foam craft ideas in a dark matte black or deep brown. This shadow layer sits in the crevices of the foam textures to create depth and realistic mountain shadows.
- Dry Brushing: Dip a stiff brush into lighter paint and remove most of it on a paper towel. Lightly rub the brush over the high edges of your expanding foam art sculpture to highlight the unique organic shapes.
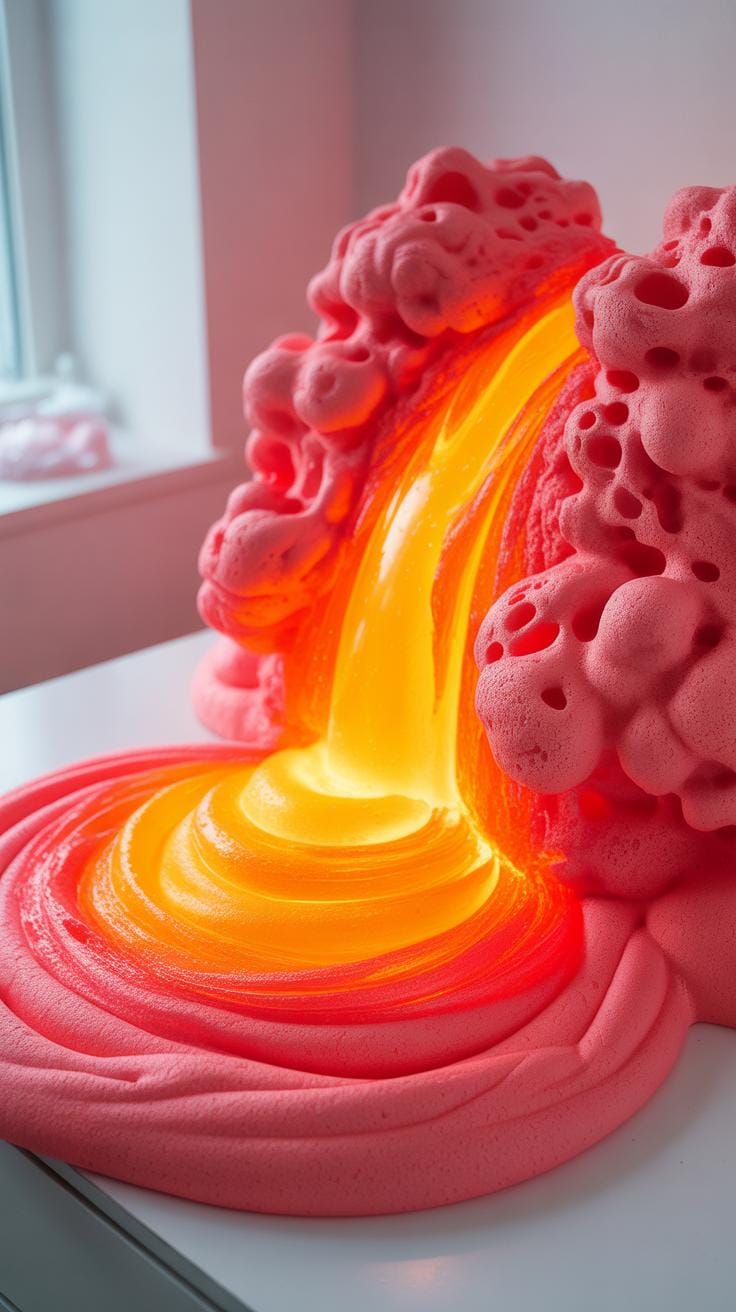
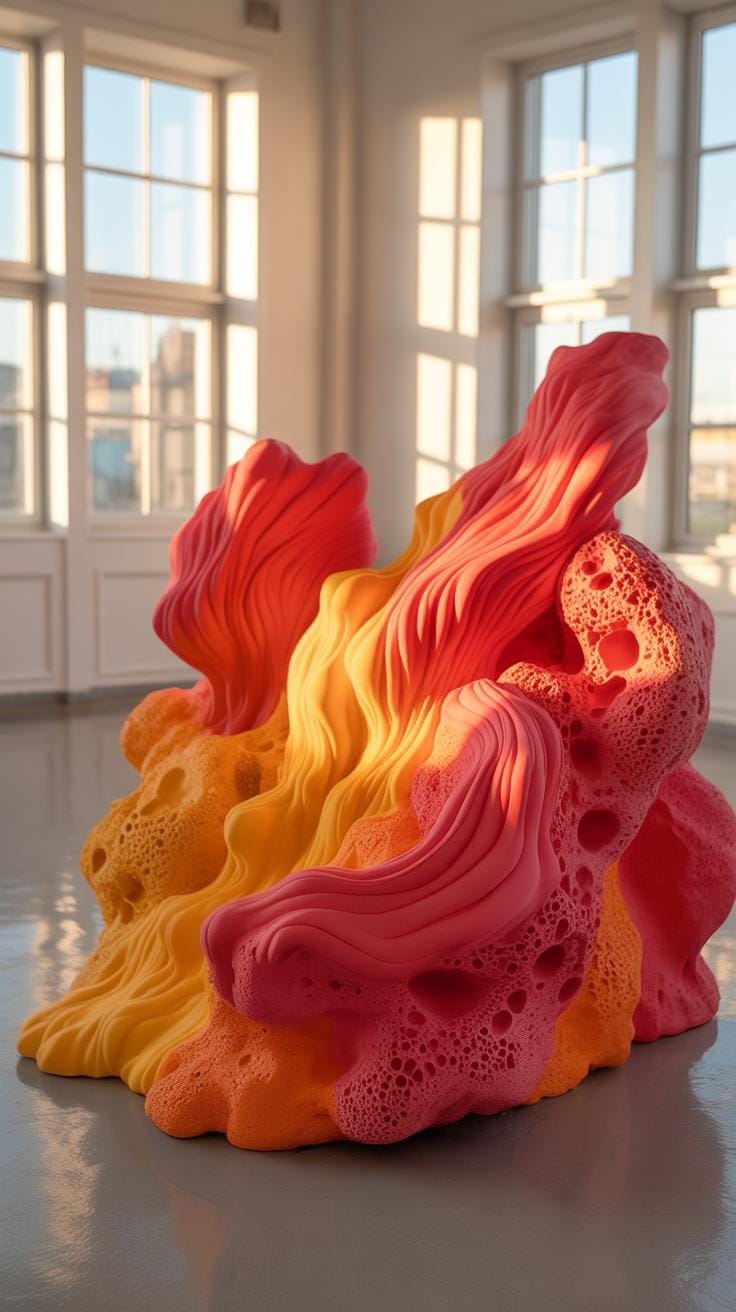
- Detailing: Paint thin lines of bright red and orange into the cracks of the foam to mimic flowing lava. This technique brings your expanding foam craft to life by making the volcano look active and hot from within.
- Protective Sealing: Spray a clear matte or glossy sealer over your finished work to protect it from dust and moisture. A good sealant keeps the colors bright and ensures your expanding foam ideas last for a long time.
Clear coats add the final touch to your foam core sculpture ideas. Choose a matte finish for a rocky volcanic look or a high-gloss spray for wet lava effects. These finishes protect the delicate foam from sunlight and handling. Your expanding foam craft project is now ready for display. Proper sealing ensures the paint will not peel or flake off the unique textured surface over time.
Color Theory
Using deep obsidian blacks and ashen grays creates a realistic base for your expanding foam craft ideas. Volcanic rock often has a dark and matte appearance. You can layer different shades of gray to show the cooling process of the stone. These neutral tones provide a strong contrast against the bright colors of the eruption. Darker shades belong in the deep pockets of the foam to mimic natural shadows.
Fiery oranges and glowing reds make your spray foam art stand out. These warm colors represent the intense heat of a volcanic eruption. Apply these bright tones sparingly to the peaks or inside the deep crevices for a glowing effect. Using color theory helps you guide the eyes of the viewer toward the most exciting parts of your work. Harmonious colors turn a simple expanding foam diy project into a professional piece of art.
Advanced Expanding Foam Crafts Incorporating Mixed Media
Lighting Effects
You can make your expanding foam ideas shine by adding battery-powered LED lights during the curing process. Place thin wire lights inside the wet foam to create a soft internal glow. This method works well for making a mountain look like it contains boiling magma. Smaller lights can peek through thin layers to mimic hot embers. This simple expanding foam diy trick brings your volcano centerpiece to life.
Wait for the outer skin to feel firm but tacky before pushing lights into the spray foam art. Leave the battery pack outside for easy access. Choosing cool-touch bulbs is vital to keep the materials safe from heat. These lights turn a basic expanding foam craft into a professional display. Your abstract foam sculpture will grab attention in darkened rooms with this bright addition to your growing collection.
Every block of stone has a statue inside it and it is the task of the sculptor to discover it.
— Michelangelo
Embedded Elements
Adding natural materials helps you create a high-quality expanding foam art sculpture with realistic textures. Press small volcanic rocks or coarse sand into the foam while it is still sticky. This creates a rough surface that looks like a real earth formation. Using these expanding foam craft ideas adds weight and stability to your project. The foam acts as a strong glue that holds these heavy pieces in place.
Experimenting with a foam core sculpture ideas base allows you to build massive structures without using too much liquid product. Sprinkle fine dirt over the wet surface to hide the plastic shine of the material. This gives your expanding foam craft a matte finish that looks like dry soil. Heavy textures make your work feel authentic and rugged. These steps ensure your project stands out as a unique piece of geological art.
Preserving And Displaying Your Expanding Foam Art
Uv Protection
Polyurethane spray foam art reacts poorly to direct sunlight. Ultraviolet rays break down the cellular structure of the plastic over time. This process causes the surface to turn yellow and eventually crumble into dust. Applying a UV-resistant clear coat protects your expanding foam craft ideas from this damage. Use a spray sealant specifically built for plastics to ensure the finish sticks properly without melting the delicate foam.
A good sealant keeps your expanding foam diy projects looking fresh for years. High-quality finishes act as a shield against moisture and pollutants in the air. This step is vital for any abstract foam sculpture that sits near a window. Choose a matte or gloss finish depending on the desired look of your work. Consistent coverage ensures every nook and cranny of the porous surface stays safe from aging.
Mounting Options
Support systems for an expanding foam art sculpture must remain light but sturdy. These pieces often carry significant depth which shifts the center of gravity forward. Using a thick plywood backing provides a solid foundation for foam core sculpture ideas. Secure the material using construction adhesive or mechanical fasteners hidden within the design. This method keeps the heavy relief from pulling away from the wall or sagging over time.
Innovative expanding foam crafts require careful placement to catch the light. Large relief pieces work best when mounted using french cleats for even weight distribution. This hardware style keeps the sculpture flush against the surface while allowing for easy removal. Lightweight expanding foam craft often stays in place with simple hardware if the base is rigid. Proper mounting ensures your spray foam art remains a permanent feature in your home.
Frequently Asked Questions

Is expanding foam safe for a beginner to use for home decor projects?
Yes, expanding foam is a fantastic entry point for novice sculptors because it is lightweight and forgiving. When starting an expanding foam art piece, always work in a well-ventilated area and wear gloves, as the material is notoriously sticky. Once fully cured, the foam is inert and easy to carve, making it a safe and versatile medium for creating dramatic, volcanic textures or abstract high-relief wall hangings.
How do I create realistic volcanic textures using expanding foam?
To achieve a realistic volcanic eruption effect, apply the foam in irregular, overlapping layers to mimic flowing lava. As the material expands, you can use a gloved hand or a spatula to manipulate the “flow.” Once dry, the key to successful expanding foam art is post-processing; use a serrated knife to carve porous details and apply a mixture of dark grey acrylic paint and sand to replicate volcanic rock.
Is expanding foam an affordable option for large-scale sculpture projects?
Absolutely. One of the biggest advantages of this medium is its cost-effectiveness compared to traditional clay or plaster. A single inexpensive can from a hardware store covers a surprising amount of surface area, allowing you to create massive high-relief sculptures without a heavy financial investment. It is the perfect budget-friendly solution for artists who want to experiment with scale and 3D depth without purchasing specialized or expensive professional casting materials.


