Introduction
Watercolor painting offers a unique way to bring animals to life with its fluidity and vibrant colors. This method uses pigments suspended in a water-based solution, allowing artists to achieve varying transparency and effects that can capture the delicate beauty of animals. Whether you are new to watercolor or looking to improve your skills, focusing on animal subjects can be rewarding and inspiring. This guide explores essential techniques and tips for illustrating animals using watercolor to help you develop your own charming creations.
Creating watercolor animals involves understanding the medium as well as the animal forms themselves. By learning about watercolor materials, brushwork, and composition, you will enhance your ability to represent different species with personality and realism. This article lays out a clear path on how to approach watercolor animal illustrations from start to finish. You will learn how to prepare your materials, study animal anatomy, apply colors effectively, and add finishing touches that make your artwork stand out.
Understanding Watercolor Basics and Materials
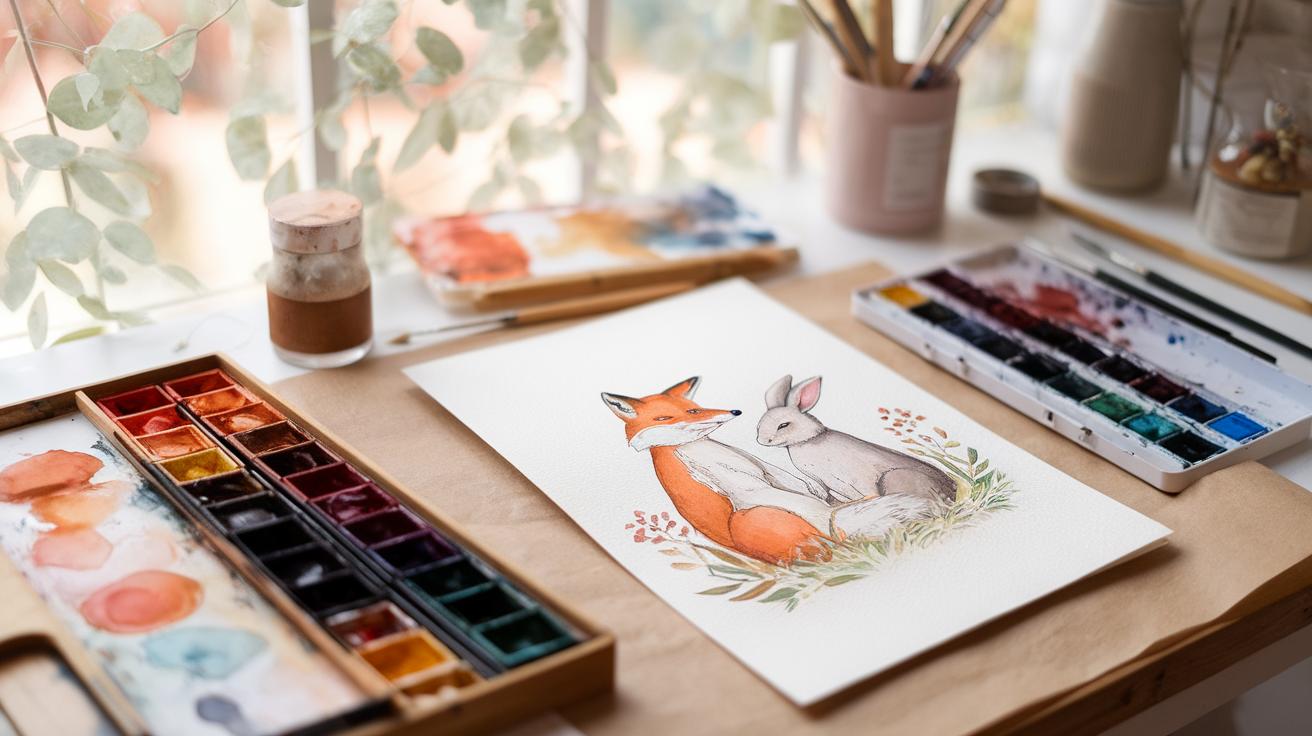
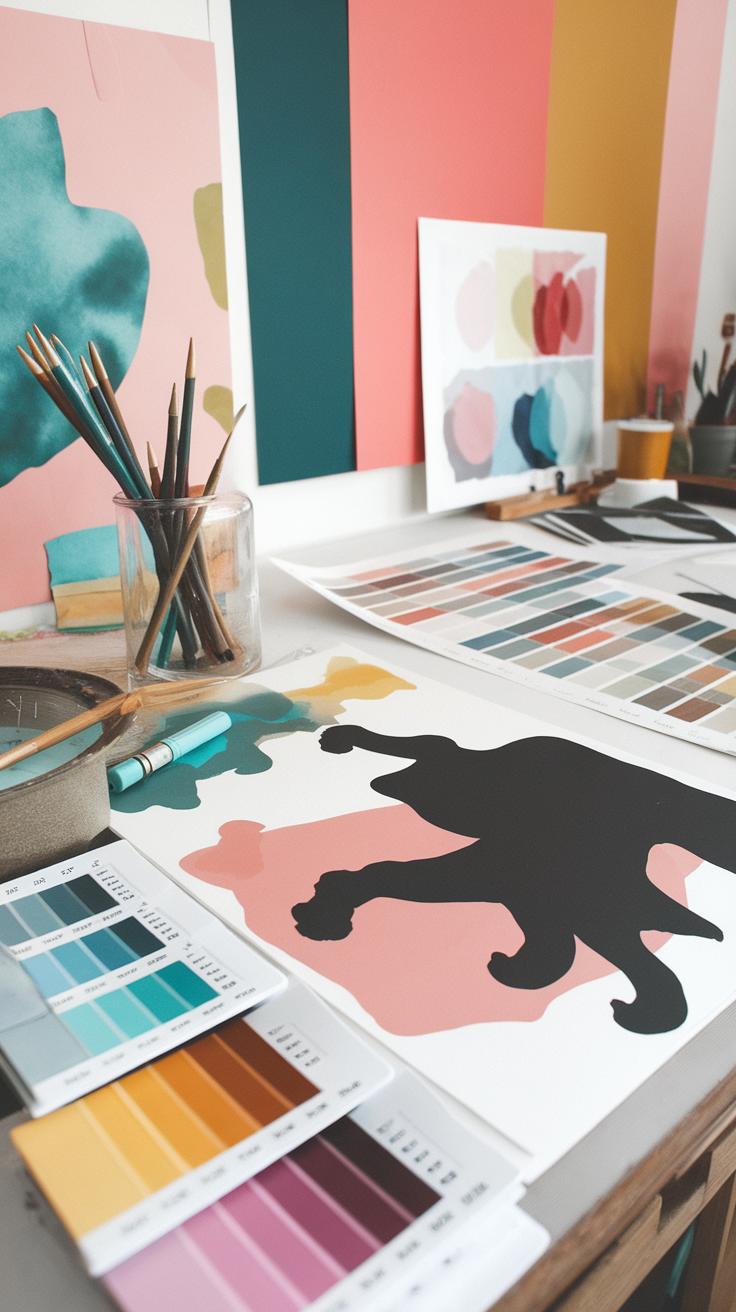
Watercolor animal illustrations need the right materials to bring your artwork to life. You will need quality paints, brushes, paper, and a palette to mix colors. Choose paints with high pigment concentration for bright, intense colors. Transparent pigments help you capture the lightness and softness of animal fur and feathers.

Brushes come in many types. Fine-tipped brushes allow you to paint delicate details like whiskers or feathers. Larger, flat brushes help create smooth washes for shadows and backgrounds. Select brushes that hold water well and keep their shape.
Paper plays a big role in how your painting turns out. Cold-pressed paper offers a slight texture that holds pigment nicely. Look for paper made with cotton fibers for strength and durability, so it won’t warp when wet.
Before you start, organize your materials. Arrange your paints for easy access, fill your palette with clean water, and test your brushes on scrap paper. Preparing ahead lets you focus on your animal illustration and avoid interruptions.
Choosing the Right Watercolor Paints and Brushes
Watercolor paints come in tubes, pans, and liquid forms. Tubes and pans both work well, but tube paint usually has more pigment and stronger color. Concentrated pigments let you layer vibrant tones to mimic animal fur or feathers. Some pigments are more transparent, which means underlying colors shine through. This feature is useful to create subtle shading.
Brushes vary by shape and size. Round brushes with a sharp point fit small details, such as fine lines on animal faces. Flat brushes cover large areas smoothly, perfect for painting backgrounds or animal bodies. Mop brushes hold a lot of water and blend colors gently, helping you create soft textures on fur or skin.
Selecting Suitable Paper for Animal Illustrations

Watercolor paper weight affects how well it handles water. Heavier paper, usually 140 lb (300 gsm) or more, absorbs water without buckling. The texture or surface finish plays a part too. Cold-pressed paper provides a subtle texture that grips pigment well, creating interesting effects for fur and feathers.
Papers with a high cotton content last longer and resist tearing during repeated washes or lifting paint. Look for acid-free papers to keep your art from yellowing over time. The paper’s texture also influences the paint’s flow, helping you achieve the natural details animals display.
Studying Animal Anatomy and Shapes
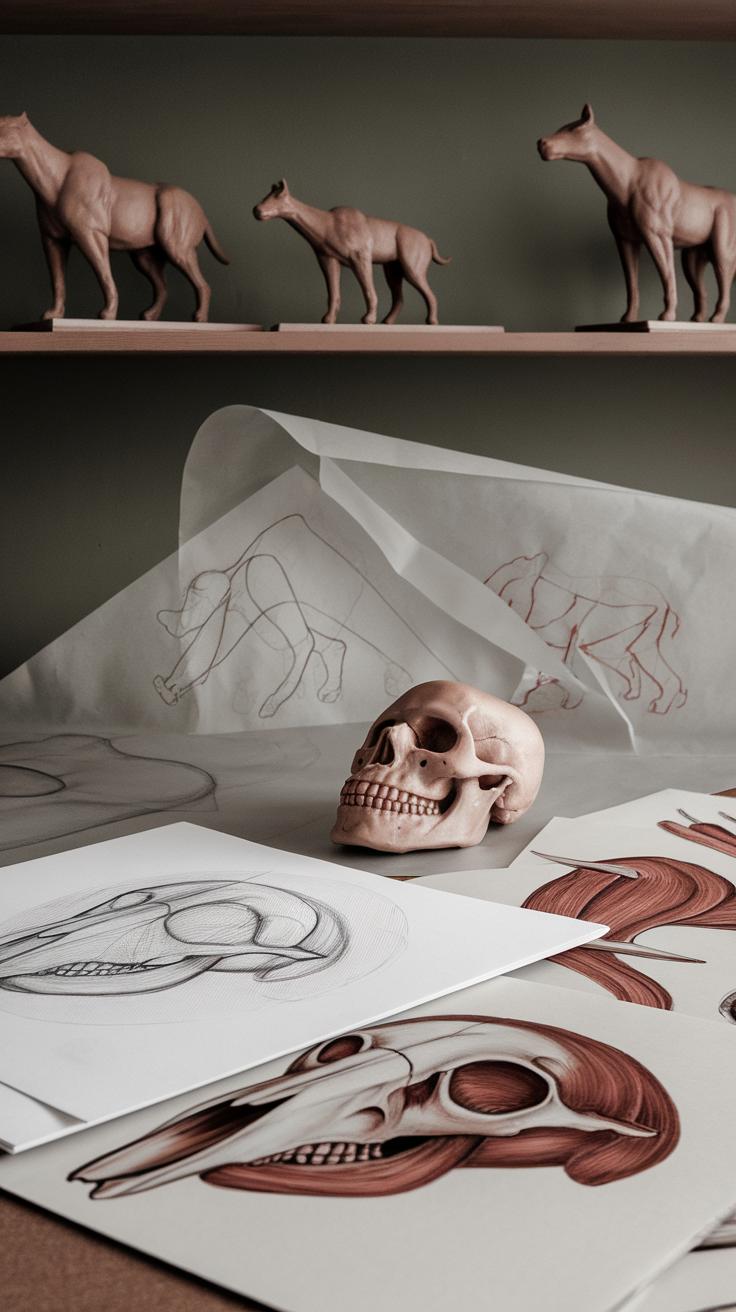
Understanding animal anatomy helps you create more accurate and believable watercolor illustrations. Pay attention to the structure beneath the fur or feathers. Look closely at bones, muscles, and how different parts connect. This shapes the animal’s overall form and movement.
Observing shapes and proportions sharpens your eye for detail. Notice how the size of the head compares to the body or how limbs join the torso. Focus on the angles of joints and the flow of curves. These details keep your drawing consistent and realistic.

Practice sketching animals regularly. Start from simple outlines and work toward adding details. Sketching develops your confidence and trains your hand to capture animals quickly. Try drawing from life or study photos to see different poses and features.
Breaking Down Animal Forms into Simple Shapes
Complex animal forms can feel overwhelming. Simplify them by breaking them into basic shapes like circles, ovals, and rectangles. These shapes act as building blocks and make it easier to capture the animal’s form.
Using simple shapes helps you hold correct proportions throughout your work. For example, placing an oval for the body and circles for joints guides where each part belongs. You can adjust shapes before adding details to avoid mistakes.
When painting, these shapes guide your brush strokes. They help you apply color in layers, matching the animal’s volume and curves. Starting with shapes also lets you focus on composition and balance before refining your artwork.
Observing Animal Movement and Posture
Movement and posture add life to your illustrations. Watch how animals shift weight, stretch, or rest. These natural poses tell a story and show personality.

Use photos or live observation to study common behaviors. Notice how a cat arches its back or how a bird tilts its head. Small changes in posture affect the feeling of your painting.
Try capturing quick sketches of different poses to understand dynamics and body language. Ask yourself: How does this pose reflect the animal’s mood or environment? Bringing these details into your watercolor work makes your art more engaging and true to life.
Planning Your Watercolor Animal Composition

Creating a strong watercolor animal piece starts with careful planning of your composition. Think about where you want to place your animal within the space before you pick up your brush. Sketching light guidelines helps you test positions without committing too soon. You can map out where the animal will sit and mark areas for color blocks to ensure balance.
Decide on your focal point early. Ask yourself: What part of the animal do I want viewers to notice first? Placing the animal slightly off-center can add interest and avoid a static feel. Planning where shadows and highlights will go also guides your color choices and helps the final work feel cohesive.
Consider how different areas of the painting will interact. This could mean leaving some parts lighter or simpler to draw more attention to detailed areas. Experiment with your sketch until the layout feels natural and balanced. This stage shapes your whole painting, making the actual painting process smoother and more confident.
Creating a Balanced Layout with Animals as the Focal Point

Animals naturally catch the eye, but where you place them matters. Position your main animal subject so it draws attention right away. Often, placing the animal along the rule of thirds lines makes the composition feel balanced and pleasing.
Think about visual weight. Larger shapes, darker tones, or detailed features carry more weight. If your animal has strong colors or textures, balance it with simpler areas nearby. Negative space is your friend—it lets the main subject stand out and gives the viewer’s eye a place to rest.
Try different arrangements by sketching quick thumbnails. Will a centered animal feel strong, or should it face into the empty space? How do other elements support or compete with the animal? Your goal is keeping focus clear without making the layout feel crowded or empty.
Incorporating Background Elements
Backgrounds add context but should never steal attention from your animal. Consider simple washes in soft colors or gradients that suggest a natural environment without sharp details. Light washes of green or blue can hint at trees, sky, or water in a subtle way.
If you prefer more defined backgrounds, keep textures loose and colors muted to support the animal’s colors. Avoid busy patterns or harsh lines that distract. Sometimes, adding a few minimal shapes or branches can frame the subject and create depth.

Ask yourself what mood you want your background to set. Is the animal in a calm forest, a bright meadow, or a misty morning? Pick a backdrop that enhances the story without taking over. A well-chosen background enriches your painting and makes the animal feel part of a larger world.
Techniques for Painting Animal Fur and Feathers

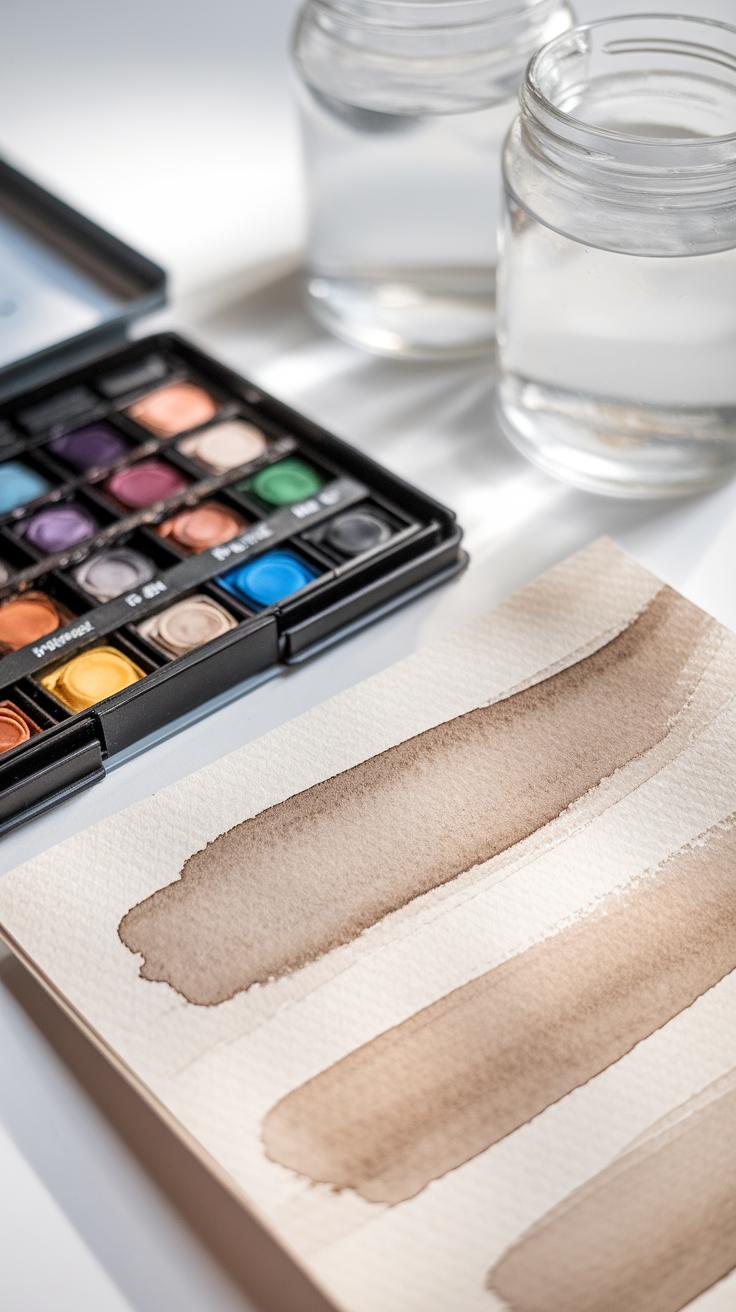
Capturing the texture of animal fur and feathers in watercolor demands specific methods that play with transparency and layering. Using thin washes and multiple layers helps build the illusion of depth and softness. You apply one light layer after another, waiting for each to dry before adding the next. This process highlights the density and flow of fur.
The dry brush technique excels at producing sharp, fine strokes that resemble individual hairs or feather strands. You use a brush with minimal water and paint, dragging it lightly across the paper surface. This method offers control for adding delicate details on tips or edges.
Wet-on-wet blending softens edges and creates smooth color transitions, perfect for the fluffy base of feathers or a furry undercoat. By dropping paint onto a damp surface, the colors merge naturally, creating organic gradients.

Lifting helps remove paint to shape highlights or correct mistakes. A damp brush or tissue can lighten areas where light hits fur or feathers, adding dimension. Have you tried combining these methods to see which yields the best texture on your paper?
Layering Colors to Build Depth in Fur
You build realistic fur by layering thin colors gradually. Start with a light base wash matching the fur’s main tone. Once dry, add successive layers using slightly darker and cooler shades to mimic shadows.
Each layer should follow the fur’s natural direction. Watch animal photos closely to track how hairs align and apply your strokes accordingly. This directional painting helps the fur appear natural and dynamic.
Keep brushstrokes small and controlled. Too much paint creates flat patches, while too little makes the fur seem sparse. Tap into patience—the effect improves when you wait between layers instead of rushing.
How long will you give your painting to dry before adding new layers? Timing affects the sharpness and texture you get in the fur. Test different drying times to find what works best for your style.
Using Wet-on-Wet and Dry Brush for Feather Effects

Soft feather sections benefit from wet-on-wet painting. Wet your paper, then add colors that naturally blend, forming smooth gradients and soft edges. This technique mimics how feathers overlap with gentle color shifts.
To bring out the feather structure, switch to dry brush strokes. With little water and pigment, drag the brush over dry paper to create fine, scratchy lines that resemble feather tips and barbs. This contrast between smooth wet shapes and textured dry lines adds realism.
Consider layering dry brush details over wet-on-wet bases. It enhances depth and highlights the subtle complexity of feathers, especially on bird wings or tails.
What bird species will you practice with? Observing different feathers helps improve your ability to capture patterns and textures accurately using these techniques.
Adding Details and Highlights
Fine details bring your watercolor animals to life. Small touches like eyes, whiskers, and highlights create depth and character. Use fine brushes with thin, pointed tips to carefully add details without disturbing previous layers. A steady hand helps, but practice improves precision.
White gouache works well for adding bright highlights. Apply it sparingly where light naturally hits, such as the tips of fur or the shine in an animal’s eye. Think about where your light source is coming from to place highlights correctly.
Scratching techniques also add texture. Use a sharp tool, like a needle or a pin, to gently scratch the paper once the paint dries. Try this on hardened areas to reveal paper beneath and create whiskers or fine fur strands. Have you tried scratching your pieces to see how it changes the look? This simple step can add life to your paintings without heavy paint layers.
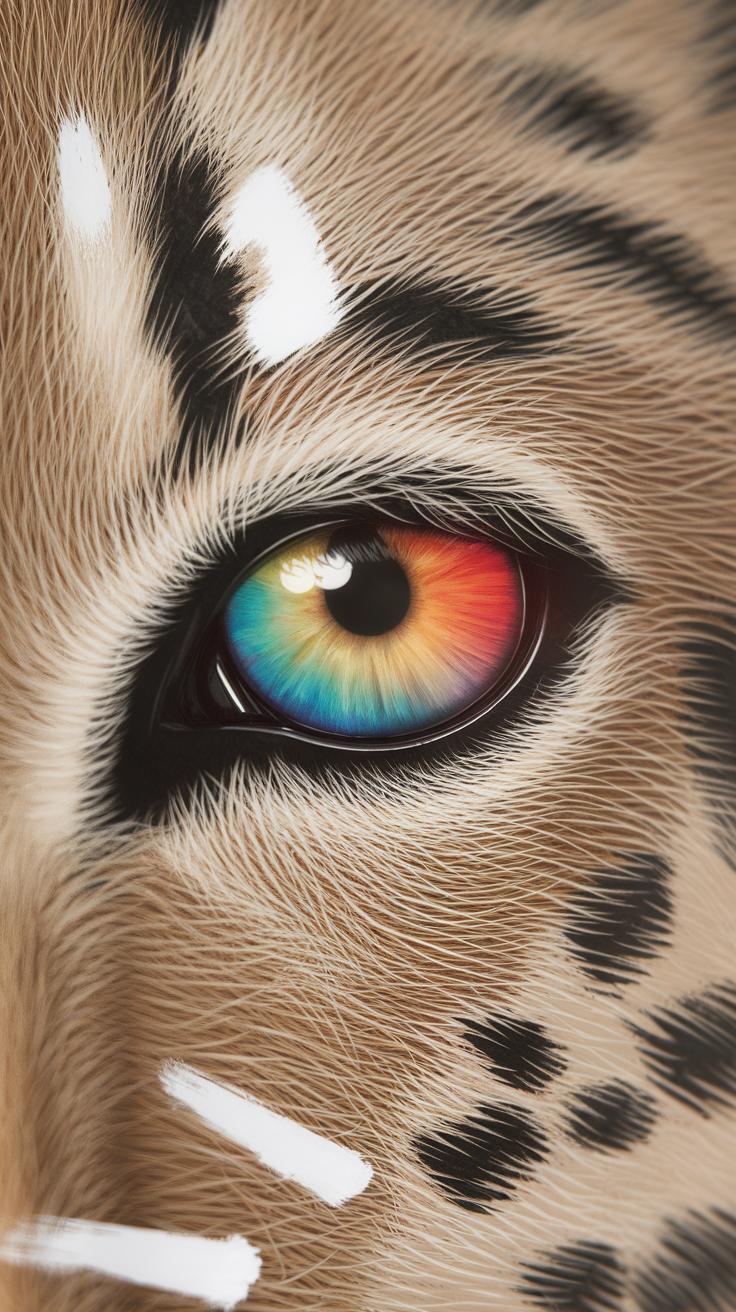
Painting Expressive Eyes and Facial Features
Eyes hold emotion in animal portraits. To express feelings, focus on painting eyes carefully. Start with a dark pupil, then add the iris by layering translucent color for depth. Shade around the eye to show its shape and the light’s angle.
Reflections play a key role. A small white spot on the pupil or iris mimics light reflecting off the eye, making it look alive. You can add this reflection with a tiny drop of white gouache or leave a tiny paper spot unpainted.
Facial features like the nose and mouth give personality too. Use gentle strokes to define those areas without harsh lines. When you pay attention to these small parts, your animal gains emotion and character.
Using White Paint and Scratching for Highlights
Adding highlights lifts your watercolor animals off the paper. White paint, like gouache, creates sharp highlights that watercolor alone can’t achieve. Apply it after your paint dries to brighten spots where light hits directly.
Use a very fine brush to add tiny dots or thin lines. For example, white paint on the nose tip or edges of feathers enhances volume and dimension. If you want more texture, gently scratch the dry paint. This exposes white paper underneath and creates natural highlights.
Scratching works best where the paint layer is firm but not too thick. Try this technique to suggest sparkling eyes or delicate hairs. It also adds a tactile feel that paint alone can’t provide. Would you experiment with both white paint and scratching to find your ideal balance of highlights?
Experimenting with Color and Style
Watercolor animal illustrations offer a wide chance to try different colors and styles. You can choose natural colors to make your animal look real. Watch how light hits fur or feathers to pick shades that match nature. Mix your paints carefully to get soft tones or sharper contrasts. This approach helps you learn about color blending and animal anatomy.
On the other hand, using bright or unusual colors creates a mood or makes your artwork stand out. Think about using blue or purple tones for a calm feeling or reds for energy. How do these color choices affect the story your animal tells? You can also try minimal shapes with limited colors to focus attention on form rather than detail.
Finding the right balance between observation and creativity helps you develop a personal style. You might start by painting a realistic fox but then add bold colors for fur highlights or simplify shapes for a modern look. What styles inspire you the most? Keep testing your ideas and watch your watercolor animal art grow.
Working with Natural and Creative Colors
Choosing colors starts with deciding if you want your animal to look real or imaginative. Use photos or observe animals closely for natural colors. Mix browns, greys, and creams to capture fur or feathers accurately. Layer washes lightly to build depth without losing the watercolor’s transparency.
If bold colors attract you, think about mood first. Warm oranges can give a lively feeling, while cool blues might feel quiet or mysterious. Experiment with mixing unexpected colors like pinks or greens in fur or feathers. These choices create style and personality beyond reality.
Make small color tests before painting. Try mixing colors you rarely use and see how they work together. Does that bright yellow make the animal seem friendly or odd? What emotions do your colors create for viewers? Use your palette to guide the tone of your illustration.
Adapting Styles from Detailed to Minimalist
Your style can change the whole look of your animal art. Detailed illustrations use fine brushes and careful layering to show every hair or feather. This style fits if you want to study the animal’s character or anatomy closely. It takes patience but results in lifelike images.
Minimalist styles focus on simple shapes and few colors. You might paint just the outline or mark key features with blocks of color. This approach is quick and modern. It makes viewers fill in details with their imagination. What shapes or lines best capture your animal’s essence?
Try both styles to see what fits your mood and purpose. You could mix them by adding details to a simple shape or simplifying a complex study. What messages do you want your style to send? Use your tools and brushwork to match your artistic goal.
Troubleshooting Common Watercolor Challenges

Watercolor painting often brings challenges that can disrupt your flow, especially when working on delicate animal illustrations. Controlling the spread of water and pigment is key to keeping your artwork clear and vibrant. When too much water mixes with paint, colors can bleed in unwanted areas, making details hard to see. You must balance water and paint to maintain control over the shapes you create. A common issue is color muddiness, where overlapping layers lose their brightness. Planning your layers and allowing each to dry can help you avoid this problem.
Fixing mistakes in watercolor might sound tricky, but proper techniques keep your paper safe and your work fresh. Lifting pigment with a damp, clean brush can remove small errors without harming the paper’s surface. Masking fluid is another tool to reserve white areas or protect parts of your painting before applying broad washes. Sometimes layering transparent colors on top of a dried mistake corrects tone without starting over. Each method offers ways to preserve your paper and keep your animal illustrations crisp. How do you currently handle slips while painting? Trying these techniques might change your approach.
Controlling Water and Paint for Clean Results
Managing water-to-paint ratio directly affects how your colors behave on paper. Using too much water makes pigments run beyond the area you want to paint, causing colors to blur and details to disappear. To prevent this, dampen your brush just enough to hold pigment without dripping. Test on scrap paper to see how the paint spreads. Painting in thin layers allows you to build color gradually and avoid overly wet spots. Let each layer dry fully before adding more paint to keep edges sharp and prevent unwanted mixing.
Drying time is another factor that influences control. Paint behaves differently on wet and dry surfaces. If you want soft blends, apply paint quickly while the paper is still wet. For fine lines and crisp edges, work on dry paper or wait until the underlying layer dries. Adjusting your pace and timing can drastically improve the clarity of your animal artwork by preventing colors from merging in ways you don’t want.
Correcting Mistakes without Damaging Paper
Accidents happen, but you don’t need to start from scratch when correcting them. Gently lifting color with a clean, moist brush can lighten errors before they fully dry. If the paint is stubborn, use a damp cotton swab or paper towel to blot it carefully. Masking fluid protects areas you want to keep white or paint-free and allows you to work boldly without fear of losing highlights.
Layering is another method to fix mistakes. Paint transparent colors over dark or unwanted spots after the paint has dried. This technique adjusts tone and helps blend corrections smoothly with surrounding areas. Be patient and build layers slowly to avoid damaging the delicate paper surface. Taking time to correct mistakes gently keeps your illustrations clean and ready to impress.
Showcasing and Caring for Your Watercolor Animal Art
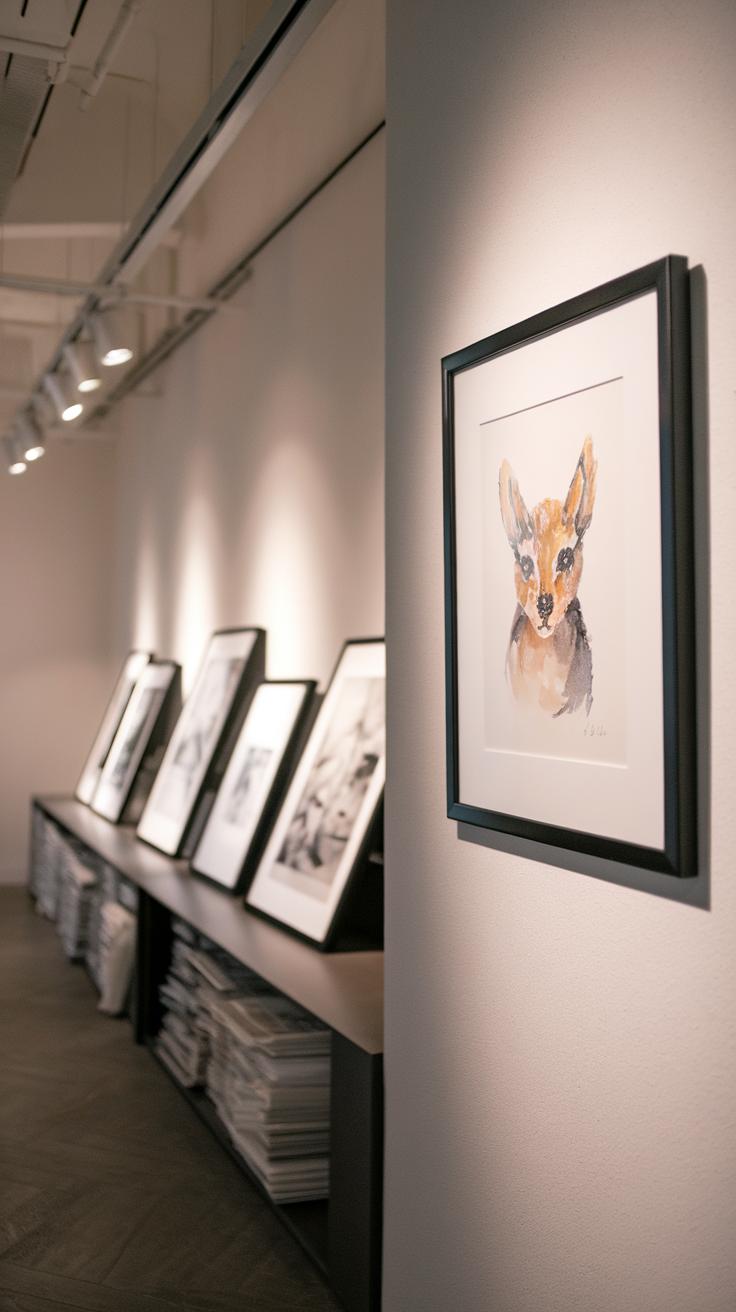
Once your watercolor animal illustration is complete, the next step is to present it in a way that protects and emphasizes its beauty. Thoughtful display choices help maintain the artwork’s vibrancy and keep viewers engaged. You want your painting to stand out, whether in a gallery, your home, or online. Proper care and presentation keep the delicate watercolor surface safe from damage over time.
Framing your piece is more than just a decorative detail. Using acid-free mats creates a protective barrier between the paint and glass. Matting prevents moisture buildup that can lead to warping or mold. Choose UV-protective glass to shield colors from fading caused by sunlight exposure. Consider lighting that avoids harsh, direct sun and uses soft, even illumination to highlight details without overheating the artwork.
For digital sharing, use a high-resolution scanner or camera to capture your painting. Proper lighting and angle reduce glare and preserve true color tones. Digital copies allow you to share your work on social media, art portfolios, or prints while keeping originals safe. Store originals flat, in acid-free folders or sleeves, away from humidity and sunlight to avoid wear and discoloration over time.
Presenting Watercolor Art Professionally
Protective matting adds both elegance and safety to your watercolor paintings. It prevents direct contact with the glass, helping to avoid smudges and moisture damage. Always select acid-free mats to avoid yellowing around the edges. Pair your mat with UV-protective glass to slow down fading caused by sunlight exposure. Frame your artwork using solid, sturdy materials that keep the piece flat and secure.
When displaying watercolor art, choose a spot with indirect natural light. Avoid areas exposed to direct sunlight or intense artificial lights, which can weaken pigments over time. Adjustable gallery lights with LED bulbs offer controlled illumination that enhances color vibrancy. Regularly check frames to ensure they remain sealed and the painting stays clean and dry.
Sharing and Storing Art Safely
Digitizing your watercolor animal art lets you showcase your work beyond physical spaces. Use a flatbed scanner if possible, setting it to at least 300 DPI for clear detail. If using a camera, shoot in natural light without harsh shadows and keep the camera parallel to the painting to avoid distortion. Edit lightly to correct color balance without changing the original hues.
Store your originals in acid-free sleeves or between sheets of glassine paper to protect from dust and abrasion. Keep the stored artwork in a cool, dry place; avoid attics, basements, or places with high humidity. Consider archival boxes designed for artwork storage to prevent bending and environmental damage. Regular inspection helps catch issues early and preserves your images for years to come.
Conclusions
You have discovered how watercolor painting can beautifully express the essence of animals through carefully chosen techniques and practices. Mastering this artistic medium requires patience and observation, but the results can be truly satisfying. By following the steps presented, you can build confidence in using watercolor to depict animal subjects in various styles—from detailed realism to more expressive forms.
Understanding the foundational elements such as pigment quality, brush selection, and layering encourages better control over the medium. Practicing regularly and observing real animals or references will strengthen your skills. Ultimately, you can create charming watercolor animal illustrations that convey emotion and captivate viewers. Keep experimenting and exploring to further advance your watercolor art journey.


