Introduction
Resin DIY Projects for complete beginners open a world of creativity and personal crafting. Resin is a sticky substance from plants or can be man-made. It can turn into a hard, glass-like material, perfect for making decorations, jewelry, and many cool things. Using resin for DIY means you can make something beautiful and useful with your own hands, even if you’ve never worked with resin before.
This article will take you through everything you need to know. You’ll learn about different types of resin, the basic tools and materials, and simple projects to start with. The goal is to make resin crafting easy and fun so you can enjoy making your own unique items step by step.
Essential Resin DIY Tools And Materials
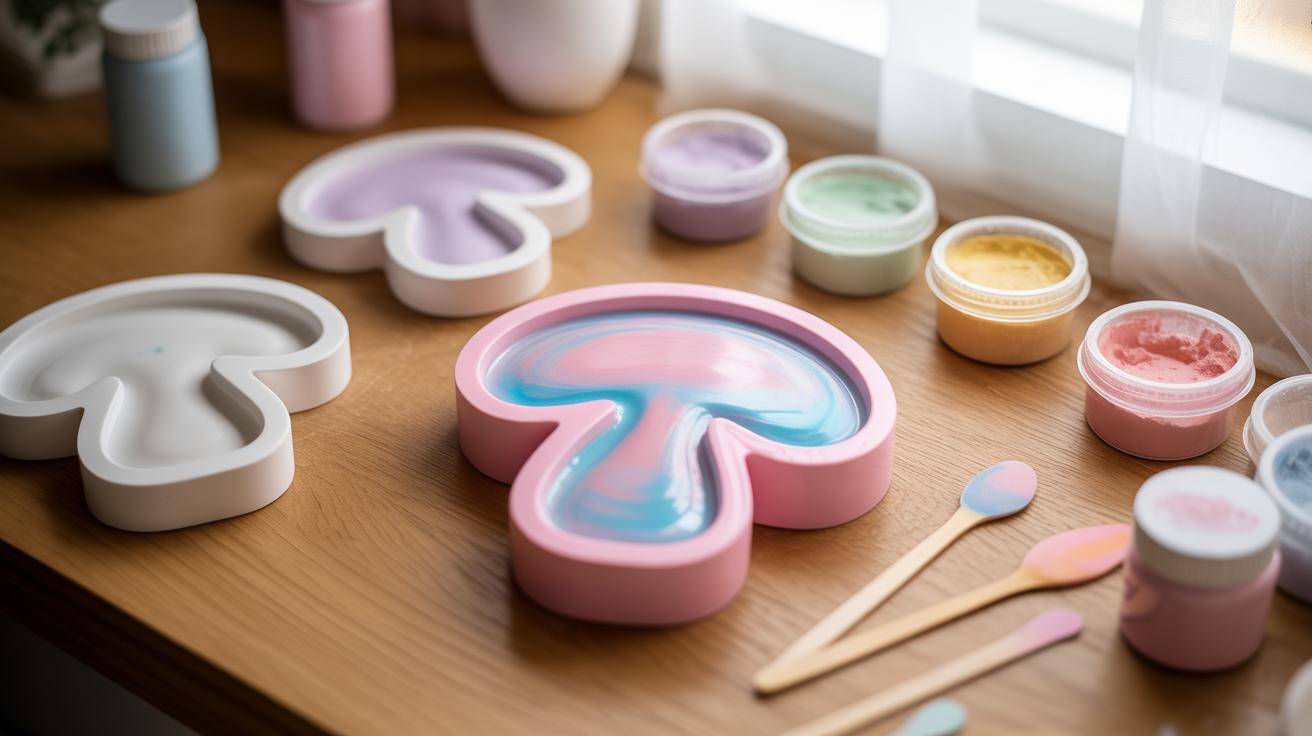
Starting resin crafting means gathering a few key tools and materials. You’ll want a resin kit first—these usually come with both resin and hardener. Getting one meant for beginners can save you from guessing ratios or curing times. Then, molds are essential; they shape your project and can vary widely in size and form depending on what you’re making.
Mixing cups are necessary for combining resin and hardener. I’ve noticed clear plastic cups work best for seeing if the mix is thorough. Gloves protect your skin from sticky resin—you’ll be grateful to have them, trust me. Safety gear like masks or goggles might seem excessive at first, but resin fumes can be tricky, so better safe.
Selecting The Right Mold
Picking molds largely depends on your project’s goal. Jewelry molds tend to be small and detailed for earrings or pendants, while coaster molds are larger and flat. Decorative molds can be almost anything—flowers, animals, or abstract shapes. Do you want sharp edges or soft curves? Sometimes the mold’s flexibility affects how easily your piece pops out, which is something beginners often overlook.
Soft silicone molds usually work best to avoid damage when removing cured resin. Hard molds might be tempting for durability but can make releasing your piece frustrating. If you plan to experiment, it might be worth trying a few mold types to see what feels right in your hands.
Other Helpful Supplies
You might think resin and molds are all you need, but colorants can bring your projects to life. There are pigments, dyes, even metallic powders—you can mix and match, or keep it simple with clear resin for a glossy look. Glitter is another favorite; sprinkle a little and see how light catches it inside your piece.
Protective sheets or silicone mats help keep your workspace clean. They catch drips and make cleanup a bit less of a chore. Stir sticks, toothpicks, or even small brushes come in handy for blending colors or adjusting details mid-pour. It’s easy to get carried away with extras, but you don’t need all tools at once—start small, and add as you feel the need.
Preparing Your Workspace For Resin Crafting
Work Surface And Ventilation
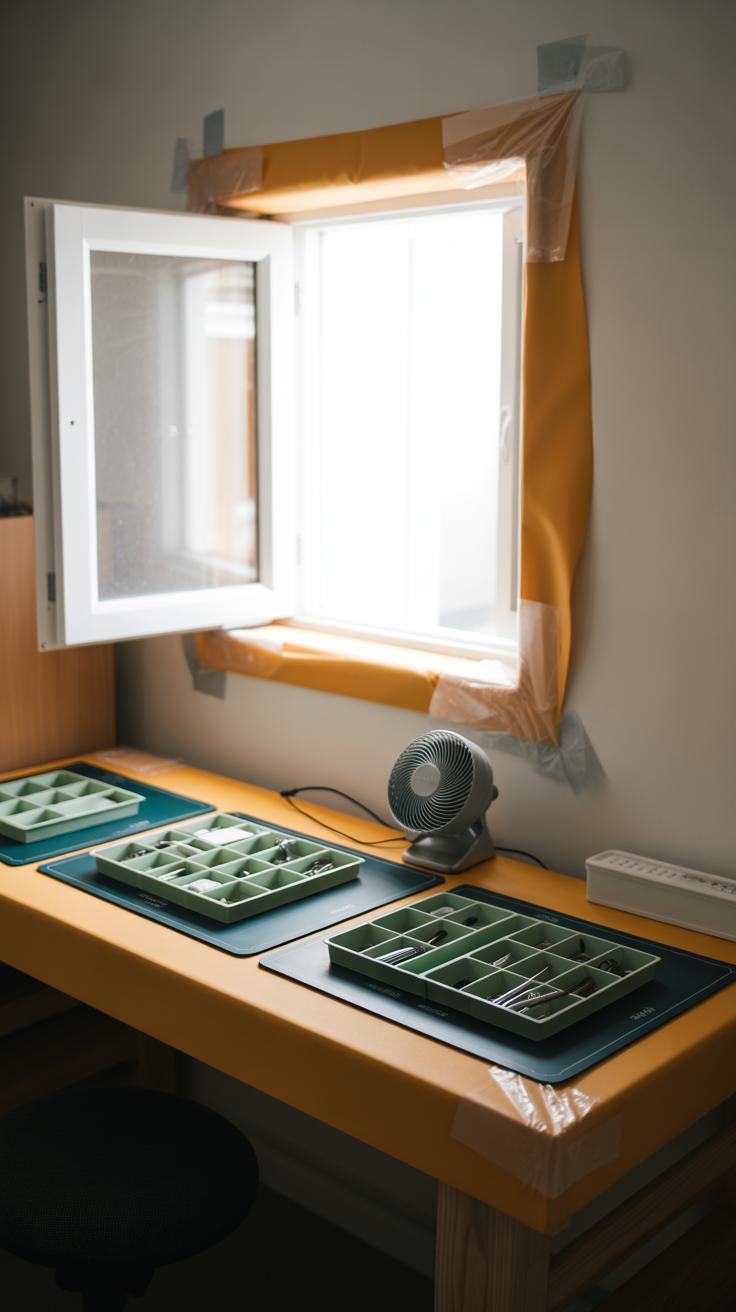
When setting up your resin crafting area, choose a flat, sturdy surface that’s easy to clean or protect it with a disposable plastic sheet or silicone mat. I’ve found that a smooth table covered with a large plastic drop cloth works well—less mess, and you won’t stress about spills. Avoid porous surfaces like untreated wood because resin can stick and stain permanently.
Ventilation matters more than people often think. Resin releases fumes that can irritate your lungs, so you want fresh air flowing. If you have a window nearby, keep it open while you work. A small fan directing airflow outwards can help, but don’t let dust or bugs drift onto your project. Some crafters swear by respirators with organic vapor cartridges, though a good airflow setup may be enough for casual work.
Safety Tips

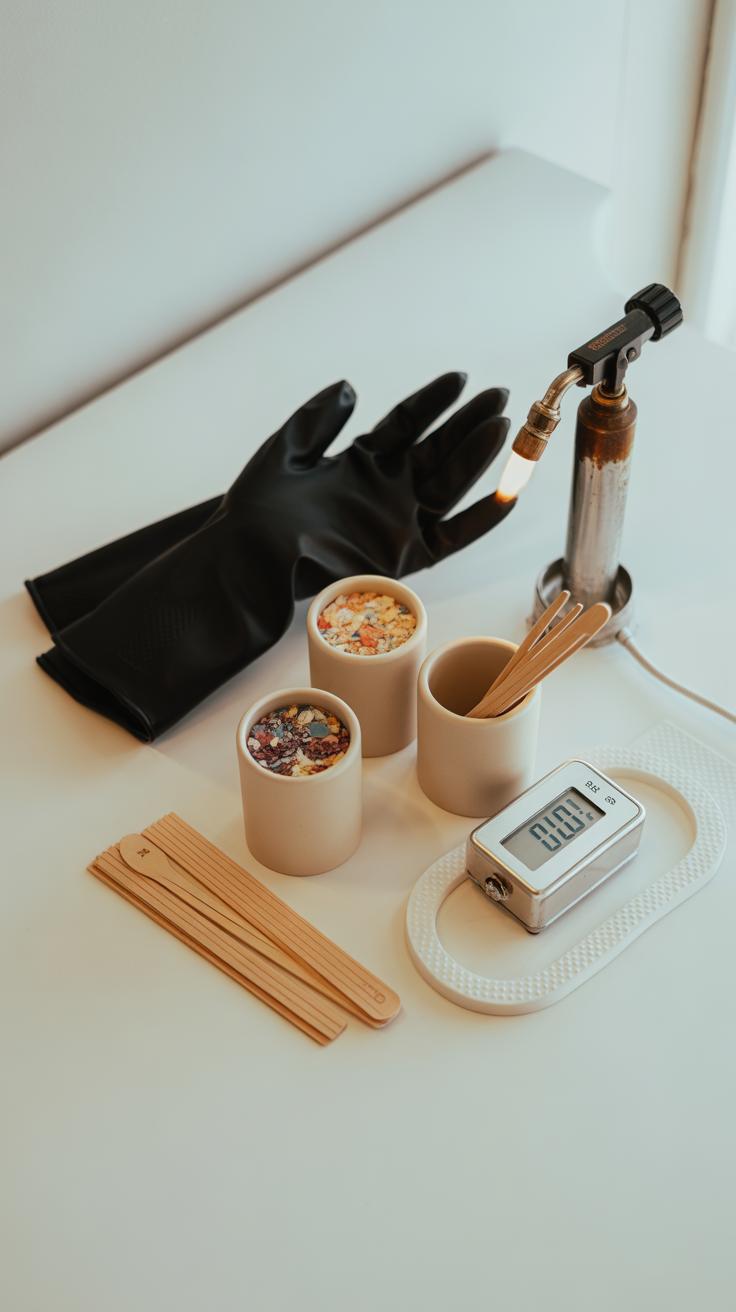
Resin touches every part of your body during a project, so protecting skin is key. Always wear nitrile gloves—the ones you get at the pharmacy—because latex doesn’t hold up well against resin. For your eyes, safety glasses or goggles stop accidental splashes. I remember once getting a tiny drop near my eye—painful and nerve-wracking, but it could’ve been worse.
Protecting your lungs can feel overkill sometimes, especially on quick projects, but if you start feeling dizzy or your throat gets dry, step back and get fresh air. Wearing a mask rated for chemical fumes is a smart move if your space can’t ventilate well. Also, don’t eat or drink near your workspace; resin residue on your hands might transfer unknowingly.
- Cover your workspace with easily washable or disposable material.
- Ensure airflow by opening windows or using fans—just be mindful of dust.
- Wear nitrile gloves and eye protection at all times.
- Consider a respirator or mask for prolonged resin exposure.
- Keep food and drinks away to avoid accidental ingestion.
It’s a bit of effort upfront, but it makes your resin crafting safer and more enjoyable. You’ll thank yourself later when your space stays clean and you don’t end up with irritating skin or worse.
Mixing Resin The Right Way
Measuring resin and hardener correctly feels like the most basic step, but it’s easy to get wrong. You can’t just eyeball it or guess—if the ratio is off, your resin might never cure properly. Using plastic or silicone measuring cups works fine, but scales offer more accuracy. I usually recommend weighing both parts if you want consistency, especially since some resins require precise ratios like 2:1 or even 1:1.
When measuring, pour slowly and carefully. Small spills or rushed pours can mess with your mix’s balance. If you use cups, double-check the markings. It’s kind of surprising how often people miss this detail. You want as exact a ratio as possible—not just for curing, but to avoid tackiness or soft spots too.

Mixing the two parts well is just as crucial as measuring. Stirring fast might seem like a time saver, but it traps bubbles inside the resin. Those bubbles often ruin your piece or force you to pop them later, which can be frustrating. I find mixing with gentle, deliberate strokes works better. Slow, rolling motions often give the best results.
Make sure you scrape the sides and bottom of your mixing container thoroughly. Resin likes to hide in corners, so if you miss some, that leftover unmixed part won’t cure right. It’s a step that feels tedious but really impacts how sturdy your final product is.
Have you ever noticed tiny bubbles creeping in despite careful mixing? Sometimes waiting a bit after mixing lets most of them rise to the surface, where you can gently pop them with a toothpick or blow on them lightly. Patience after mixing can pay off.
Finally, keep your mixing time between 2 to 3 minutes. Too short, and parts stay unmixed. Too long, and you might introduce too much air or even start the curing too soon. It’s a delicate balance, but once you get the hang of it, your pieces will feel much more solid and clear.
Adding Colors And Effects To Your Resin

Once you have your resin mixed right, the next step is to bring it to life with colors and effects. You can use different types of colorants designed specifically for resin—pigments, dyes, mica powders, even alcohol inks. Each one behaves a bit differently. Pigments tend to give you opaque, solid colors, while dyes soak in and create translucent, glassy layers. I remember flirting with mica powder once, expecting a subtle shimmer, but ended up with a nearly metallic look that surprised me.
Mixing these into resin is straightforward but demands some patience. Usually, just a little goes a long way. Stir gently to avoid bubbles but enough so the color spreads evenly. There’s room to experiment: add more pigment to deepen the hue or just a touch for a pastel effect. You might wonder how many layers you can pour. Well, layering colored resin can produce some really cool depth, but timing matters. Pouring too soon can mix the colors; waiting allows clear divisions.
Now, creative effects. Glitter is a favorite for many, but it’s not just about sparkle. You can create swirling patterns by dropping pigments into wet resin and using a stick to tug or swirl them. Or try embedding small objects like dried flowers for texture. Another idea is painting on cured resin with alcohol inks layered under fresh resin for a smoky, 3D impression. Even just layering clear resin with different pigments can mimic waves or clouds. Sometimes the unexpected outcomes, like how colors bleed or layer, make resin crafts much more engaging.
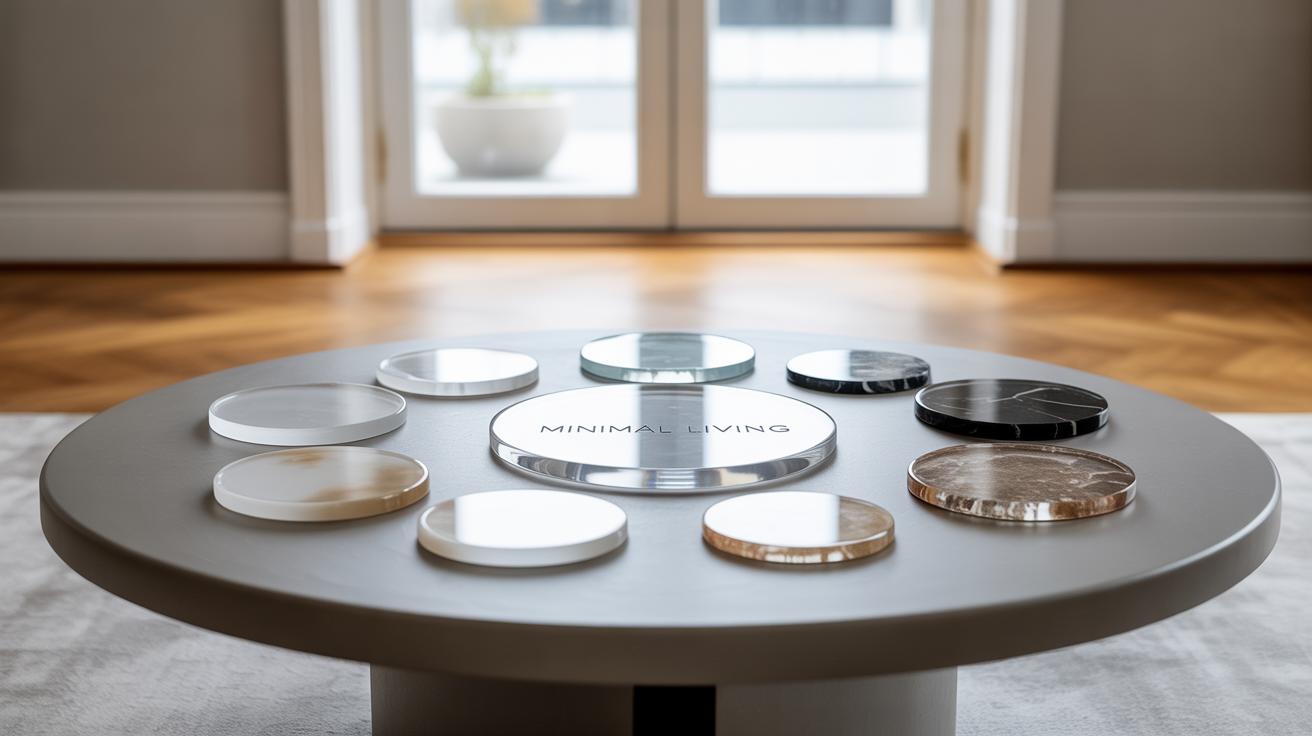
Basic Resin Projects To Try First

If you’re starting out with resin, it’s best to pick projects that won’t overwhelm you right away. Small, simple items like coasters, keychains, or little jewelry pieces let you practice without feeling lost in all the steps. These projects are just right for getting a feel of resin’s behavior—how it flows, sets, and reacts.
Making Resin Coasters
Coasters are a popular beginner’s craft because the molds are easy to find and use. Start by choosing a silicone mold—square or round, depending on your style. Pour your mixed resin carefully into the mold, but don’t fill it to the brim; leave a bit of space in case of overflow.
Adding decorations is where the fun begins. You might sprinkle dried flowers, bits of colorful paper, or even tiny objects like confetti. Just make sure they’re small enough to lie flat and fit inside. Pour another thin layer of resin over the decorations to seal them in.
Wait patiently for the resin to harden, typically 24 to 48 hours. Don’t touch or move the mold too much to avoid imperfections. After it cures, gently pop out your coaster. You’ll have a handmade item that’s both practical and unique—perfect for testing your resin skills without pressure.
Creating Resin Keychains
Keychains are another great choice for beginners. They are smaller and quicker to make, so you get that instant gratification it’s easy to crave. Pick a small mold shaped like a circle, heart, or even a simple rectangle.
Mix your resin and add pigment or glitter for color—this is just like you did before, right? Pour the colored resin into the molds carefully. Now, to make your keychain special, place charms, small stickers, or tiny trinkets onto the resin before it cures.
Once everything is in place, pour a little more resin on top to secure the decorations and get a smooth surface. Let it cure completely in a dust-free area. When dry, insert your keychain hardware through the provided hole or attach a small metal ring. It’s a straightforward project that really helps build your confidence with resin. Plus, you end up with an accessory you can carry around or gift.
How To Remove Bubbles From Resin
Bubbles in resin can be quite frustrating, especially when you’re after a smooth, glass-like finish. Luckily, there are a few ways to get rid of or at least reduce those pesky bubbles once they appear.
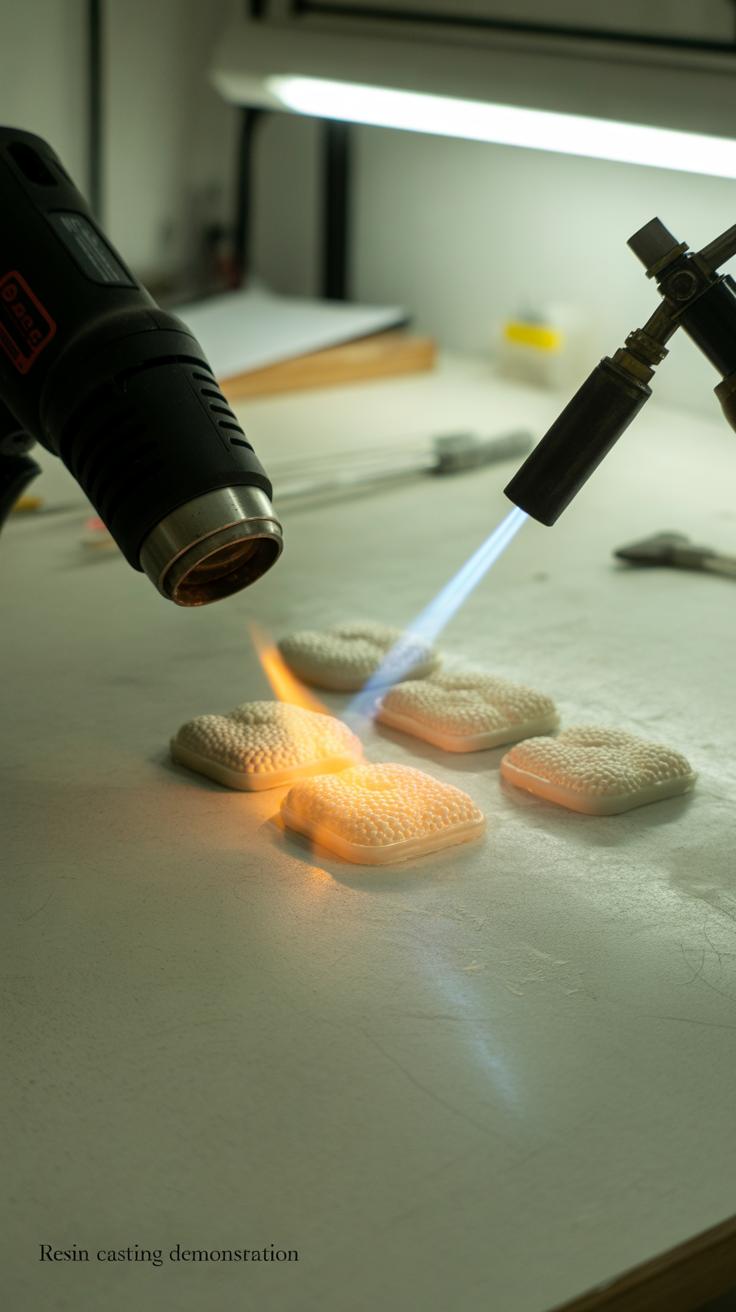
Using Heat To Clear Bubbles
One common method is applying heat carefully. A small kitchen torch or even a hair dryer on low heat can help push bubbles to the surface and pop them. When using a torch, keep it moving quickly over the surface—don’t hold it in one spot, or you risk scorching the resin. With a hair dryer, aim from a slight distance and blow gently; too strong a blast might create more bubbles or move your resin around. I remember feeling nervous the first time I tried a torch, worried it would ruin my piece. But steady hands and patience make it manageable.
Prevention Tips
Prevention is better, of course. Slow, gentle mixing helps avoid whipping air into the resin. Stirring too vigorously is often the culprit behind bubbles forming. Then, let your mixed resin sit for a few minutes before pouring; this gives tiny bubbles time to rise and disappear on their own.

Pouring resin slowly and in a thin stream also reduces trapped air. Some people even warm their resin bottles slightly beforehand, making the resin less viscous, which helps bubbles escape more easily. It feels a bit like a balancing act—too fast, and bubbles hatch; too slow and the resin might start curing before you finish pouring.
Have you noticed certain brands or types of resin create more bubbles, or is it mostly how you handle them? Sometimes, it’s all part of the learning curve.
Curing Resin And Finishing Touches
Curing Time And Conditions
Resin curing isn’t instant—sometimes it takes time, patience, and a bit of trial and error. Typically, resin needs around 24 to 72 hours to fully cure, depending on the type you’re using. Keep in mind that temperature plays a big role. Ideally, maintain a warm environment—somewhere between 70 to 75 degrees Fahrenheit works best. Cooler temps can slow curing down and lead to sticky or soft spots, while too much heat might cause resin to cure unevenly or warp.
Humidity matters, too. High humidity can cause a cloudy or foggy finish on your pieces. So, if possible, try to work in a dry space. I’ve had times when a sudden rise in humidity made my resin turn a bit murky despite all my care. You might want to keep your work sealed off or even use a dehumidifier if humidity is an issue.
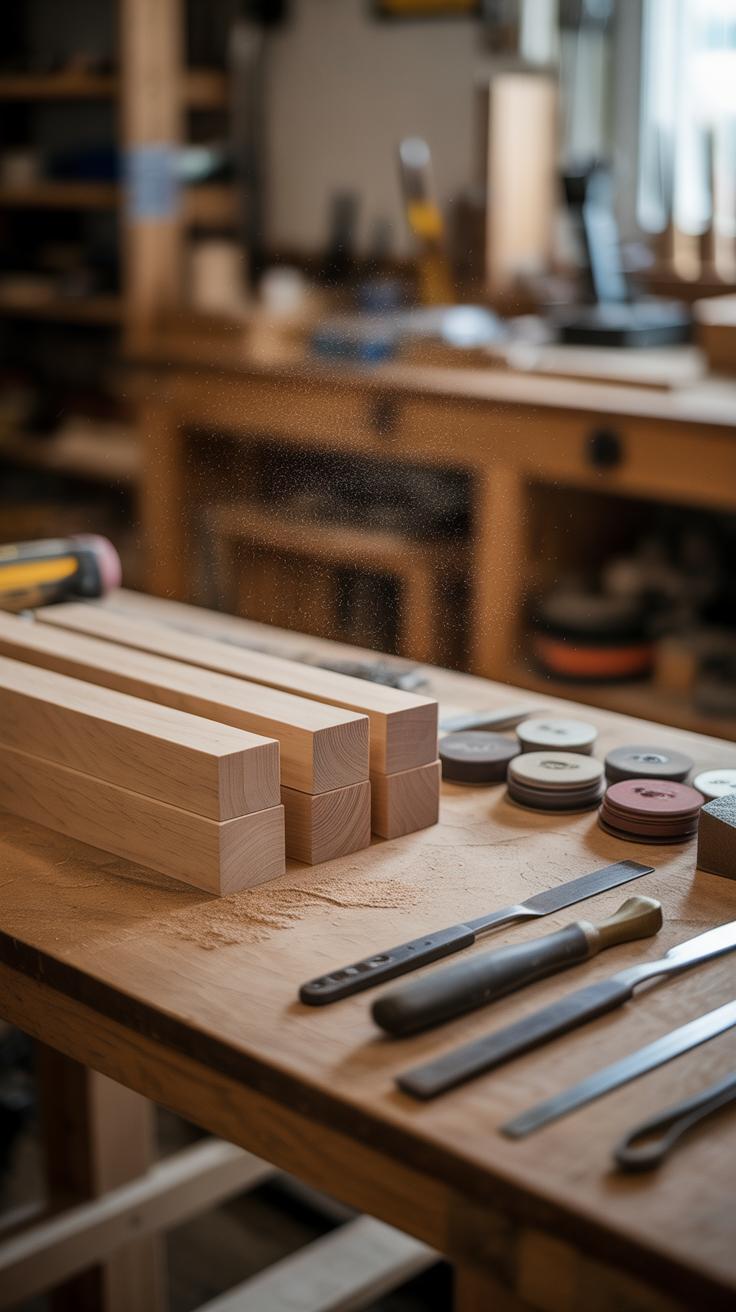
Sanding And Polishing
Finishing a resin project starts when it’s cured. If your piece feels rough or has small bumps, sanding is your go-to. Start with a coarser grit paper like 220, then gradually move to finer grits—320, 600, up to 1200 or 1500. Wet sanding helps keep dust down and lets you see the surface better. Yes, it’s a bit tedious, but the smoother your piece, the better the shine after polishing.

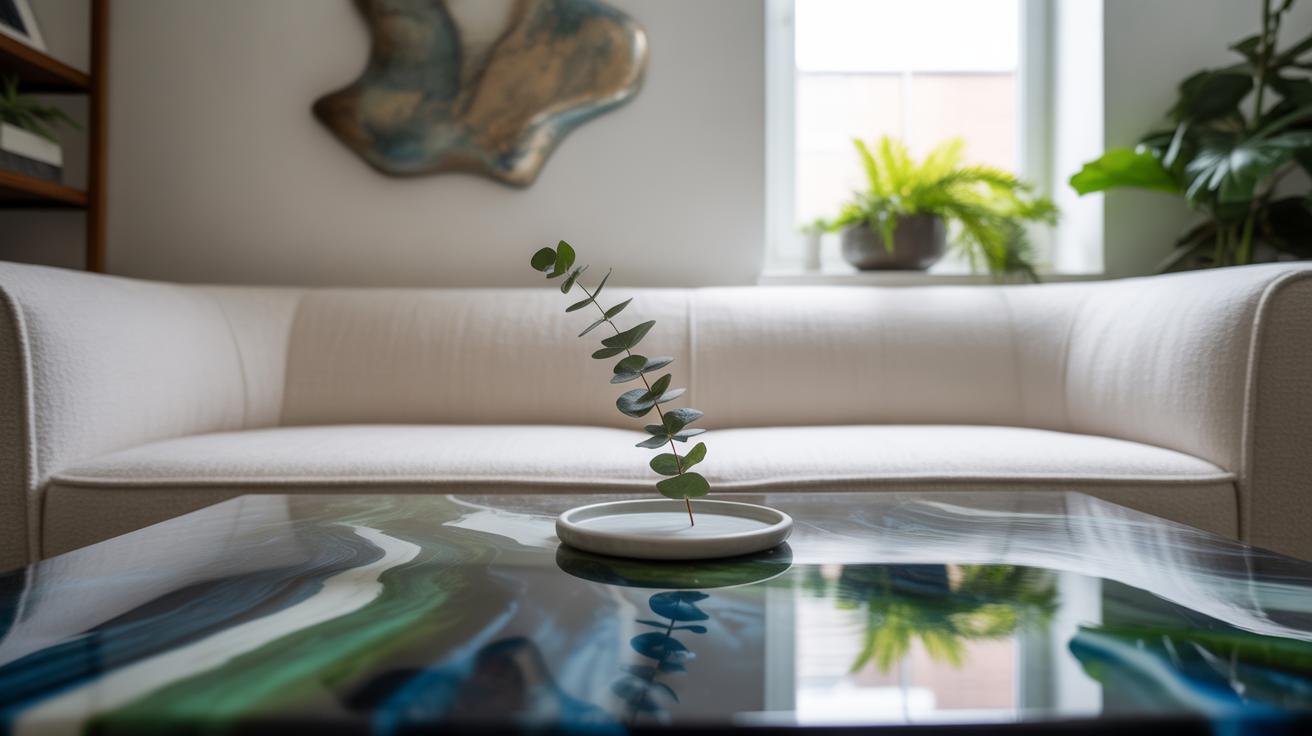
For polishing, use a soft cloth and a plastic polish or even automotive rubbing compound. Buffing the resin this way reveals that glassy finish that many of us expect from resin crafts. Sometimes, after polishing, adding a protective clear coat can enhance durability and give your piece a richer shine. I’ve found that this extra step can also help if you plan to use your resin item as a coaster or jewelry, where scratches are likely.
So, what’s your preferred way to finish your resin pieces? Are you more about that natural shine or do you like adding extra layers for protection?
Troubleshooting Common Resin Problems
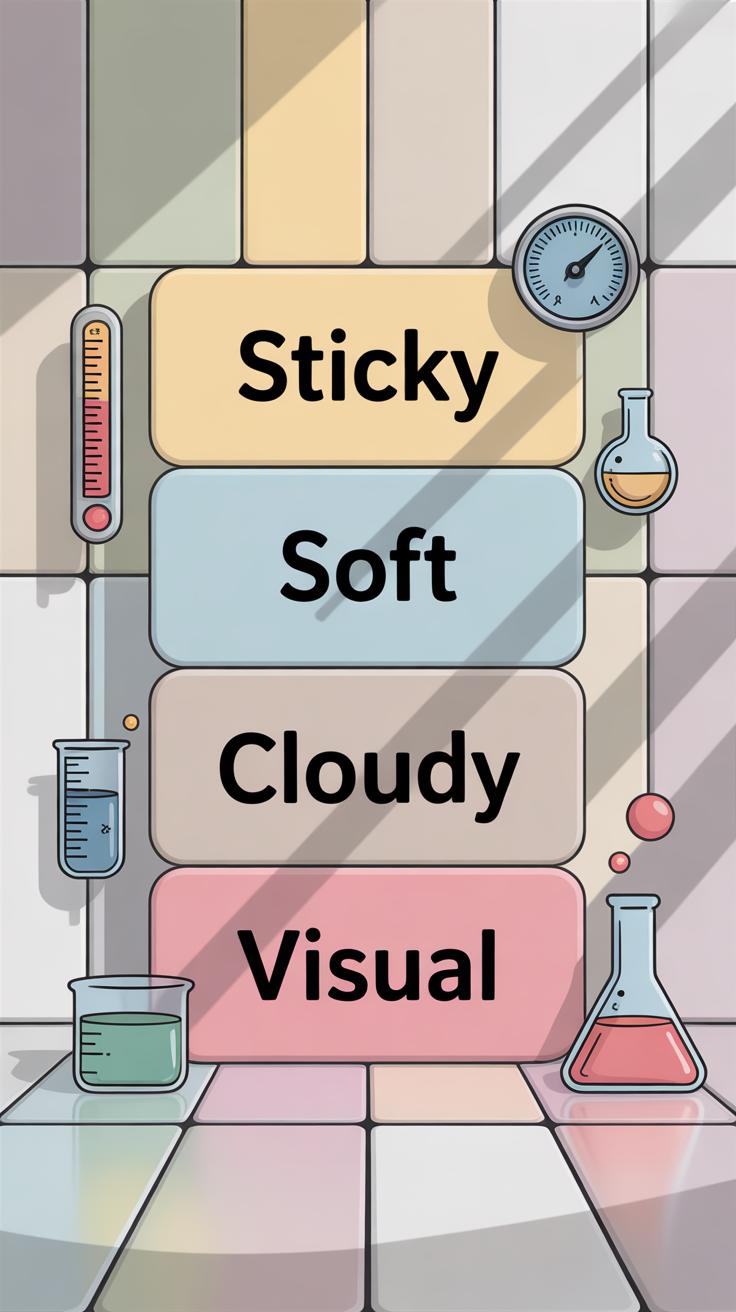
Sticky or soft resin is a common issue that many beginners face. This usually happens when the resin hasn’t completely cured, often because the mix ratio between resin and hardener was off or the curing time was too short. Sometimes, using cold temperatures or high humidity during curing slows down the process, leaving the surface tacky. To fix this, you can try letting the resin cure longer in a warmer, dry environment—ideally around 70-75°F. If it stays sticky, applying a thin layer of fresh, properly mixed resin can create a hard, smooth finish. If the problem persists, sanding the sticky layer off and recoating might be necessary.
Cloudiness in resin can be tricky. It often results from trapped air bubbles, moisture, or using resin that’s too cold. Also, stirring resin too vigorously introduces bubbles, and pouring resin over a damp surface can cause haziness. To get a clear finish, try warming your resin slightly before mixing and stir gently. Using a heat gun or torch lightly over the surface helps pop bubbles early on. If cloudiness remains, sanding the affected area and polishing it with a resin polish or even toothpaste can improve clarity dramatically.
Ideas For Advanced Resin Projects
Resin Jewelry And Embedding Objects
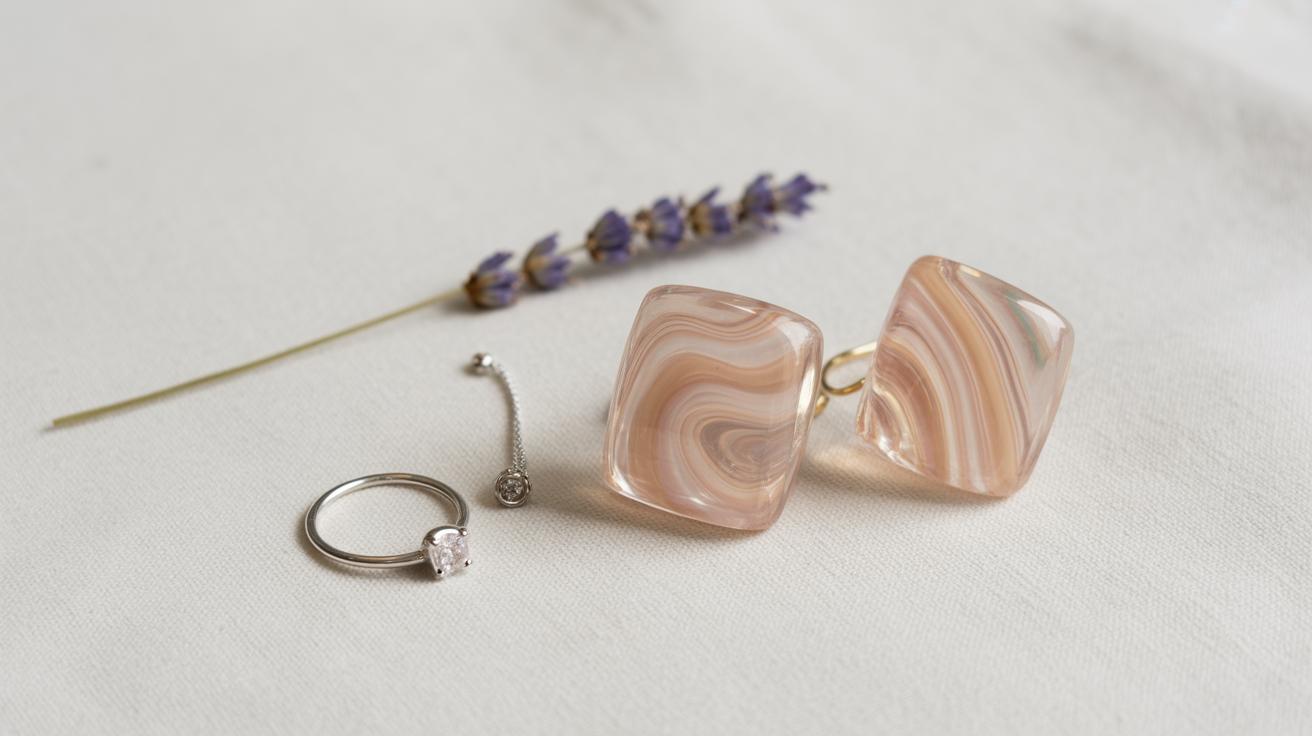
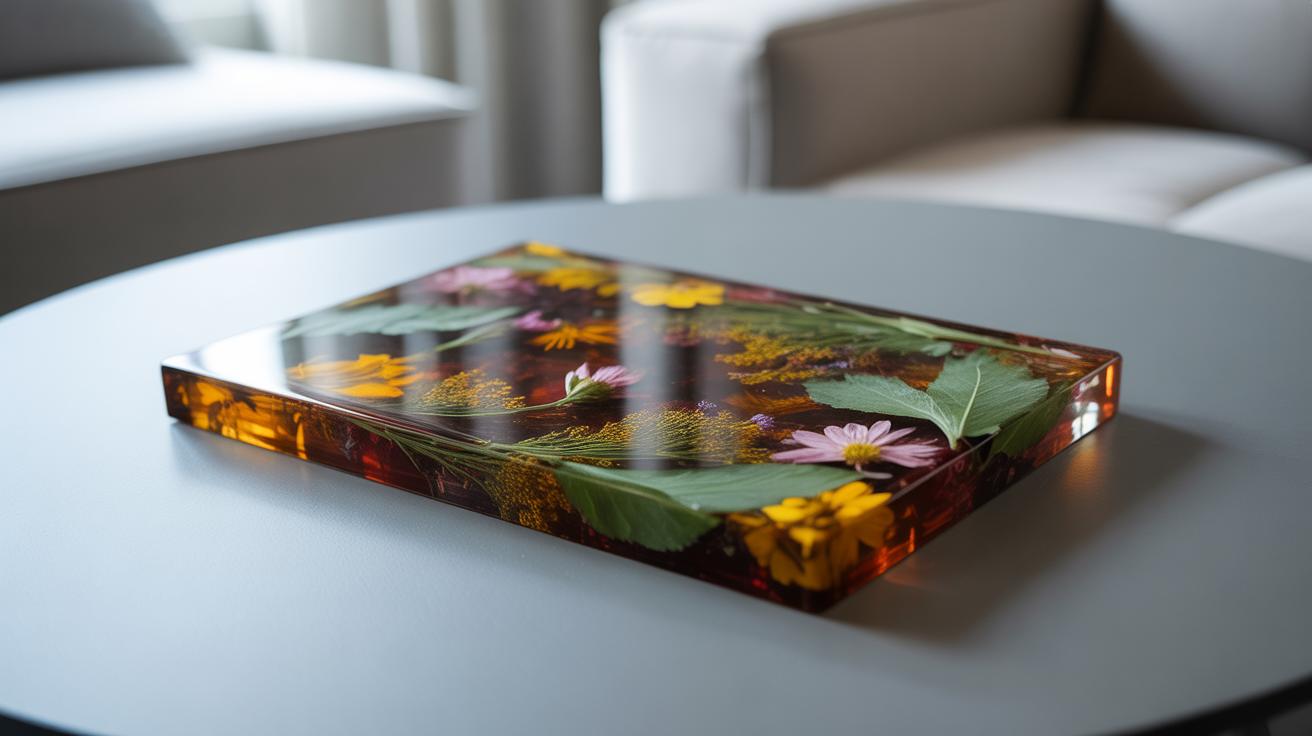
Once you’ve mastered the basics, embedding objects in resin is a natural next step. You can capture leaves, flowers, or tiny keepsakes and preserve them inside clear resin—making each piece unique. For example, pressing a delicate flower before encasing it can create a subtle, organic look that’s hard to replicate with other materials.
Small charms, beads, or even bits of fabric can add texture or meaning to your resin jewelry. One thing I noticed is your choice of objects can affect curing time and clarity. Some organic materials release moisture or tiny bubbles, which might not be ideal unless you’re aiming for a rustic or imperfect style.
Try starting with simple shapes like rings or pendants and experiment layering objects inside. Don’t be afraid to mix in pigments or metallic powders to change the mood entirely. The trick is patience—layer carefully and let each set before moving on.
Layered And 3D Resin Art
Creating layered resin art takes control and creativity a bit further. You can pour resin in stages, letting each layer cure enough to hold the next set of embedded objects or colors without blending. This technique lets you build depth and interesting visual effects—like a mini world captured inside a flat surface.
Molds are your friend here if you want 3D shapes. Silicone molds come in countless designs, from geometric forms to organic, flowing shapes. Pour resin slowly to avoid bubbles or uneven edges. Sometimes, filling a mold in parts gives better results; for instance, you can add an object mid-pour for a suspended effect.
What’s fun—and tricky—is balancing transparency with opacity across layers. If you add too many pigments or inclusions, your piece might lose its clarity or seem cluttered. I’ve played with alternating clear and colored layers to keep things lively without overwhelming the eye.
Have you tried something like this before? It might feel complicated, but with a bit of trial, the possibilities can really open up.
Conclusions
Working with resin can be a great way to make personalized gifts, decorations, and art. You learned how to pick the right resin and tools, mix resin carefully, and try beginner projects like coasters and keychains. Remember, practice helps make your creations better each time you try.
Now that you have the basics, don’t be afraid to explore more creative ideas. Resin DIY is a fun, hands-on hobby that anyone can enjoy. What will you create next? Keep experimenting and watch your skills and projects grow.