Introduction
Resin coasters offer a wonderful way to add personality and protection to your surfaces. Whether you are new to crafts or an experienced DIY enthusiast, resin coasters let you create items that fit your style. This article explores resin coaster ideas from simple to luxe. You’ll find ways to make beautiful, functional coasters that can protect your tables while showing off your creativity.
You will learn about the materials you need, basic techniques, and how to add decorative touches to your resin coasters. We will cover simple ideas you can make quickly and also ways to achieve more luxe and striking looks. By the end, you will have useful tips to create your own resin coasters that complement your home or make thoughtful gifts.
Understanding Resin And Materials Needed
Resin is a liquid polymer that hardens into a durable, glass-like finish. For coaster crafting, you’re mainly dealing with two-part epoxy or UV resin. Epoxy resin requires mixing a resin and a hardener, while UV resin cures under a light source. Each has its own quirks—epoxy takes longer but generally gives a sturdier result, and UV resin sets fast but can be trickier with larger molds.
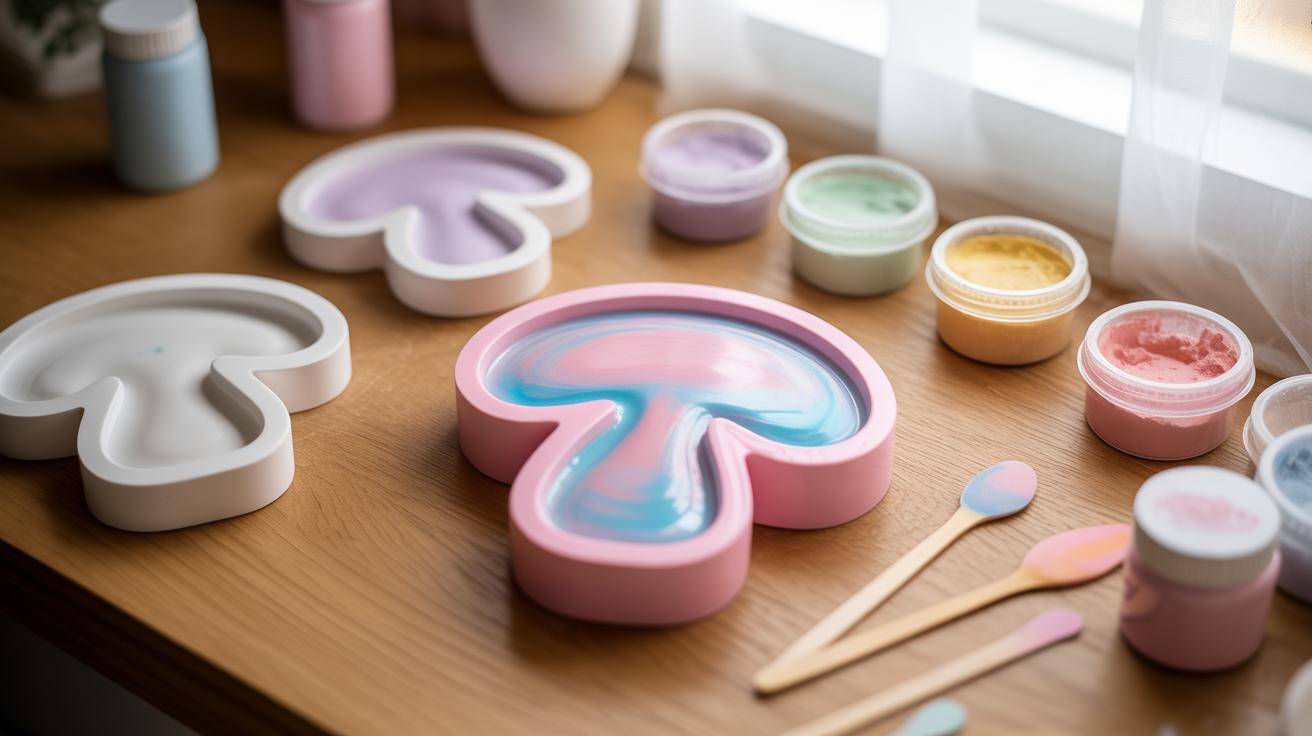
You’ll need molds shaped like coasters. Silicone molds are popular because they’re flexible and easy to demold. There are countless shapes, from basic circles to intricate geometric designs. Sometimes, a mold’s texture or detail level changes the final look more than you expect.
Safety is key, especially if you’re new. Resin can irritate skin and lungs. Use gloves no matter what, and keep your workspace well-ventilated—open windows or a fan helps. Some people underestimate this until they start feeling a bit lightheaded or notice skin redness. Better to be cautious right from the beginning.
Types Of Resin For Coasters
Epoxy resin and UV resin are the most common for coasters. Epoxy resin gives you more working time—usually around 20-30 minutes—which is great for beginners to experiment without rushing. Plus, it’s quite sturdy once cured. But it does take a day or two to fully harden.
UV resin is more “instant,” curing under a UV lamp or sunlight in minutes. That’s handy but can feel a bit unforgiving since you have less time to fix mistakes. I found UV resin works well for simpler coaster designs but can frustrate if you want more detailed layering.
If you’re just starting, epoxy seems easier because you have room for adjustment. UV resin shines for quick projects or small embellishments. Both give tough, water-resistant coasters, so your choice depends on how you like to work.
Essential Tools And Safety Gear
There are a few basic tools you’ll want on hand:
- Measuring cups for accurate resin and hardener mixing.
- Stir sticks to blend components without creating too many bubbles.
- Silicone molds shaped for coasters.
- Disposable gloves to protect your skin.
- A heat gun or small torch to gently remove bubbles after pouring.
- Pipettes or droppers for precise resin placement.

Make sure your workspace has good airflow. An exhaust fan or open window can help reduce fumes. Some beginners skip ventilation, thinking resin is harmless, but even minimal exposure may cause irritation, so it’s worth taking seriously.
Keeping things tidy matters too—cover surfaces with plastic or silicone mats. Resin spills can be stubborn to clean up once dry, and you wouldn’t want to ruin your favorite table right away.
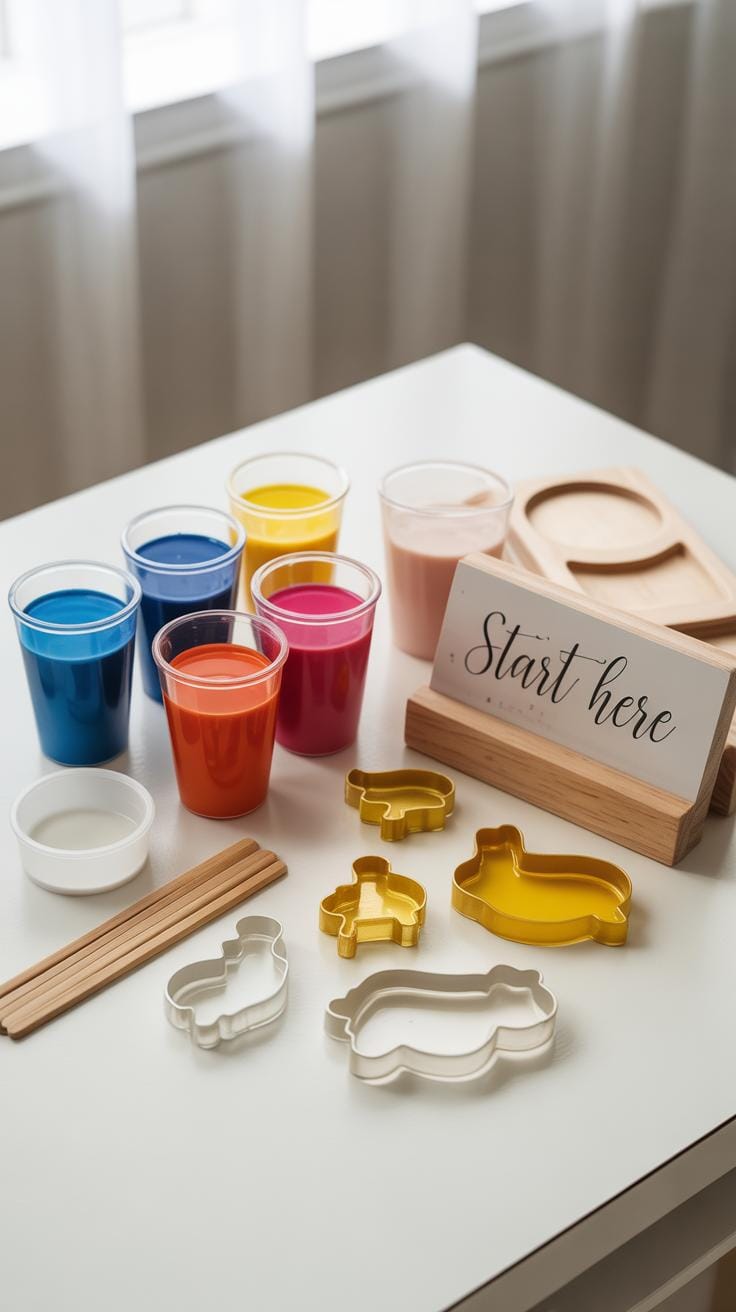
Starting With Simple Resin Coaster Designs
When you’re just starting out with resin coasters, it’s best to keep things simple. The process might seem a bit tricky at first, but once you get the hang of mixing and pouring, you’ll find it pretty straightforward. The basic steps include mixing resin and hardener, pouring into molds, removing bubbles, and finally, demolding after curing.
Mixing resin properly is key — you generally measure equal parts resin and hardener by volume. Stir slowly for a few minutes to minimize bubbles but enough to blend the mixture well. Once mixed, you can add color pigments—either a single shade or combine two for a subtle gradient or swirl effect. Pour the resin gently into silicone molds, filling them just right.

After pouring, you might notice bubbles forming on the surface. A simple trick is to use a heat gun or a small torch briefly; the heat helps bubbles rise and pop. If you don’t have one, a damp brush lightly brushing the surface can help, though it’s not as effective.
Curing takes time—usually 24 to 48 hours—but it depends on your resin brand and room temperature. Cover your molds with a box or a plastic container to keep dust away during this period. Once cured, carefully flex the mold to release your coaster. You might see uneven edges or small rough spots; sanding with fine-grit sandpaper smoothens these and gives a more polished look.
Small imperfections can happen. Sometimes resin pools unevenly or tiny bubbles remain trapped, but that’s part of learning. What matters is you made something with your hands. Would you try mixing two colors next time or stick with a single tone? There’s room to explore as you go.
Adding Decorative Elements To Your Coasters
Small items like dried flowers, glitter, or tiny stones bring a unique touch to resin coasters. Incorporating these elements lets you personalize each piece beyond plain resin. You might find that some objects work better than others, depending on size and weight.
Here are some ways to add personality:
- Place dried flowers flat to avoid thick spots in your resin.
- Use fine glitter sparingly for a subtle sparkle instead of overwhelming the design.
- Embed small, lightweight stones that won’t shift or sink during curing.
- Try layering these elements between resin pours so they appear suspended.
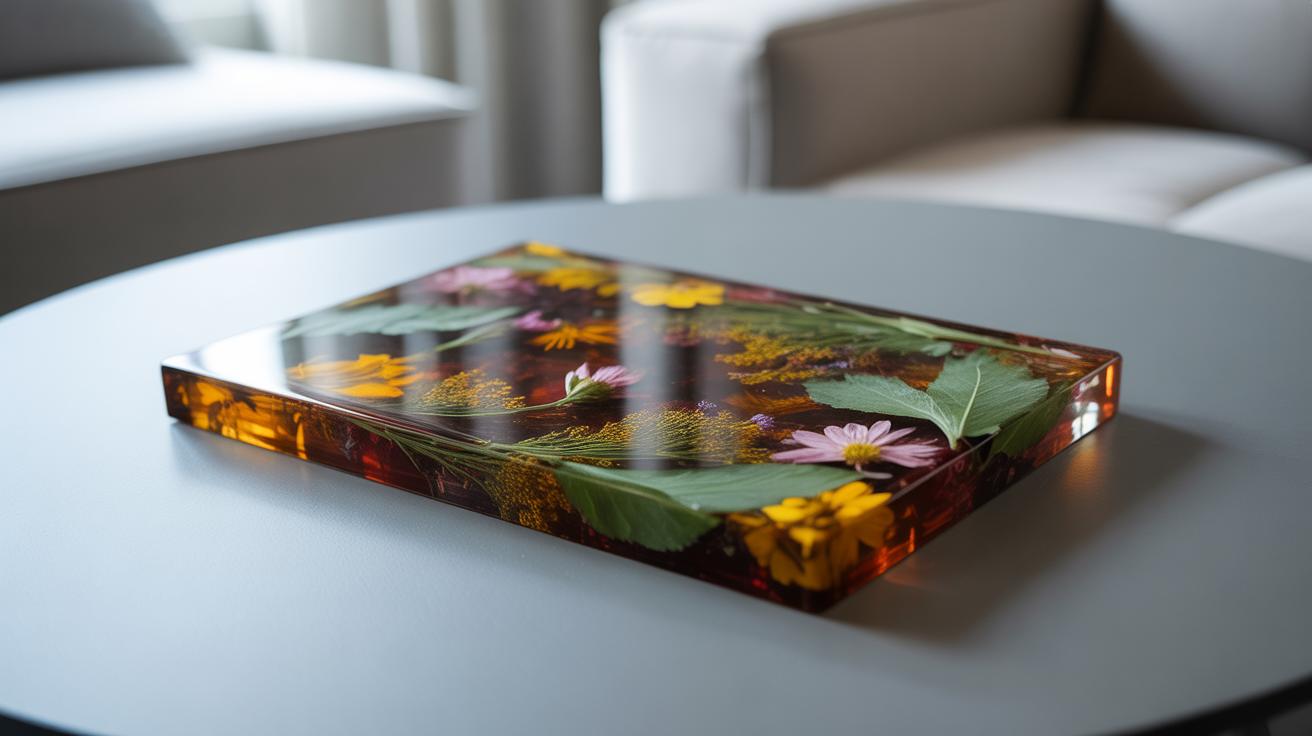
Embedding objects safely takes a bit of care. Fragile items like flowers need sealing—spray them with clear sealant beforehand or press fully dry. I once rushed this and ended up with clouded resin over the petals, which wasn’t quite the look I wanted. Also, pour resin slowly over delicate items to avoid disturbing their placement.
For clear resin effects, ensure your resin is well-mixed but not overmixed to minimize air bubbles. Using a heat gun or torch lightly can help pop bubbles near the surface.
Color and texture layering can add unexpected depth. You can pour a tinted resin base, then add glitter or stones, and top off with clear resin for a glass-like finish. How do these layers affect your coaster’s feel? Often, they add slight variations in texture, making each coaster truly one of a kind. Experiment and see what combinations you enjoy most.
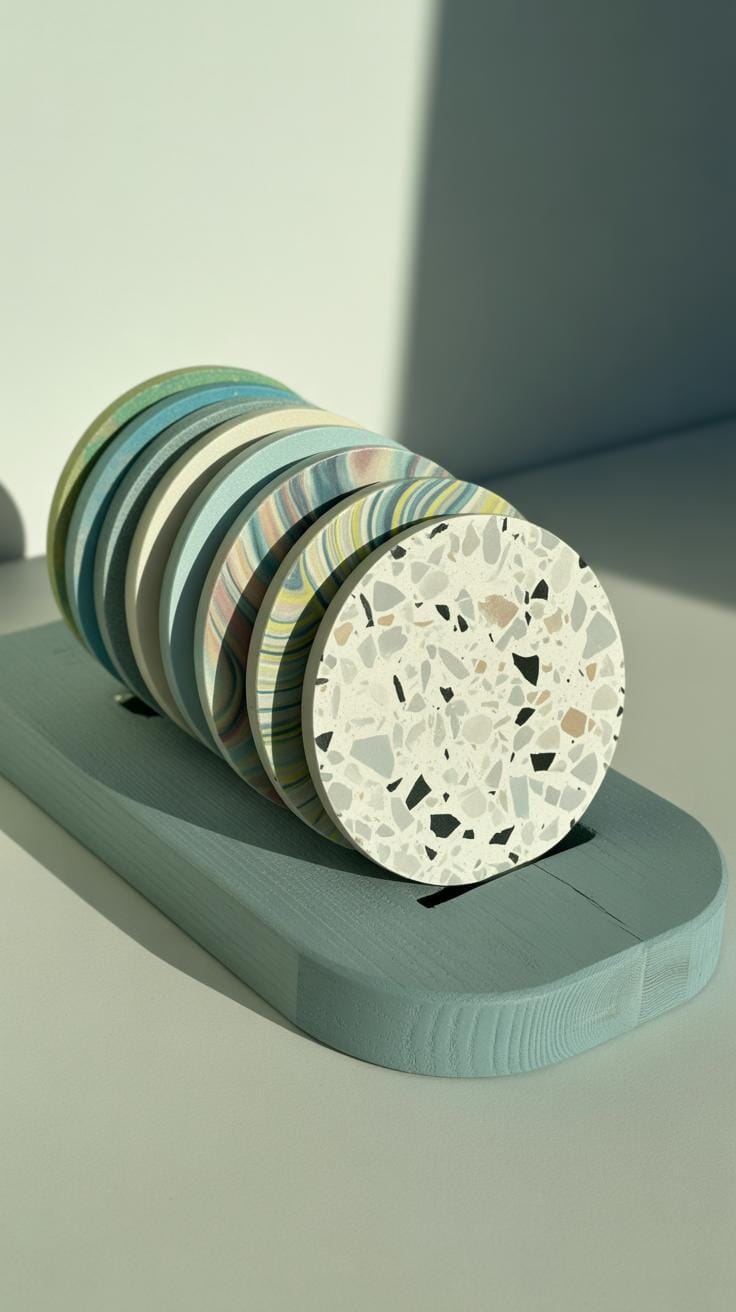
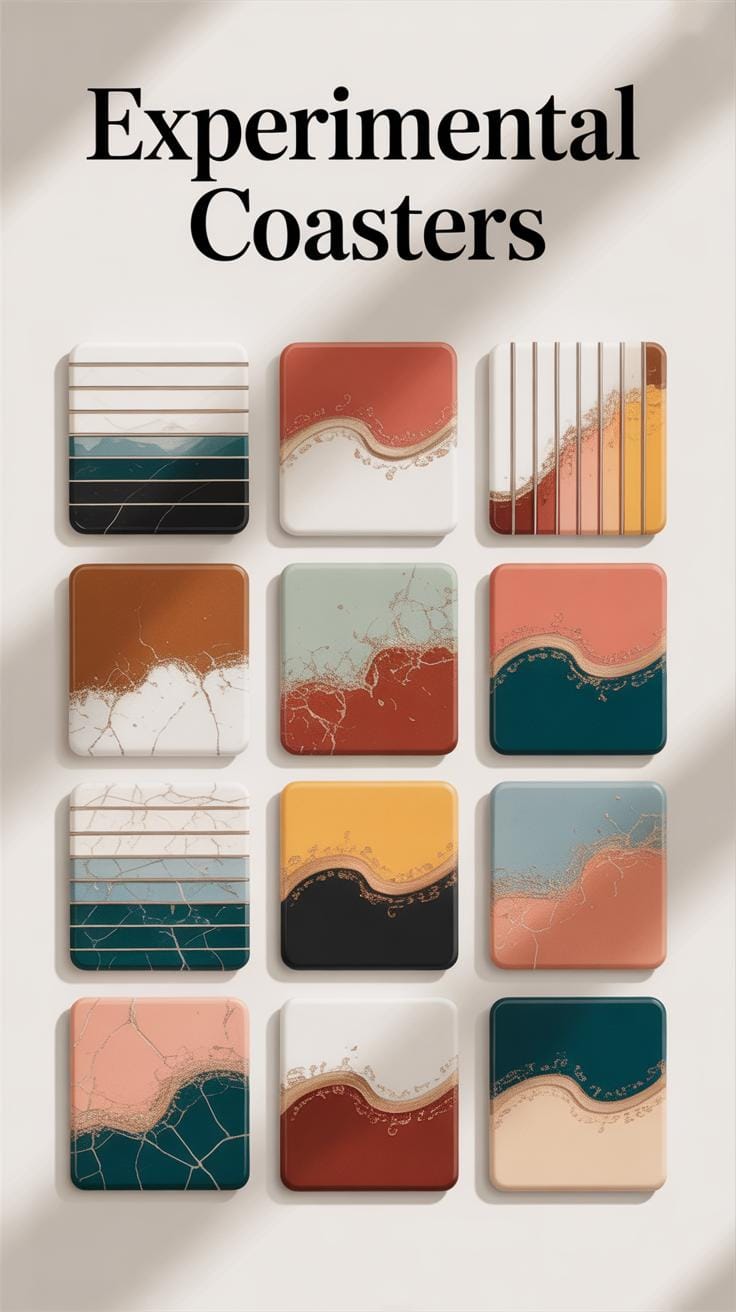
Creative Techniques For Luxe Resin Coasters
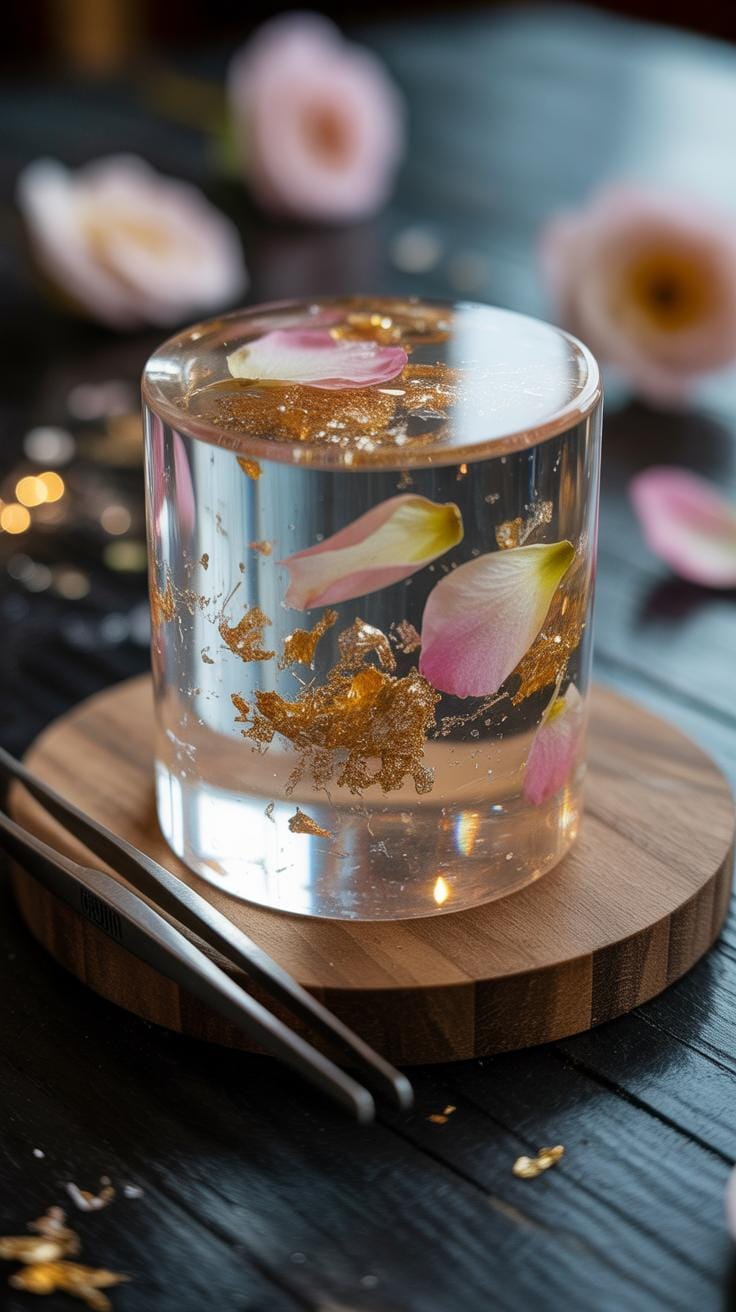
When you want to take your resin coasters up a notch, playing with metallic paints, gold flakes, and marbling can really change the game. Marbling creates these smooth, flowing swirls that almost look like liquid metal or polished stone. You mix a few different metallic pigments into your resin and then gently swirl them with a toothpick or small stick. The trick is to work fast but not overmix. Too much blending flattens the effect, but too little leaves uneven clumps. It’s kind of a balance you find through trial and error.
Metallic touches don’t just add shine—they lend depth. A cobalt blue mixed with silver paint dances differently under light than just plain resin. For something more striking, you can layer translucent resin tinted with metallic pigments to build complexity.
Then there’s foiling or leafing. Applying gold, silver, or copper leaf inside your resin coasters is a delicate but rewarding process. Usually, you pour a thin layer of resin, let it get tacky, and then place tiny sheets or flakes of metal leaf with tweezers. When sealed under a final clear resin coat, the fragile leaf creates gleaming spots that catch your eye. I think this method especially suits elegant spaces—it’s subtle, yet you know it’s there.
You might ask, what shape or size complements these luxe effects best? The answer isn’t obvious. Sometimes, a classic circle lets the intricate patterns shine with no distractions, but other times, an irregular edge frames the leafing in unexpected ways. What kind of visual story do you want your coaster to tell? Playing with these techniques pushes you beyond basic craft into something a bit more refined, though it doesn’t always mean complicated.
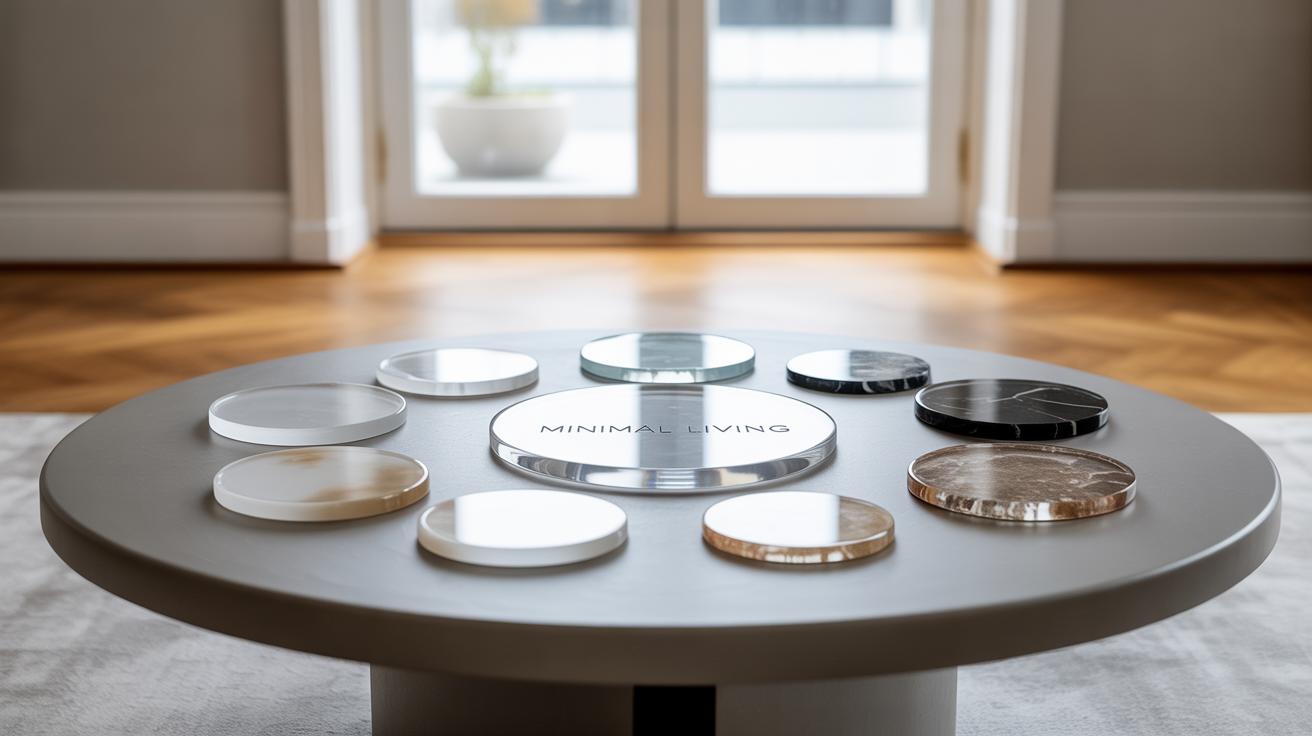
Customizing Shapes And Sizes

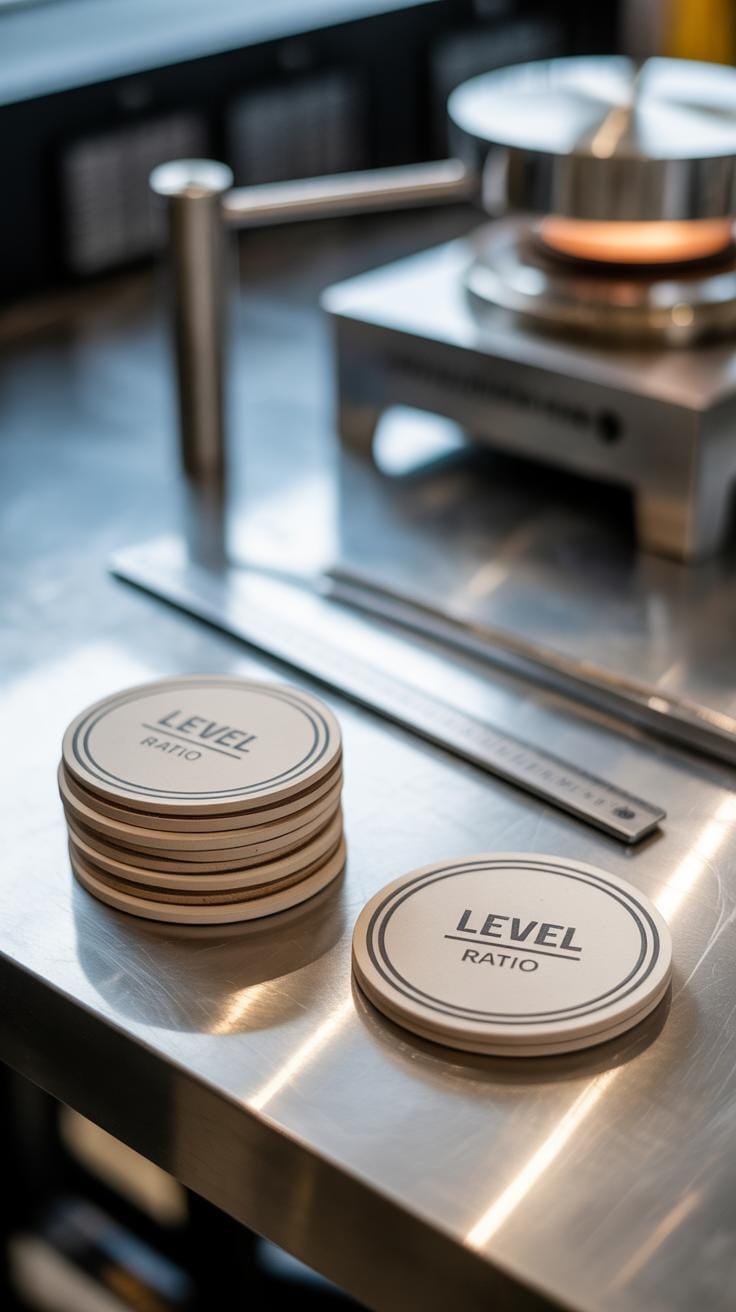
Choosing Or Making Molds
When it comes to crafting resin coasters, your choice of molds really shapes the whole project, literally. You can find an array of molds online or in craft stores, ranging from simple circles and squares to intricate patterns like hexagons or even leaf shapes. These ready-made molds are convenient, but sometimes they don’t quite fit the personal touch you want.

Making your own molds with silicone is surprisingly doable. You can start by selecting an object with the shape you desire—maybe a small dish, a wooden form, or something unique you’ve made. Then, mixing silicone rubber and pouring it around that shape creates a flexible mold. It takes a bit of patience, especially since silicone curing times vary, but making custom molds opens up an entirely new range of possibilities for your coasters.
Shaping Edges And Surfaces
Once your resin coaster cures, it rarely comes out perfect. The edges may be rough or uneven—this is normal, and actually expected. Sanding these edges smooths out any sharpness and can redefine the coaster’s shape if you want to tweak it slightly.
Starting with a coarser grit, like 120 or 220, helps remove lumps or unwanted parts. Then, moving to finer grits—400, 600, or even higher—makes the surface smooth to the touch. Polishing comes next if you want that glossy finish; buffing with a polishing compound or even automotive wax can bring the resin back to life. It’s a bit of extra work but rewards you with that professional, finished feel.
Have you ever tried sanding your cured resin only to notice dust everywhere or the edges looking cloudy? It’s a bit bothersome, but keeping things wet while sanding reduces dust and prevents overheating the resin, which causes those cloudy spots. Small details like this can make a big difference in the final look.
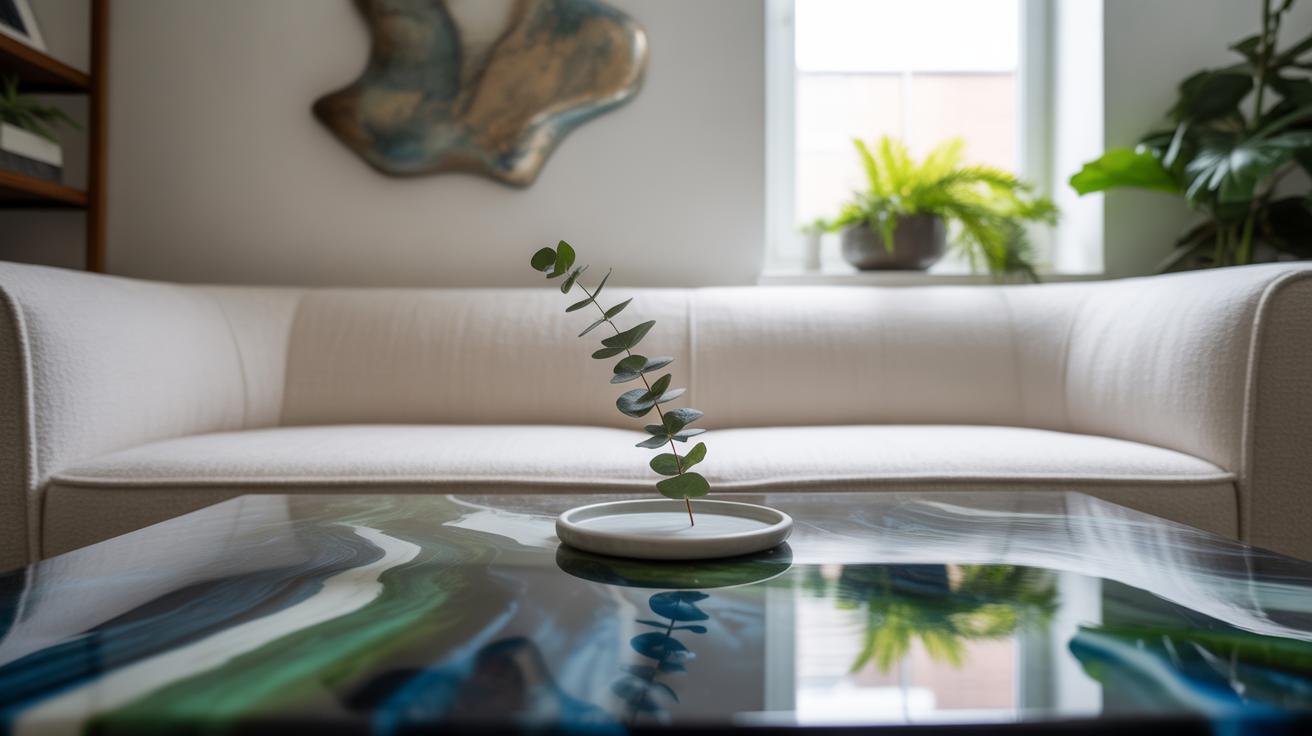
Practical Uses And Gift Ideas
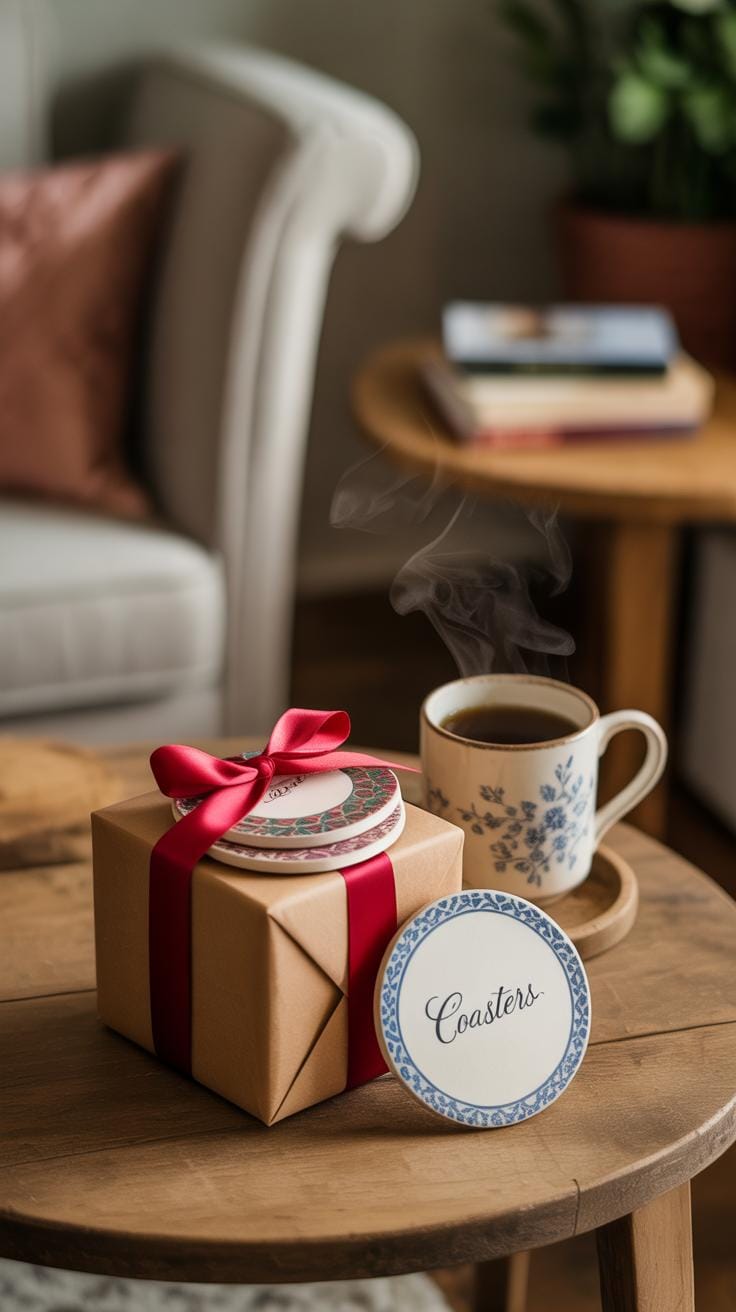
Resin coasters do more than just look good on your table. They protect surfaces from water rings, heat marks, and scratches that cups and glasses tend to leave behind. You might not think about it until a ring shows up on your wood or marble, and then you realize how handy a coaster really is. The hard, non-porous surface of resin means liquids don’t seep through, making them ideal for everyday use.
Personalized resin coasters add a special touch that plain ones don’t offer. Imagine giving a set customized with someone’s name, a memorable date, or a theme that reflects their personality. They make for gifts that feel more thoughtful, even if you’re not handcrafting them yourself. Wedding favors, housewarming presents, or even simple thank-you gifts become memorable with a personal flair.
Everyday Use And Care
Cleaning resin coasters is pretty straightforward. Usually, all you need is a damp cloth or a mild soap and water solution. Avoid harsh scrubbing or abrasive cleaners—they can dull the glossy finish over time or cause tiny scratches. I’ve found that wiping them gently and drying immediately keeps them looking new for months on end.
It’s tempting to toss resin coasters in the dishwasher, but don’t. Heat and strong detergents can warp or discolor the resin. If your coasters have a lot of intricate details, you might want to clean them more gently to avoid dirt buildup in crevices. Occasionally, buffing with a soft cloth can restore shine if things start to look a bit dull.
Making Personalized Gifts
Customizing resin coasters is easier than you might think. You can embed tiny keepsakes, use photo transfers, or hand-paint names and dates before sealing them with resin. Themes for gifts can range widely—think monograms for weddings, birth dates for baby showers, favorite quotes for birthdays, or even coordinates of a special place.
If you’re unsure what to choose, it helps to think about what matters most to the person. Sometimes, a simple color scheme or pattern personalized with their initials is just as meaningful as an elaborate design. And if you’re gifting sets, varying each coaster within the set slightly can make it feel more curated and unique.
Troubleshooting Common Resin Issues
Avoiding And Removing Bubbles
Bubbles in resin coasters can be frustrating. They tend to show up even when you think you’ve mixed carefully. One trick I find useful is to mix resin slowly, in a circular motion, instead of stirring too vigorously. This tends to trap less air. Pouring resin in thin layers rather than all at once helps too—thicker pours tend to hold bubbles longer.
After pouring, you can gently pass a heat source like a small torch or a heat gun over the surface to pop bubbles. Just be careful not to overheat the resin—it can scorch or cure unevenly. A toothpick also works to manually pop stubborn bubbles, but it requires patience.
Fixing Surface And Curing Problems
If your resin curing feels uneven or sticky, think about your environment. Resin may cure poorly if it’s too cold or humid. Try to work in a stable room temperature, ideally between 70-75°F. If parts remain sticky after curing, often it’s because the mix ratio was a bit off—too much resin or hardener can cause this.
Cloudy finishes might come from mixing too quickly or from dust landing on wet resin. You can sometimes sand and polish the surface once cured to restore shine. For areas that didn’t cure fully, adding a top layer of fresh resin can help, but only if the previous layer isn’t tacky anymore.
Have you ever wondered if it’s okay to let resin sit longer before pouring to reduce bubbles? In my experience, letting it rest for a few minutes only helps so much before it starts thickening and becomes hard to work with. So timing really matters, but it’s a bit trial and error based on your resin brand too.
Inspiring Ideas To Keep Improving
If you’re feeling ready to move beyond the basics, mixing resin with other materials can open up some interesting possibilities. For example, embedding wood slices inside resin creates a nice contrast between natural textures and smooth, glossy surfaces. I remember trying this with thin, uneven wood rounds—it wasn’t perfect, but the imperfections added character. You might try sealing the wood first, then pouring resin over it, and watching how the resin enhances the grain.
Paint designs offer another layer to explore. You can swirl acrylic paint right into the resin or paint a pattern on the coaster base before pouring resin on top. It’s a bit unpredictable. Sometimes the paint blends softly, other times it stays sharp and distinct. That unpredictability might frustrate you—or maybe you’ll find it adds to the fun.
Thinking about shapes? Why stick to squares or circles? Try asymmetrical forms or puzzle-piece shapes that connect. Functional art is subtle but rewarding—you end up with something practical and visually intriguing. Coasters that also serve as small trays or nest in geometric patterns provide a twist worth trying. Can these experiments help you find what really fits your style? Probably. Are they perfect every time? Maybe not. But they push your skills forward.
Conclusions
Resin coasters are fun crafts that anyone can enjoy. Starting with simple designs helps build your skills. Mixing colors, adding small decorations, and using different shapes can create unique and practical pieces. As you grow confident, you can try more complex ideas to make luxe resin coasters that catch attention.
Every step in making resin coasters can be satisfying and lets you personalize your space. Remember to work safely with resin and give yourself time to experiment. You can impress your friends or simply enjoy your custom coasters daily. Now it’s your turn to start crafting resin coasters that suit your style and needs.