Introduction
Diy Resin Art Projects You Can Finish Today offers a hands-on way to create unique and personalized items. Resin art involves using resin — a sticky liquid that hardens to a clear, shiny finish. With simple tools and materials, you can make many beautiful things quickly. This guide introduces you to basic resin art techniques and easy projects you can try right now.
You will learn about the types of resin and supplies you need, how to mix and pour resin safely, and how to add colors and designs. Whether you want to make coasters, jewelry, or decorations, this article covers practical tips and clear steps. By the end, you will feel confident to start your own resin art projects today.
Understanding Resin and Its Uses

Resin, at its core, is a sticky liquid that hardens into a solid, clear, and durable form. It’s a bit strange to think about—something gooey transforming into a solid that feels smooth and glass-like. The main types artists use are epoxy, polyester, and UV resin. Epoxy resin is probably the most familiar in DIY circles because it cures slowly, giving you time to work. Polyester resin often smells stronger and cures faster, but it’s less common for delicate crafts. UV resin is different; it hardens quickly when exposed to UV light, making it handy for small or quick projects.
Why choose resin for art? Its shiny finish is hard to beat. The surface feels silky and smooth, almost like glass, which can make colors pop intensely. Plus, resin can trap objects—like dried flowers, glitter, or tiny trinkets—preserving them visibly in clear layers. This layering ability opens up a lot of creative doors. It’s not just about looks either; resin is also quite strong and lasts long, which helps your projects hold up over time.
It’s interesting how resin combines function with aesthetics in ways many other materials can’t. But does that shiny, perfect finish mean you need a lot of experience? Not really. The process is something many find rewarding, even if you mess up a little at first. Maybe it’s its versatility or the way it turns simple ideas into something tactile and lasting. Whatever it is, resin keeps drawing people in for DIY projects, and it might just work for you too.
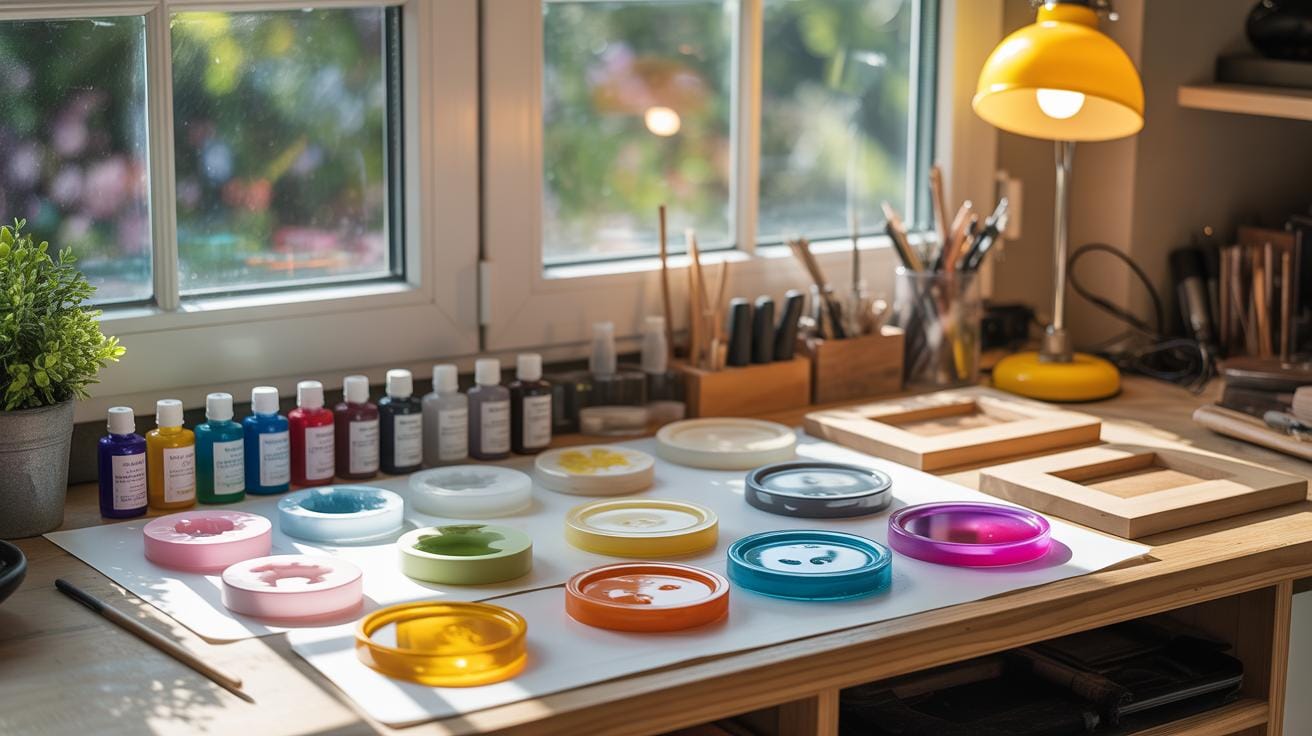
Gathering Your Tools and Materials

Before diving into your resin art project, getting your tools and materials ready can make a big difference. You’ll want to start with a resin kit, which usually includes the resin and hardener. These come in different curing times and finishes, so picking one that fits your timeline and style is handy. Then, have a few mixing cups at hand—disposable ones work well to keep cleanup simple. Stir sticks are crucial too; wooden sticks tend to work better than plastic because they don’t bend or break easily while mixing.
Don’t forget gloves and a mask. Resin smells strong, and the chemicals can irritate your skin. If you’ve got a sensitive nose or skin, these are non-negotiable. Cover your work surface with a protective sheet or disposable paper—resin drips and spills are almost guaranteed, especially at first.
Once you’ve got these basics covered, you might want to include some extras to make your art stand out. Pigments let you play with color in so many ways—powdered or liquid options can completely change your piece’s vibe. Glitter offers a sparkly twist, but it can be a bit messy, so a small container for it helps avoid chaos.

Molds shape your resin into anything from coasters to jewelry pieces. They come in silicone mostly, which makes removing your finished product easier. And finally, sealing sprays can protect your creation and add shine or a matte finish, depending on what you prefer. Choosing the right mix of these tools and materials can feel overwhelming, but experimenting with what you have is part of the fun.
Preparing Your Workspace
Setting up your resin art area carefully saves you from a lot of headaches later on. Resin can be messy, and if you’re not careful, it can stick to everything. A clean, well-ventilated workspace is really the foundation for any project you want to do at home.
First, think about safety. Resin fumes aren’t something you want to breathe in for long periods. I like to open windows or use a fan to keep air moving—sometimes it feels like the fumes fade slower in smaller rooms, so bigger, airy spaces work better. Wearing disposable gloves is non-negotiable—your skin thanks you later. And masks help, even if you think your room is well-ventilated; better safe than sorry. It feels a bit much at first, but trust me, it sets the tone for working carefully.
Now, for your surfaces. I usually cover my table and the floor under it with thick plastic sheets or old newspapers—something waterproof that can catch drips or spills. It might sound like overkill, but resin’s stubborn to clean up once it cures on something. If you’ve ever tried scrubbing resin from a hardwood table, you’ll know exactly why this is essential. Plus, taping down the edges keeps things from sliding around, which can be a subtle help during busy projects.

Ask yourself: Is my space easy to clean up? If not, rethink before mixing. And maybe keep a dedicated resin tray or mat nearby. All these steps make the whole process less stressful. It’s curious how much having a good setup influences your patience and how smoothly the crafting goes.
Mixing Resin Correctly
Measuring resin and hardener precisely makes a big difference. The usual method involves using clear, graduated measuring cups. You pour the resin into one cup, then the hardener into another, matching exact amounts according to the instructions on your kit. Sometimes, the ratio isn’t 1:1—often it’s 2:1 or even 3:1. That means you really have to pay close attention. Even a small misstep can affect curing time or final hardness.
I’ve noticed that when I rush this part or eyeball the measurements, the resin ends up sticky or stays soft. So, taking your time here pays off. If you want, you can mark the cups to avoid confusion next time. Reusing the same cups makes things easier, but just watch out for leftover resin that could throw off your measurements.
After measuring, the mixing is straightforward but requires patience. Stir slowly—don’t whip it like eggs. Doing it too fast introduces bubbles that you’ll regret later. A gentle, steady stir for around three to five minutes usually does the trick. You want to combine the two parts so they blend into a consistent, clear solution without streaks.
Sometimes I pause mid-mix to scrape the sides and bottom of the cup. That avoids pockets of unmixed resin or hardener that could mess up curing. And, yes, stirring isn’t exactly the most fun part, but it’s necessary. You’ll see fewer bubbles and a better finish if you take it slow.
Have you ever questioned whether faster mixing might save time? It might seem so, but it usually just brings trouble—more bubbles or uneven curing. So why not be patient and get it right the first time? It makes the whole project smoother, maybe even more enjoyable.
Adding Colors and Effects
Choosing Colors
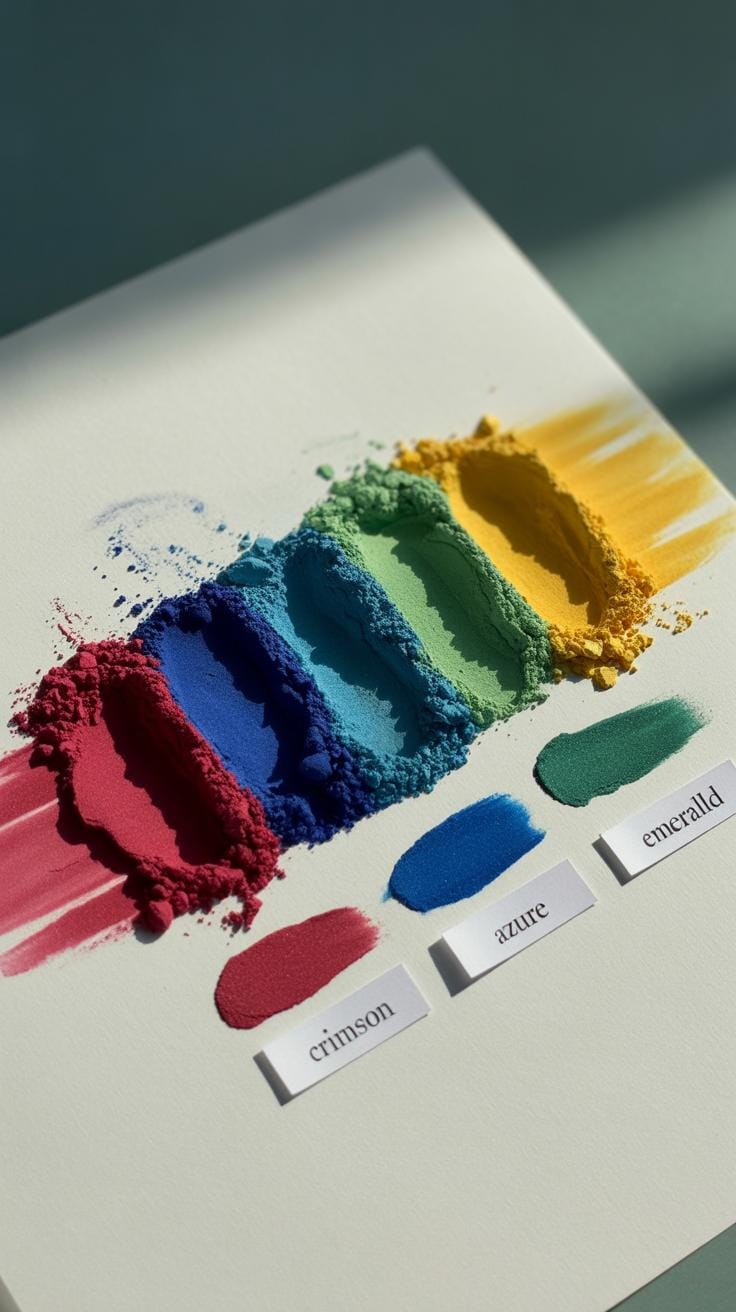
When you start adding color to resin, the choice between pigments and liquid dyes can feel a bit confusing at first. Pigments tend to be thicker and offer solid, opaque hues. They’re great if you want a bold splash of color. Liquid dyes, by contrast, are more transparent and give a softer, more delicate tint. If you want your resin pieces to catch the light or show depth, dyes might be the way to go. Some people mix both, but that can get tricky with how colors settle and interact.
For practical use, start with just a few drops of dye or a small pinch of pigment. It’s easy to add more but hard to take color away once it’s mixed in. I remember a project where I went overboard with blue pigment and ended up with a murky mess that took ages to cure properly. So, it pays to be cautious and test first.
Creating Patterns
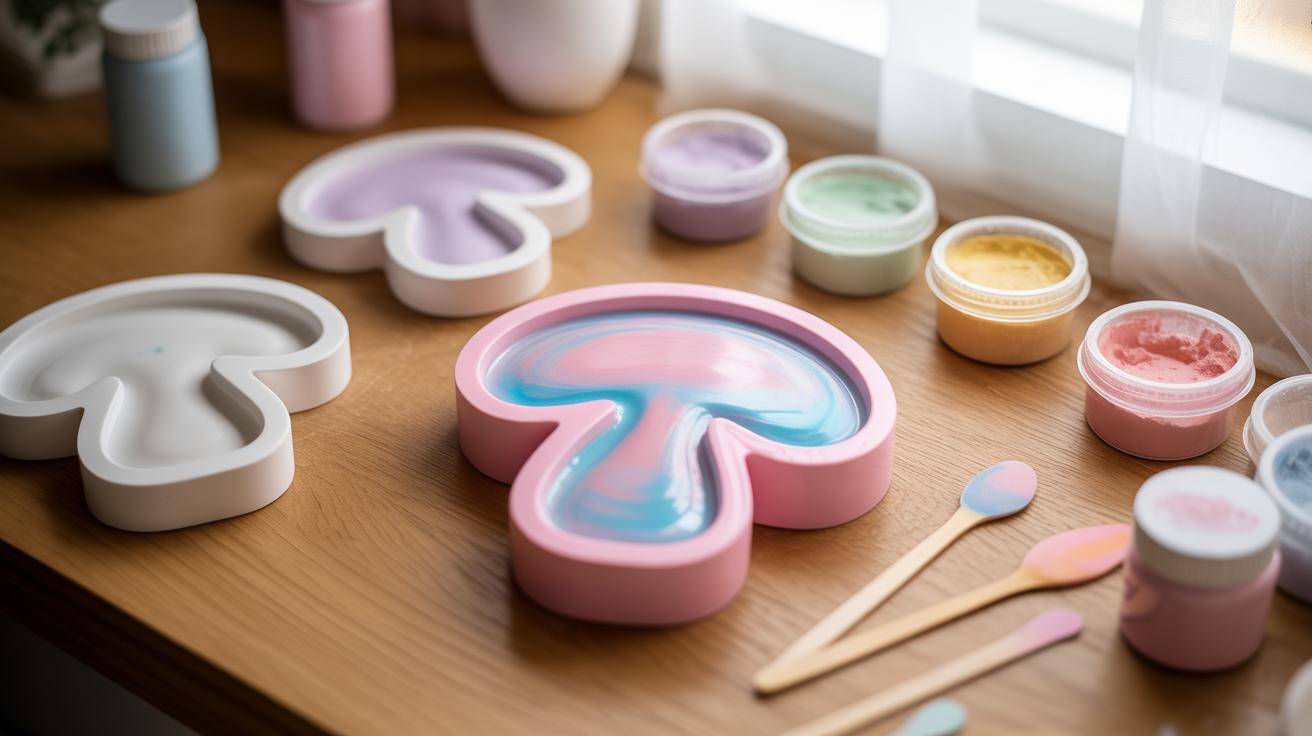
Playing with how colors behave inside resin is where things get interesting. You can pour different colors in layers to build depth. Pouring one color, letting it sit for a minute or two, then adding another creates natural separation but can also cause unexpected mixing. Sometimes it’s beautiful, sometimes it’s just messy—so maybe experiment on small samples before full projects.
Swirling resin colors is another technique. After pouring, use a toothpick or skewer to gently drag colors around. This creates marbled or wave-like effects. Then there’s glitter, which adds sparkle and texture. Sprinkle it on top or mix it into the resin before pouring. Be mindful that too much glitter can affect curing, so balance is key. I found that fine glitter creates a subtle shimmer, while chunkier glitter makes a really textured surface.
What kind of patterns do you find yourself drawn to? The unpredictability is part of the process, and sometimes the ‘mistakes’ turn into the most interesting effects.
Pouring Resin into Molds
Selecting Molds
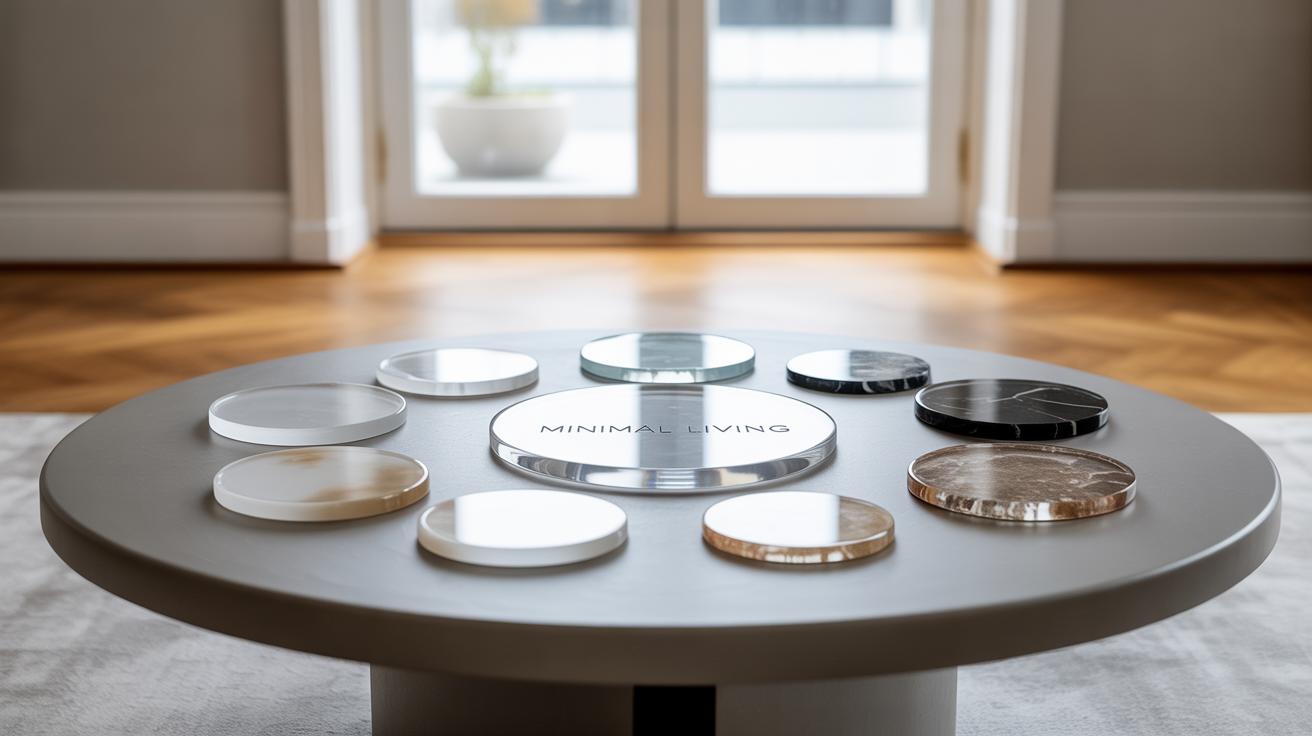
Picking the right mold makes a big difference, especially if you’re just starting out. Silicone molds come in all sorts of shapes—circles, squares, hearts, even tiny jewelry trays. For beginners, smaller sizes like 3 to 4 inches work well because they’re easier to handle and cure faster. Coaster molds are popular since they’re practical and not too complex. Jewelry molds, like pendants or rings, offer a chance to play with detail but require more patience. You might want to avoid huge molds at first, since they take longer to set and can be fiddly to manage. Honestly, I started with simple round coasters and found the process less frustrating than I expected.
Pouring Techniques
When it comes to pouring resin, slow is key. Pouring it all at once often traps bubbles or makes resin overflow the mold edges. Instead, start by pouring a thin layer, then let it settle for a minute or two. You can gently add more resin in small amounts after. Moving the container close to the mold helps control the flow better—dropping resin from too high can splash and cause bubbles.
You might think a quick pour saves time, but it usually just means more work cleaning up later or uneven curing. I remember trying a faster pour once and regretting it because tons of bubbles showed up; I had to heat the resin again to pop them. Patience pays off here. A small stick or even a toothpick can help nudge resin into tight corners or smooth out surfaces if needed.
Working with Resin on Flat Surfaces
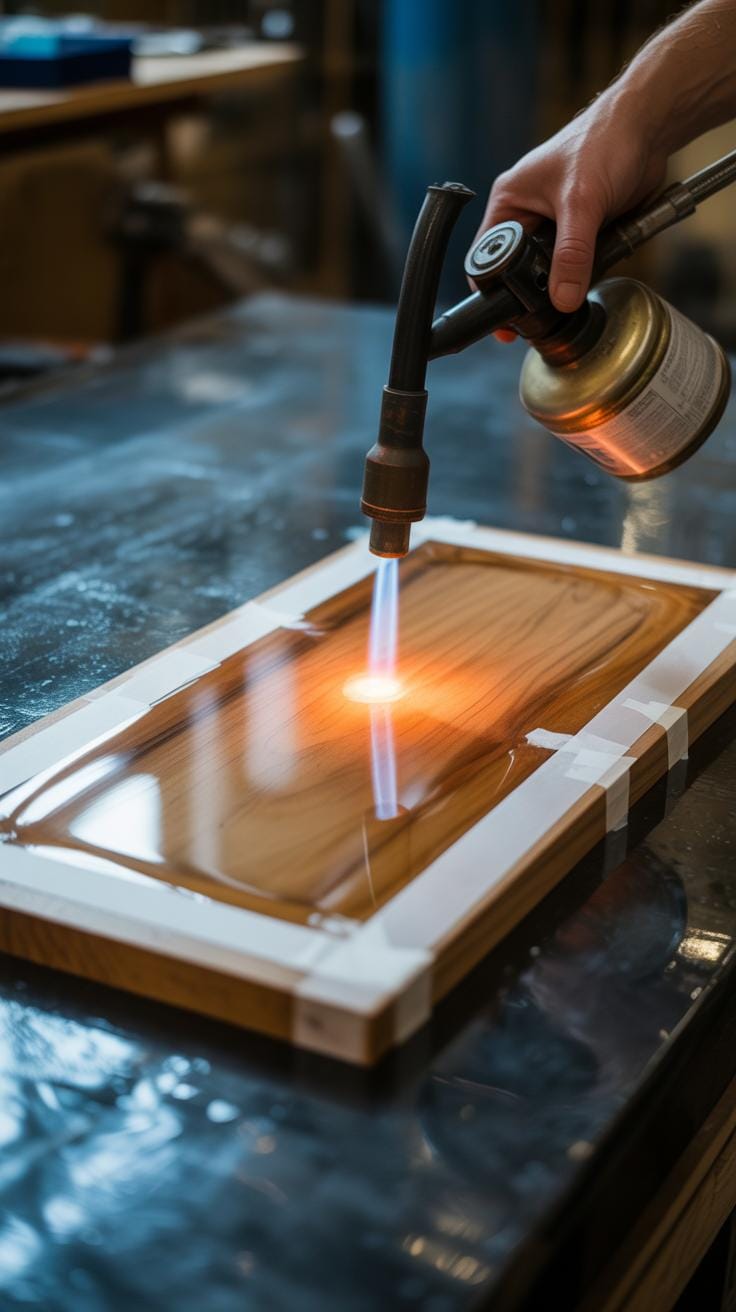
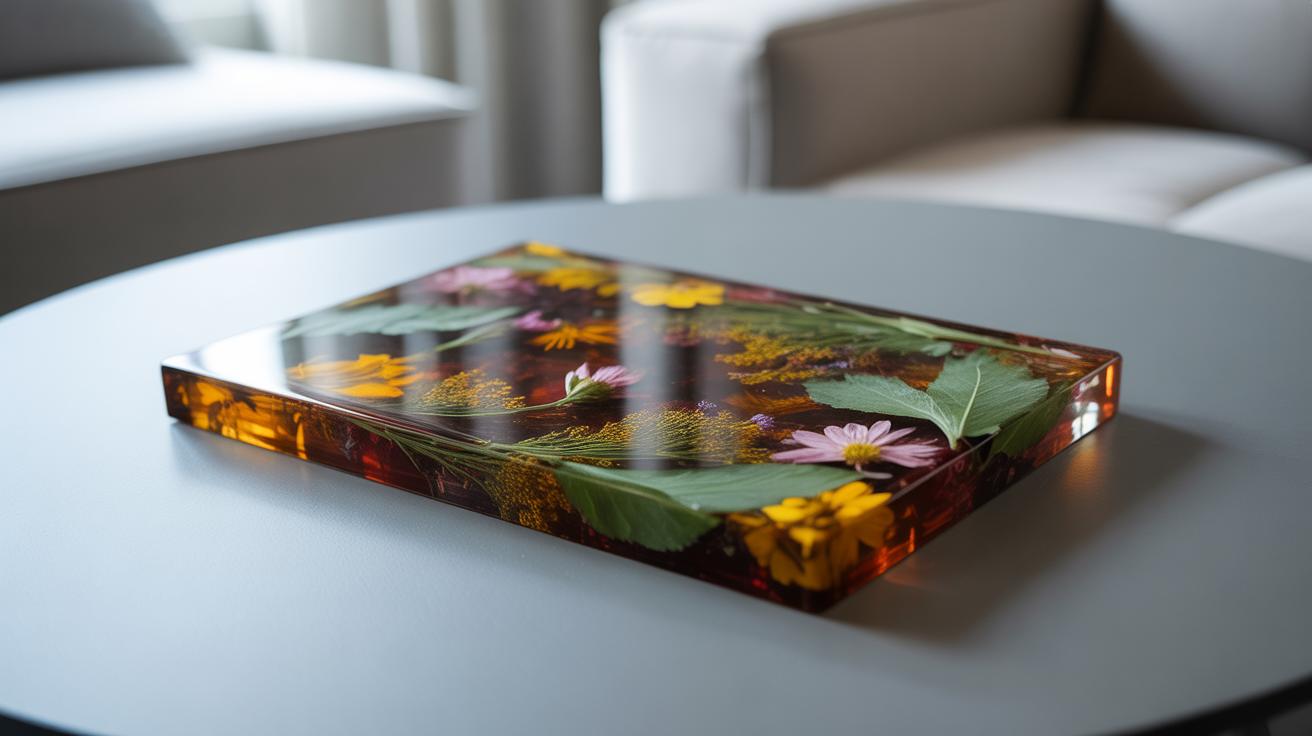
When you pour resin over flat surfaces like wooden boards or trays, you’re basically creating a smooth, glassy layer that brings out colors and textures in a unique way. Before you start, your surface needs some attention. Clean it thoroughly to remove dust, oils, or any dirt—that’s a must. Some people skip sealing the surface, but I’ve found that applying a thin sealant, like a clear varnish or shellac, helps prevent resin from soaking in unevenly or causing bubbles later. It also keeps the wood from swelling or reacting to the resin.
Once your surface is ready, pour the resin slowly, starting in the center. You don’t want to rush this part. The resin will naturally spread, but using a spreader or a plastic card helps move it gently toward the edges without pushing too hard. It’s tempting to go wild with spreading, but a light touch works better. Bubbles will form—there’s no avoiding them—but you can pop them by passing a small heat torch or even a lighter quickly over the resin’s surface. Just don’t linger too long, or you could scorch your piece. Let the resin settle a bit first, and keep your movements steady. With some practice, you’ll get a feel for when it’s ready and how to handle those pesky bubbles that pop up unexpectedly.
Curing and Finishing Resin Projects
Watching the Cure

When you pour resin, the wait begins. Typically, resin takes anywhere from 24 to 72 hours to fully harden, but this depends on the type you use and environmental factors like temperature and humidity. Sometimes, it feels like the resin should be set after a day, but it might still be a bit tacky. I’ve found that gently touching the surface after 24 hours gives a good sense of progress—if it feels cool and slightly firm, you’re on track.
Keep an eye out for cloudiness or soft spots; those indicate it’s not ready yet. A slow, careful approach is better because rushing can cause dents or impressions later on. If you want to speed things up, some people place their projects in a warm spot, but be cautious—the resin might cure too quickly and trap bubbles.
Finishing Touches
Once the resin is fully cured, edges and surfaces sometimes need a little refinement. Sanding helps smooth out any rough or uneven parts. Start with a coarser grit like 220 to shape edges, then progress to finer grits—320, 600, or even higher for a polished feel. I often use wet sanding to control dust and get a near-glass finish, but it does require patience.
After sanding, adding a seal coat can really transform the look. A thin layer of resin, poured carefully over your piece, fills in scratches and boosts shine. Yet, some prefer a spray-on sealant instead—it’s quicker but might not be as deep or glossy. Which finish you choose might come down to your time, tools, or just what you prefer visually. What feels right to you will guide the final step.
Fixing Common Resin Issues
Removing Bubbles
Bubbles can be a real nuisance when working with resin, right? They tend to show up just when you want a smooth, clear surface. Popping bubbles as soon as they appear helps, but it’s not always that simple. One way to avoid them altogether is by pouring your resin slowly and steadily—you don’t need to rush. Stirring gently can also prevent air from getting mixed in too much.
If bubbles still form, grabbing a heat source like a small butane torch or even a heat gun briefly passed over the surface usually makes them rise and pop. Be cautious not to hold the heat too close or too long, or the resin can get damaged. Some folks swear by just blowing gently on the resin, but that sometimes moves the resin more than you want. Another trick I found is using toothpicks or needles to carefully pierce stubborn bubbles after pouring, though this takes patience.
Dealing with Sticky Resin
Sticky resin. Oh, the frustration. It often stems from not mixing the two resin parts thoroughly or cutting the curing time short. If you notice a tacky surface after what should have been enough curing, it may just need more time in a dust-free spot where air circulates moderately.
If extra curing doesn’t fix it—or you’re out of patience—light sanding with fine-grit sandpaper usually sorts out the stickiness. After sanding, wiping down the surface to remove dust is a good idea. Sealing with a thin layer of fresh resin or a compatible sealant can also help make the surface fully smooth and non-sticky. Sometimes imperfections in measurements cause this too, so double-checking ratios next time saves headaches.
Creative Resin Art Ideas to Try Today

If you’re just starting out with resin art, there are plenty of simple projects that you can actually finish in a day. Sometimes it’s tempting to jump into complicated designs right away, but starting small helps you get a feel for the material without feeling overwhelmed.
Try making resin coasters—they’re practical and straightforward. Pour resin into silicone molds, add some color or tiny embellishments, and you’re done. Keychains are another good option. They don’t need much resin, cure quickly, and you can personalize them with dried flowers or glitter. Jewelry, like simple resin pendants or earrings, also works well as a quick project and gives you something wearable from your efforts.
Easy Projects
Some beginner-friendly crafts to consider:
- Resin coasters with pressed leaves or colored swirls
- Small keychains featuring initials or miniature objects
- Chunky resin rings or simple pendants
These let you practice mixing and pouring without too much pressure. Plus, they cure fast enough to satisfy instant curiosity about the outcome.
Expanding Your Skills
Once you feel comfortable, you might want to try things that stretch your skills a bit. Layered resin art can be a neat challenge. Pour one layer, let it set, then add more layers with different colors or items embedded inside. It adds depth and lets you experiment with timing.
Embedding objects like tiny shells, beads, or charms can bring a personal touch, though it takes a delicate hand to avoid bubbles or shifting pieces.
Shapes don’t have to be basic. Moving beyond circles or squares opens up new possibilities. Try making resin sculptures or molds in irregular forms—you might discover something unexpected that you enjoy.
Do you find yourself drawn more to functional crafts or decorative pieces? That’s a good question to ask when picking your next resin project.
Conclusions
Diy resin art projects give you a rewarding way to create personalized art at home. With a few materials and some practice, you can make items that are both beautiful and useful. The process lets you use your imagination and enjoy the satisfaction of finishing handmade crafts quickly. You can experiment with colors, shapes, and patterns to make your art truly one of a kind.
By following simple instructions and using the right supplies, you will avoid common mistakes and get great results. Remember to work safely and clean your workspace carefully. This article has laid out clear and doable steps for you to complete resin projects today. Dive in and start crafting your diy resin art creations now.


