Introduction
Creating a haunting dark mermaid illustration with mixed media invites you into a spellbinding world beneath the water’s surface. This guide will help you explore ways to combine different art materials to make your dark mermaid appear both eerie and captivating. You’ll learn how to use colors, textures, and lighting to bring out the mysterious essence of the dark mermaid.
You will discover step-by-step techniques for mixing media, from paints to pastels, and how to add small details like shadows and reflections that make your illustration stand out. No matter your skill level, this article will guide you to create a unique piece that tells a story of a mermaid with a haunting beauty.
Understanding the Dark Mermaid Concept
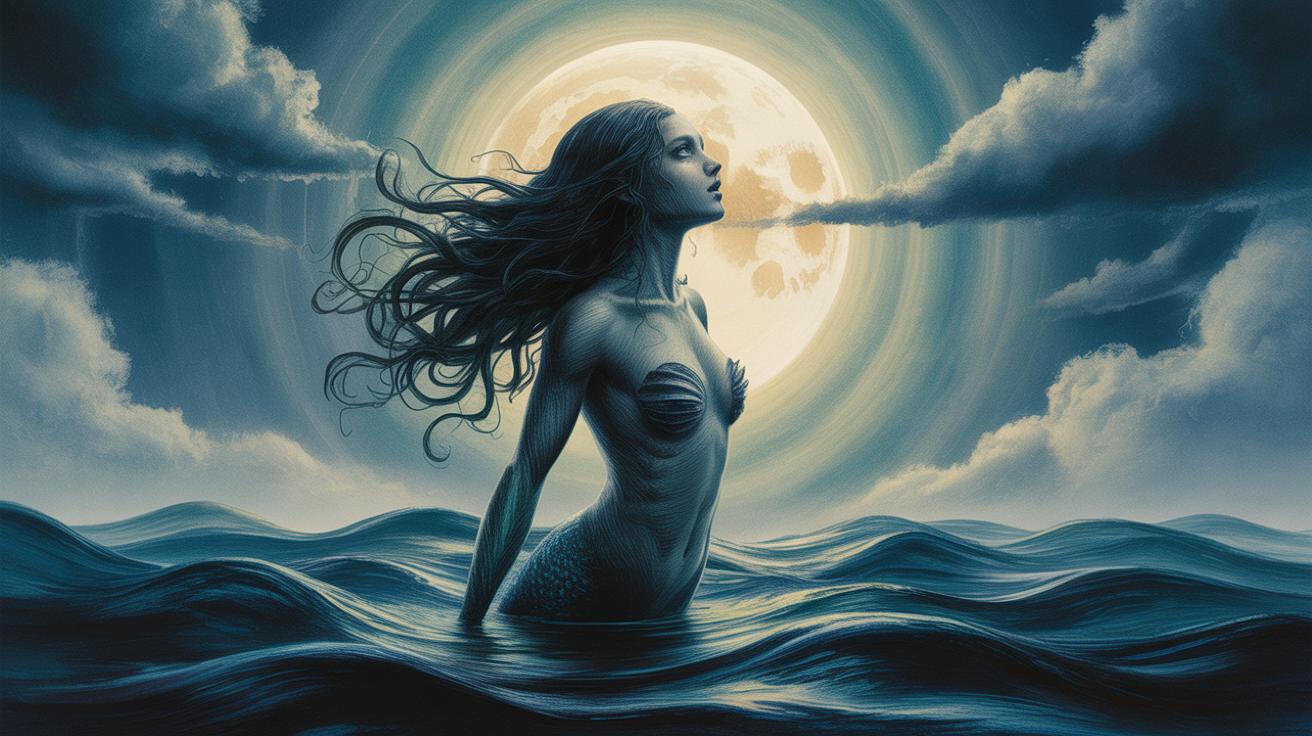
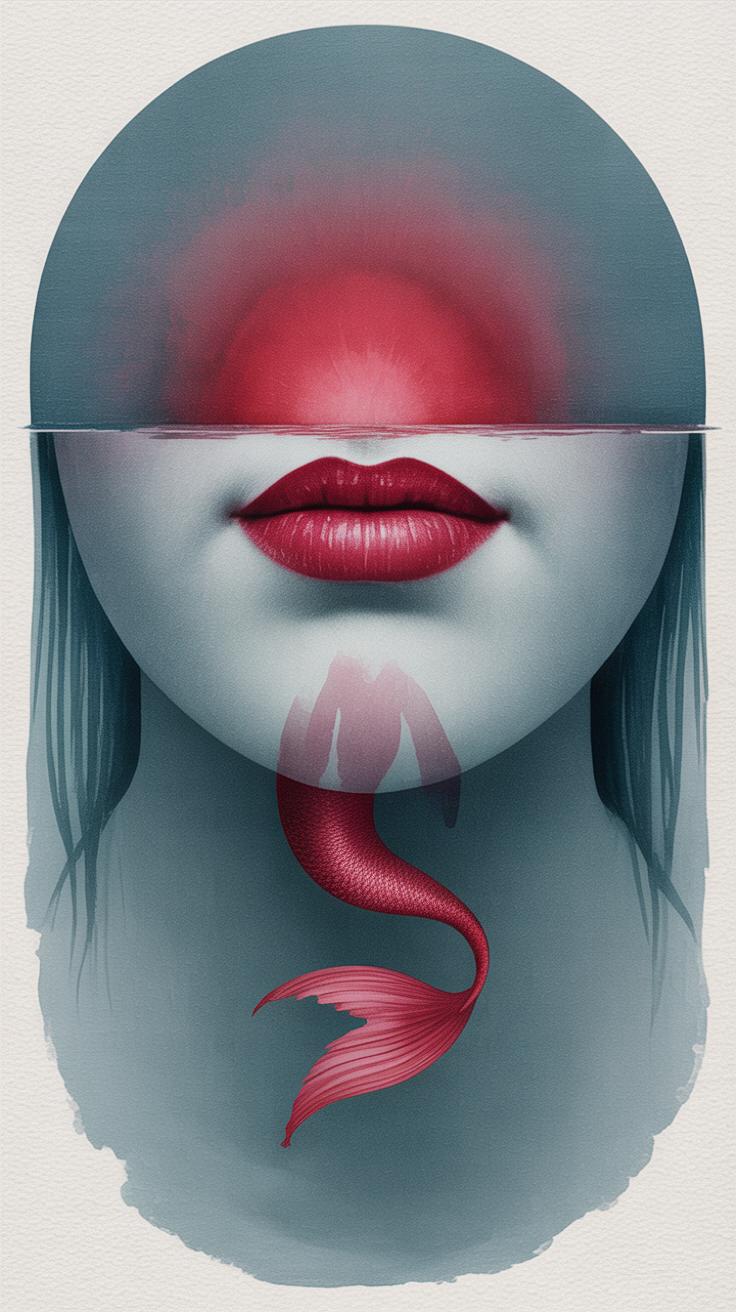
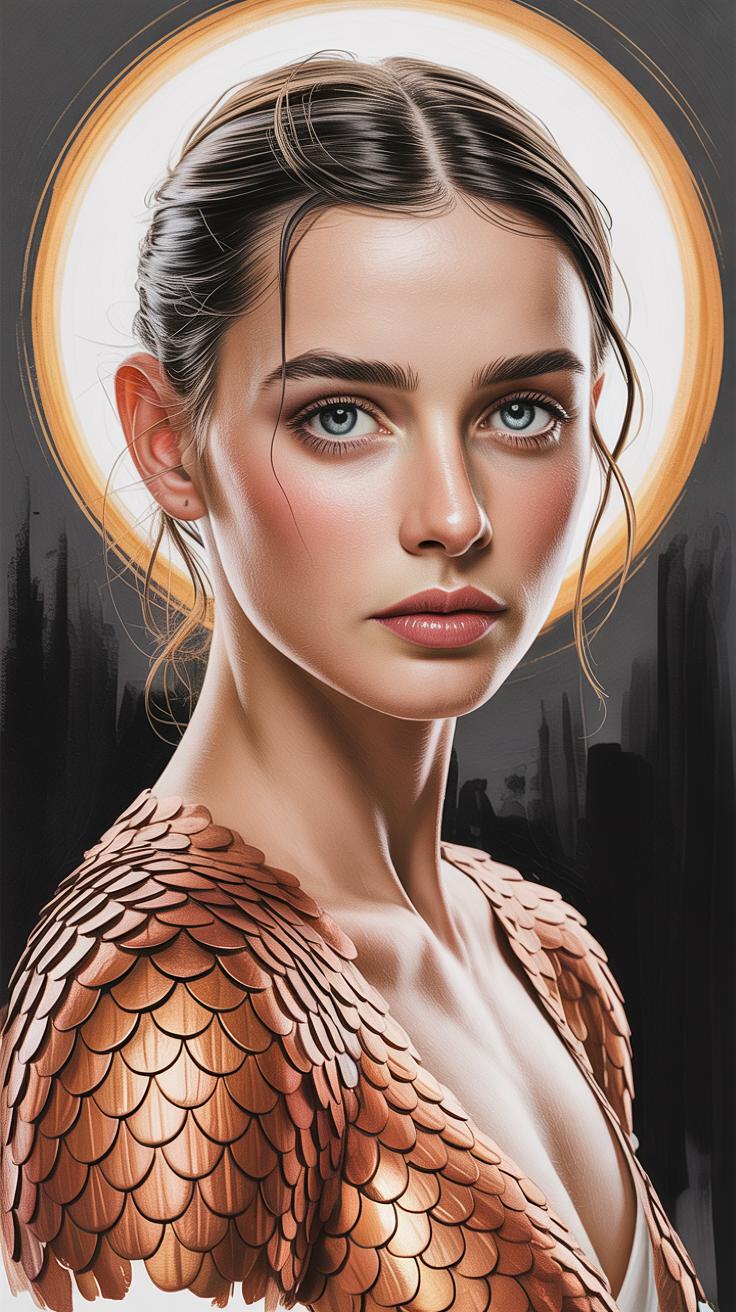
A dark mermaid is more than just a twist on the familiar siren of the sea. It’s a figure that balances beauty with a sense of foreboding, mystery, or even menace. When you picture a dark mermaid, think less of shimmering, playful creatures and more of beings dwelling in twilight waters—enigmatic, perhaps a little dangerous, or haunted by something unseen. Thematically, these mermaids often embody themes like isolation, the unknown depths, or bittersweet longing, which makes them complex and compelling subjects.
The mood an artist should chase isn’t cheerful or bright; it’s somber, eerie, or tense—sometimes quietly unsettling. Imagine still waters at dusk, where light fades and shadows merge, this tension between light and dark can guide your illustration. Creating that uneasy calm, where the viewer feels drawn in but wary, is key. You want your piece to evoke questions, not immediate answers.
Visual Traits of a Dark Mermaid
Visualizing a dark mermaid means leaning into elements that suggest mystery or danger. Common traits you might explore include:
- a muted, often cool color palette—deep blues, greys, blacks, with occasional muted reds or purples;
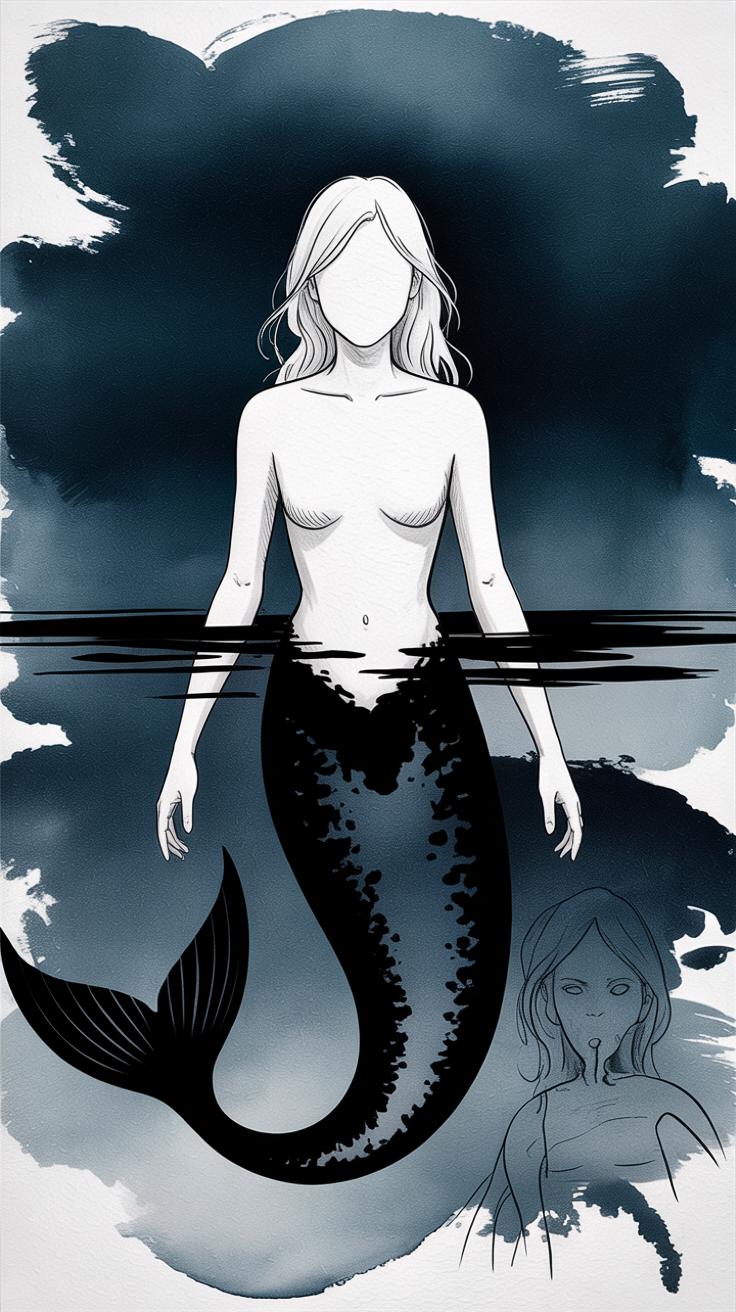
- sharp or unnatural features—elongated fins, cracked scales, or hints of decay;
- expressions that are distant or unreadable—sadness, anger, or an unreadable calm;
- hair that drifts like seaweed, tangled and wild, sometimes obscuring the face;
- eyes that can be glowing, hollow, or dark pools themselves, adding to the unsettling vibe.
These elements don’t have to be literal. Subtle hints often work better than overt features, allowing the viewer’s imagination to fill in the blanks. It’s about suggestion rather than explanation.
Creating a Haunting Atmosphere
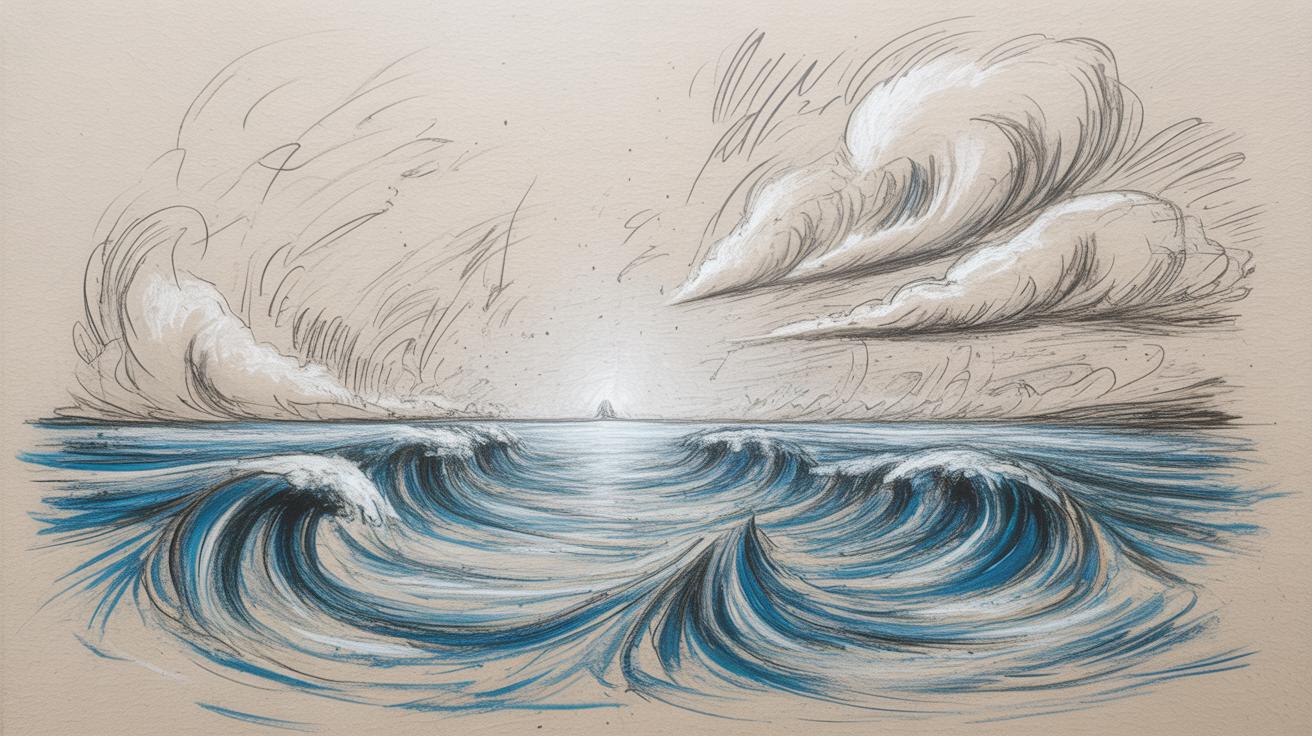
The atmosphere around a dark mermaid often makes or breaks the illustration. Lighting plays a huge role—you might consider dim, diffused light, perhaps from a dying sun or bioluminescent creatures, to cast strange shadows and highlights. Shadows can obscure parts of the figure or make the background feel infinite and deep.
Backgrounds should feel like part of the story, not just a setting. Consider warped, underwater ruins, dense kelp forests, or stormy seas. Compositionally, having the mermaid partially framed by dark shapes or strange textures can heighten tension. Space and silence around her, too, can add to the mood—sometimes what’s not shown is as powerful as what is.
Think about your own reaction as you work. Does the scene make you hold your breath? That feeling is what you’re aiming for with the dark mermaid illustration.
Selecting Mixed Media Materials
Choosing materials for a dark mermaid illustration can feel tricky. You want things that bring out those deep, shadowy vibes but still allow some subtle highlights to emerge. When it comes to paints, oil-based or heavy-bodied acrylics often give you that rich, almost velvety black or deep blues. They sit thick and can be layered to create textures, so they’re quite handy for the mysterious atmosphere of a dark mermaid.
Inks, especially waterproof ones, offer sharp contrasts—perfect for fine details like scales or shadowed facial features. I’ve noticed that India ink, for example, stays intense even when layered, which helps in keeping the moody tone intact without bleeding or fading. Sometimes, a touch of diluted acrylic ink can add a translucent, watery effect, which fits the aquatic element well.
Best Paints and Inks for Moody Effects
If you want real depth, think about mixing materials. Acrylics build layers quickly, but they dry faster, so working wet-on-wet is limited. Oils give more blending time but take much longer to dry—this can be frustrating or a relief, depending on your pace. Ink washes can add a gradient of shadows if applied thoughtfully but might overpower if you’re not careful.
Try pairing thick paints with thin ink lines to keep things dynamic. I sometimes use gouache for subtle highlights because it’s opaque but doesn’t reflect too much light. It’s a bit of trial and error—experimenting with drips or smudges might add to that eerie, unpredictable feeling.
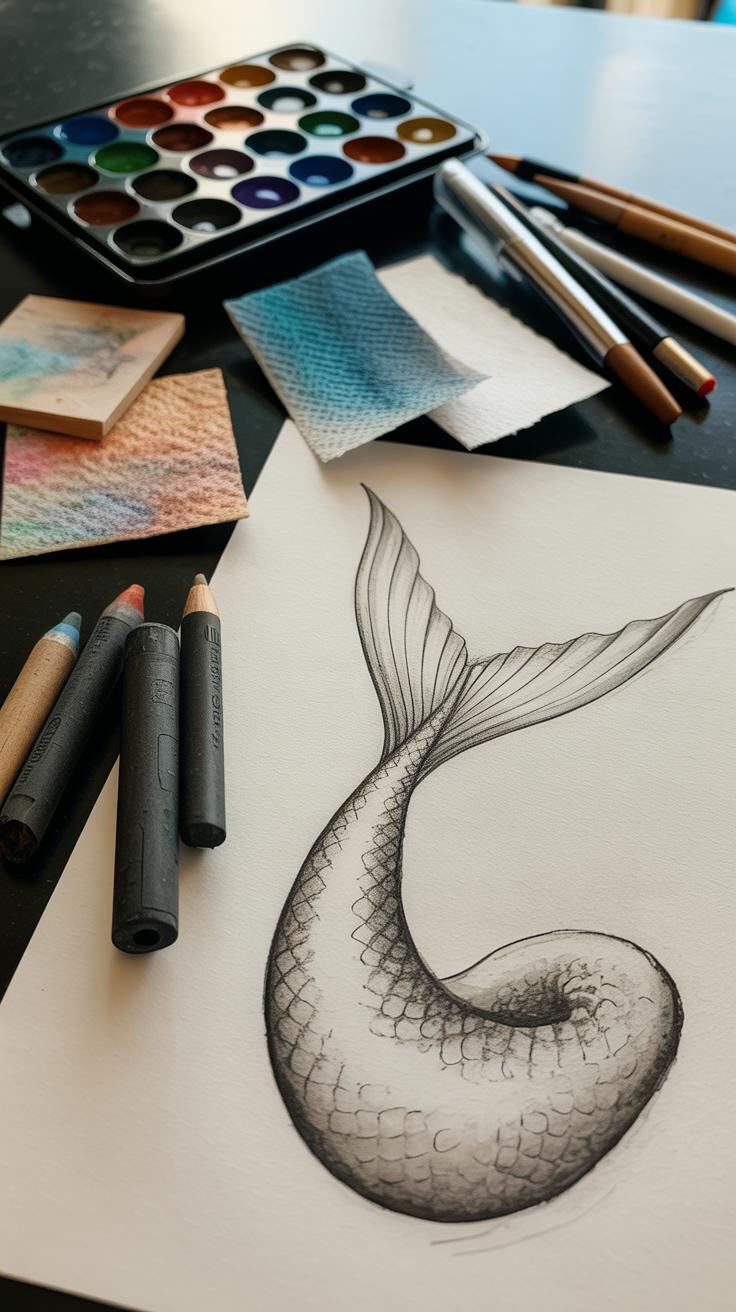
Choosing Textured Papers and Surfaces
Paper choice plays a huge role. Rough watercolor paper offers natural textures that can resemble scales or underwater currents. Cotton rag papers are strong, handle wet layers well, and keep your work from warping too much. For a darker, more intense work, cold-pressed surfaces seem to hold pigments better, almost trapping the paint in their valleys.
Sometimes I’ve used canvas boards primed with gesso to add a tactile quality. The grit influences how paint layers settle and can give your mermaid’s skin or tail a gritty, almost otherworldly look. Smooth Bristol board, while tempting for precise lines, might leave your work feeling a little too clean, which doesn’t always match the haunted tone.
Which materials do you find draw out the dark mood best? It might be worth testing small patches before you dive into the full illustration. Each choice nudges the overall feeling in subtle ways you might not expect.
Planning Your Illustration Layout
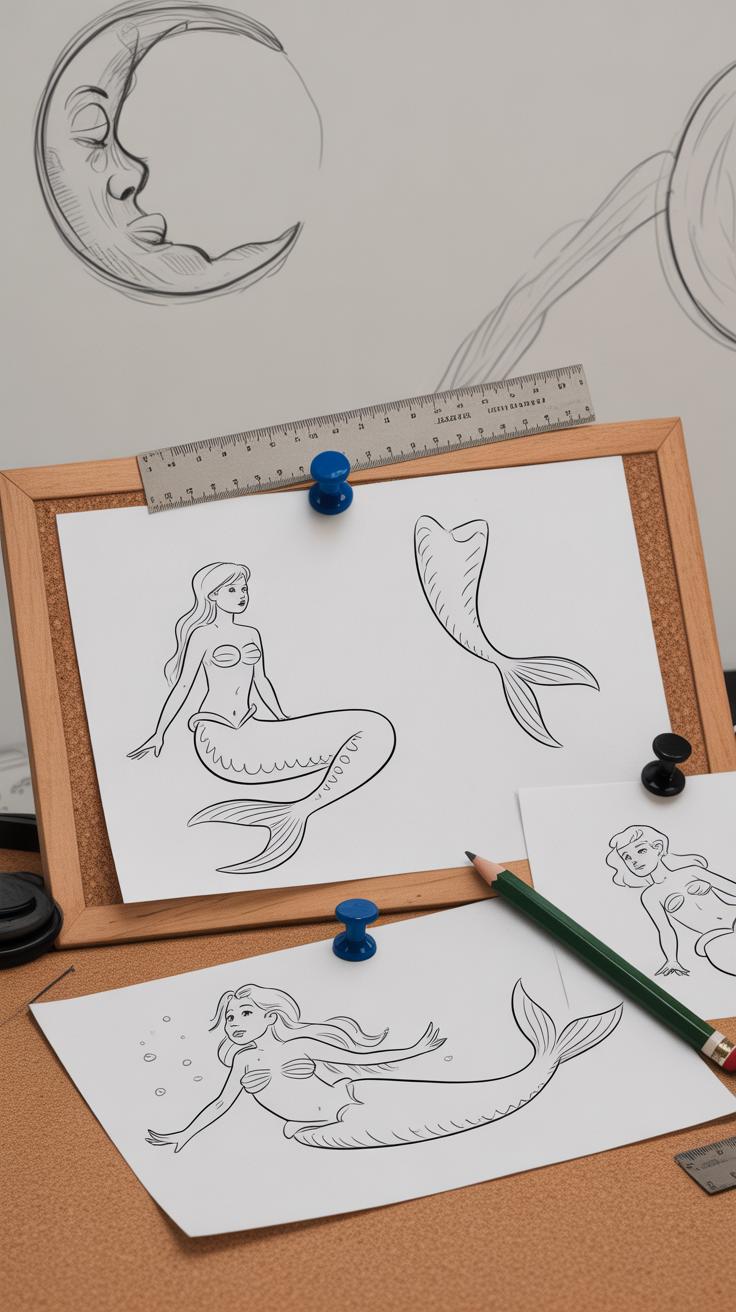
Sketching the Basic Shape
When starting your dark mermaid illustration, it helps to focus on the posture right away. What mood do you want to convey? Is she lurking beneath, or perhaps rising ominously? Aim to capture that in your initial lines. I find it useful to keep sketches loose—don’t get trapped in details just yet. Let the silhouette express weight and tension. Play with asymmetry; a slight tilt of the head or a subtle curve in the tail can make the figure feel alive and unsettling at once. Remember, the stance sets the tone for everything else, so spend some time here, even if you think you’ll erase most of it later.
Deciding on Background and Environment

Choosing a background that complements your dark mermaid is tricky but crucial. You don’t want it to compete, but it shouldn’t be empty either. Consider dark, murky waters or an eerie underwater cave—places that feel claustrophobic or mysterious. Sometimes less is more, though. A few jagged rocks or faint silhouettes in the distance can add depth without cluttering. Think about how the environment shapes the story. Does it enhance her isolation? Or does it suggest lurking threats? Color here should support the mood without overtaking your mermaid. It’s okay to be uncertain; sometimes the background reveals itself after a few attempts.
Building Layer Depth with Mixed Media
Starting with Base Layers
Begin by laying down a solid foundation. I like to start with a light wash—watercolors work well here because they’re translucent and flexible. This helps establish the overall tone without locking you in too early. Think about the main shapes: the mermaid’s silhouette, the contours of her tail, and her pose. Use muted colors to sketch these in, so the image doesn’t feel flat but also leaves room to build on. Sometimes I find myself overworking this stage, but it’s okay if the base looks rough—that’s what the next layers are for.
Try layering thin washes rather than one thick coat. It allows subtle interplay between colors that can hint at underwater shadows or a murky atmosphere. The base doesn’t have to be very detailed. In fact, if you get too caught up here, you risk losing focus on the bigger picture.
Adding Shadows and Highlights
Once the foundation is dry, you can start adding depth with shadows and highlights. Darker tones give the mermaid volume and help her pop from the background. I usually switch to inks or colored pencils to sharpen these contrasts—ink’s precision complements the loose base nicely.
When placing shadows, consider where your light source hits and where the form curves inward. You want to exaggerate these subtle dips and bulges without making it look artificial. Shadows on her scales, around the jawline, and beneath flowing hair add a lot of weight.
Highlights work the opposite way—white gouache or pastel can bring those wet, slick surfaces to life. A highlight on the cheekbone or a glint on a scale changes everything. But watch out: too many bright spots diffuse the tension and mystery the dark mermaid carries. Sometimes less is more, though occasionally I’ve gone overboard and had to tone things down. It’s a balancing act that invites a bit of trial and error.
Incorporating Textural Effects
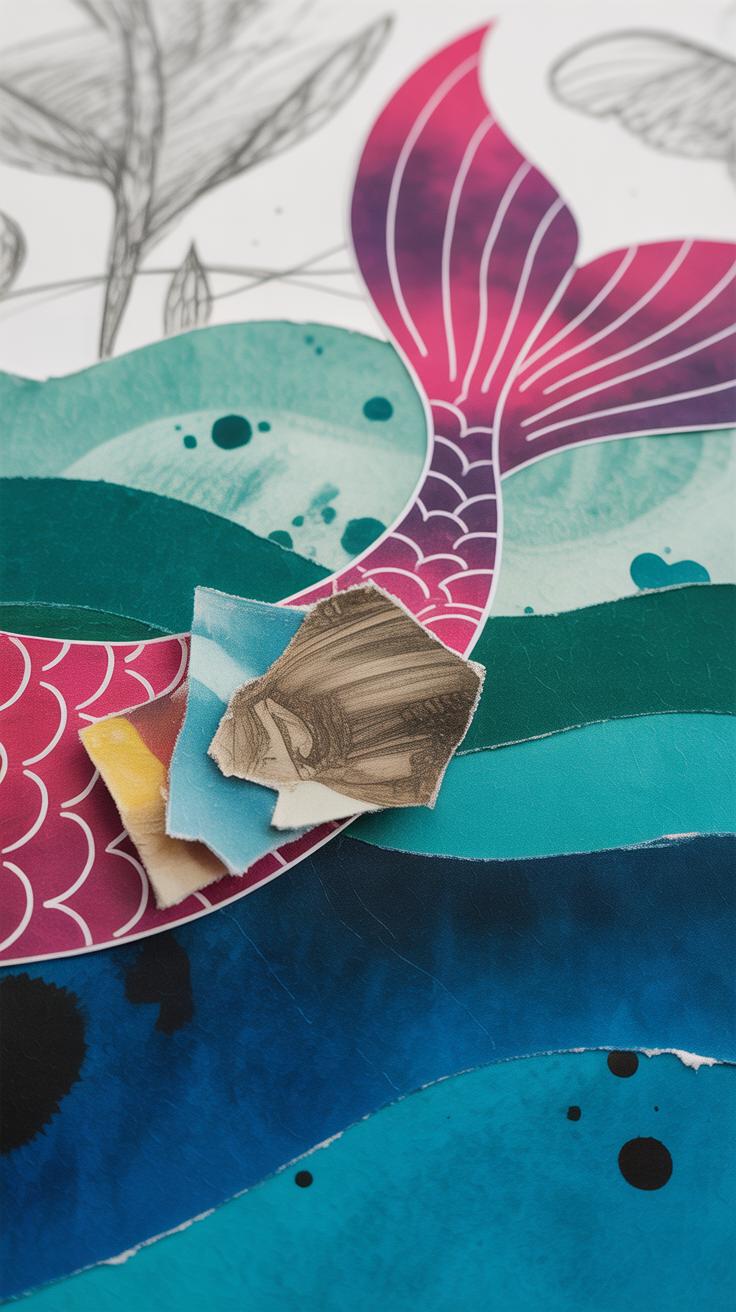
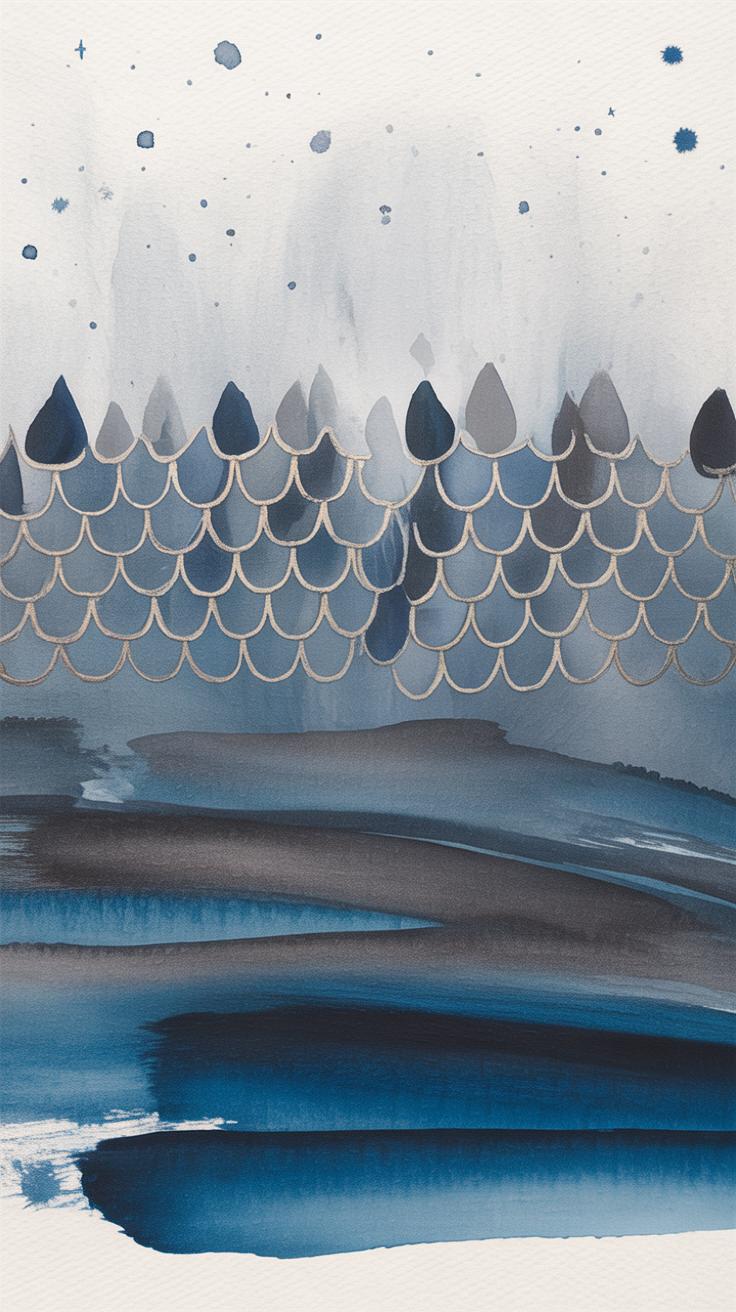
Texture plays a big role when bringing a dark mermaid to life, making the illustration feel tactile and real—or at least convincingly eerie. You can’t just paint scales flat and call it a day. The way you add texture can shift the whole mood. For scales, layering paint with a bit of pastel or even tiny bits of sand or tissue can create roughness or smooth shine. It’s fun to experiment. Sometimes, I’ve layered acrylic with a dry pastel wash over it, then used a scraping technique to leave behind scale-like patterns that catch the light strangely. It feels a little worn, mysterious.
Hair and water are trickier. With hair, you want that flowing, tangled movement without it becoming just a blurred mess. Using soft brushes for loose strokes, then overpainting with thin lines or even string or fibers glued lightly, can add subtle depth. Water ripples could be hinted at with textured gels or translucent layers, maybe even scratching into the surface once partly dried. Those broken edges and sheen make the water unsettled—fits the dark vibe, I’d say.
Think about mixing materials you might not usually pair: pastels for softness in places, rougher textures from mixed paper or fabric scraps in others. It’s less about perfection and more about how these textures interact. Sometimes the unexpected contrasts—smooth vs. gritty, thick vs. thin—grab the viewer’s attention better than anything perfectly blended. What textures will you choose to bring your shadowy sea creature to life?
Using Color to Evoke Emotion
When choosing colors for a dark mermaid illustration, the palette sets the mood right away. Dark and muted tones—deep blues, charcoal grays, and washed-out greens—tend to foster an atmosphere of mystery and unease. These shades mimic the ocean’s twilight zones where light barely reaches, which fits the idea of a mermaid lurking in shadow. You might feel drawn toward these colors, but they can also feel cold or lifeless if not handled carefully.
It’s often best to layer these muted tones, letting hints of black or dark indigo create subtle depth without overwhelming the scene. Avoid overly saturated colors that pull the image into something too bright or cheerful. Instead, think about how the colors interact with one another in dim light. For example:
- Using smoky purples to suggest underwater gloom.
- Dark forest greens that feel organic yet threatening.
- Faded teals that balance the marine vibe with subtle eeriness.
But the story doesn’t end there. Adding tiny accents of unexpected color—like a flicker of crimson on a scale or a soft iridescent shimmer on the tail—can catch the eye and keep the viewer intrigued. These splashes don’t break the mood; instead, they create focal points that feel almost otherworldly. They hint at something beneath the surface, which is crucial when you want the viewer to look closer, to wonder.
Choosing when and where to add these accents can be a bit tricky. Too much, and the piece loses its haunting feel; too little, and it might become flat or monotonous. Think of small glimmers, like bioluminescence or a dying ember, barely lighting the dark scene. Experiment with one or two contrasting highlights to maintain tension between shadow and color. It’s a delicate balance—one worth spending time on, really, because it defines your mermaid’s mood more than you might expect.
Enhancing Details for Impact
Drawing Expressive Facial Features
When it comes to making your dark mermaid’s face truly compelling, the eyes are where most of the magic happens. Rather than aiming for perfect symmetry, focus on subtle imperfections that reflect a hint of inner struggle or mystery. Maybe one eye is slightly bigger, or the gaze isn’t quite direct, adding to her unsettling charm.
Small details like faint shadows under the eyes, delicate wrinkles, or a barely visible smirk can suggest complex emotions—something between sorrow and defiance, for example. Layer your lines carefully, mixing softer strokes with sharper, more deliberate marks to avoid a flat look. It can feel tricky, but it’s these tiny idiosyncrasies that pull viewers in.
Expressions don’t have to be overt. Sometimes a glance just out of place or a slightly parted lip tells more than a broad smile ever could. If you’ve struggled with this before, try photographing your own face in subtle moods or watching actors for moments where less is more. It’s almost like reading between the lines, but with pencil and paint.
Detailing Accessories and Elements
Accessories can dramatically enrich your dark mermaid’s story. Instead of just throwing in shells or seaweed randomly, think about their placement and meaning. Are those shells trophies from past victims? Is the seaweed wrapped tightly around her wrist like an old curse? Let these elements whisper fragments of her background.
Layer textures by combining media—maybe real sand glued here, or thin strips of paper for delicate kelp. Jewelry doesn’t need to be shiny and perfect; tarnished metals or cracked pearls add to the eerie, aged vibe. Small flaws can be surprisingly expressive.
Try sketching out a few accessory ideas separately before committing to the main piece. This trial-and-error helps avoid overcrowding but keeps your work detailed. In my experience, sometimes less is more, but other times a cluttered look better mirrors the chaotic depths where your dark mermaid dwells.
Finalizing and Protecting Your Artwork
After you’ve refined all the intricate details and layered textures of your dark mermaid, it’s time to think about the final steps to complete and safeguard your piece. Sometimes, you might feel tempted to stop right here—after all, getting the colors and shadows just right can be exhausting—but a few finishing touches can make a surprising difference.
Look closely at the overall balance of your composition. Maybe some areas need subtle darkening to deepen the mood, or slight highlights could give the illusion of wet scales catching faint light. These minor tweaks in color or contrast often pull everything together in a way that feels intentional, yet still natural.
Textures—oh, textures!—can be enhanced by gently rubbing or layering translucent paint, or even adding faint washes with ink or watercolor to smooth transitions. A small white gel pen dot on the eye or a few raised specks on the tail might sound trivial, but they really draw the viewer’s gaze. It’s about patience and restraint.
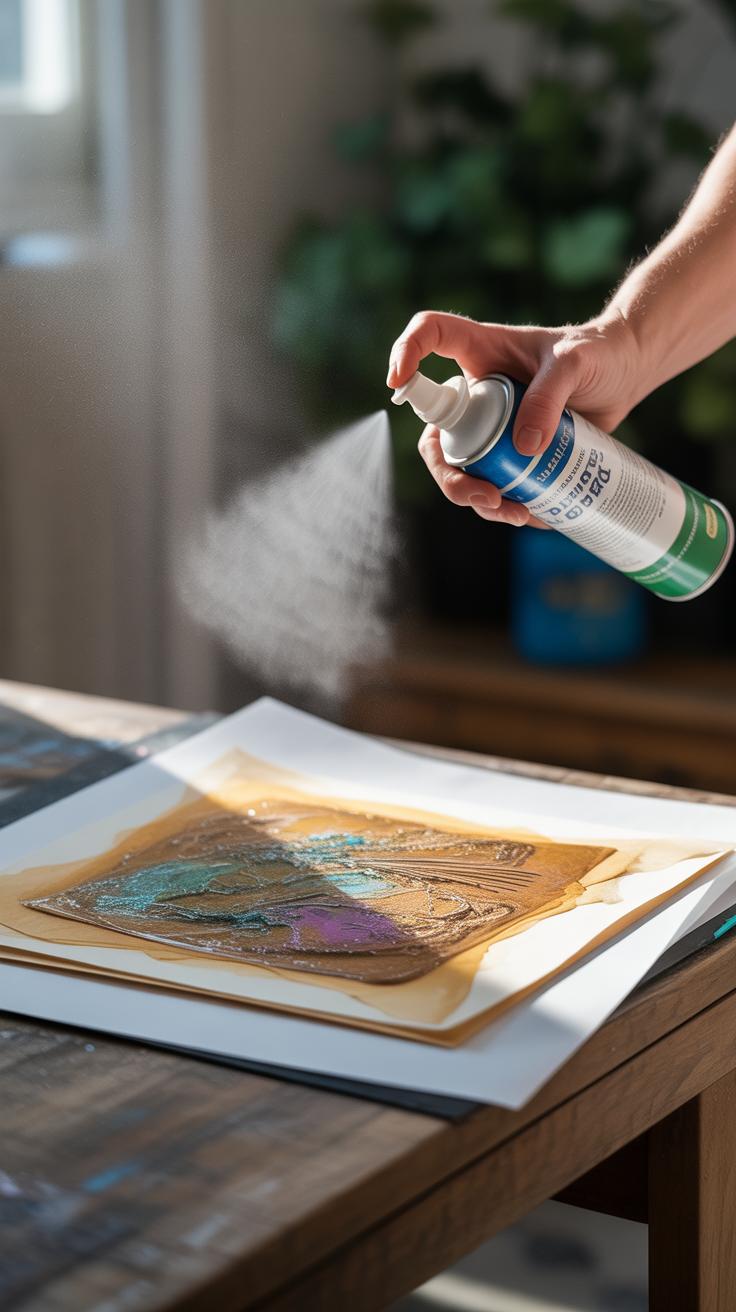
Once happy, sealing your mixed media artwork protects it against dust, moisture, and fading. You have options. Spray fixatives work well for pencil and charcoal layers but can dull wet paints. Glossy or matte varnishes preserve acrylic or oil parts while maintaining the original shine—or flatness—depending on your choice. You might have to test on a scrap first, since some varnishes can slightly alter colors.
Framing also plays a part in preservation, especially if your piece includes delicate paper or layered materials prone to warping. Using acid-free mats and UV glass shields the artwork from environmental damage while giving it space to breathe, preventing damage over time.
So, when do you know your dark mermaid is truly finished? Sometimes, it’s a gut feeling. Other times, stepping away for a day or two helps you return with fresh eyes—and that’s often when you notice which final touches really matter.
Sharing and Displaying Your Dark Mermaid Illustration
Getting your dark mermaid illustration out into the world can feel a bit daunting. You might wonder, where do I start? The first step is to photograph or scan your work carefully to capture the textures and layers that mixed media brings. Natural light often works best—soft, indirect sunlight can reveal details without harsh shadows or glare. Try multiple angles and exposures. Sometimes close-ups on the rougher parts of the piece bring a new dimension to the image.
Once you have a good digital version, think about how you want to share it. Online platforms like Instagram or art portfolios give wide access, but the challenge is standing out. Consider the story behind the dark mermaid—what draws you to that haunting mystery? Sharing that alongside your post invites people in. And don’t just post it once; remind your followers with different views or behind-the-scenes shots, maybe displaying slight variations or early sketches.
If you’re leaning toward physical displays, look for small galleries, cafes, or community events. Spaces with an intimate atmosphere often match the eerie tone of a dark mermaid—and might even spark interesting conversations. Framing can make a big difference, but you don’t have to overdo it. Sometimes simple, clean frames help the shadows and contrasts of your piece speak for themselves.
Think, too—what kind of audience do you want? Mood boards on Pinterest or niche art forums can attract people who appreciate dark fantasy, which could lead to more focused feedback or even sales. Have you considered running a small exhibition with other artists exploring similar themes? It might feel risky, but it’s worth seeing how your dark mermaid resonates in different environments.
Conclusions
By now, you understand how mixing media can add depth and interest to your dark mermaid illustration. Using varying materials allows you to explore the mermaid’s mysterious nature effectively. Each step, from choosing the right colors to adding fine details, builds on the last to create a piece that draws viewers in.
Your dark mermaid illustration becomes more than just a picture. It tells a story and invites viewers to imagine the world she inhabits. Keep practicing these methods, try new techniques, and let your creativity bring your haunting dark mermaid to life.


