Introduction
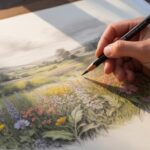
Watercolor painting offers a unique way to bring the playful spirit of cats to life on paper. This art form uses pigments suspended in a water-based solution to create delicate, transparent layers of color. Watercolor paper, often made from cotton, provides the ideal texture for this medium and minimizes distortion when wet. Your brush captures the cat’s lively movements and expressions, making it an exciting subject for both beginners and seasoned painters. Understanding how to manipulate watercolor tools can elevate your cat portraits from simple sketches to vibrant, fluid artworks.
Exploring cat watercolor painting means mastering techniques to show texture, emotion, and motion. The transparent quality of watercolor lets you layer colors to create depth without heavy lines, perfect for capturing fur and playful antics. You will learn how to use water effectively, control color flow, and employ various brush techniques to animate your feline subjects. Prepare to engage with the medium and your creativity, while your skills grow in depicting the charm of playful cats.
Understanding the Basics of Watercolor Painting

Watercolor painting starts with four main elements: paper, pigments, brushes, and water. Each plays a key role in creating lively and playful cat paintings. Watercolor paper is specially designed to hold water and pigment without warping or tearing. Choosing the right paper lets your colors blend smoothly and your lines stay clear.

Pigments give your painting color and texture. They come in pans or tubes, each offering different levels of vibrancy and transparency. Using quality pigments makes your cat’s fur and eyes come alive with depth and softness.
Brushes control how you apply color. Soft, flexible brushes hold water well and allow you to create fine details or broad washes. Knowing how to use brushes helps you capture a cat’s delicate whiskers and playful movements.
Water controls how pigment spreads and bonds with paper. Managing water lets you create transparent layers or bold strokes. Mastering water’s role builds the foundation for painting cats with charm and personality.
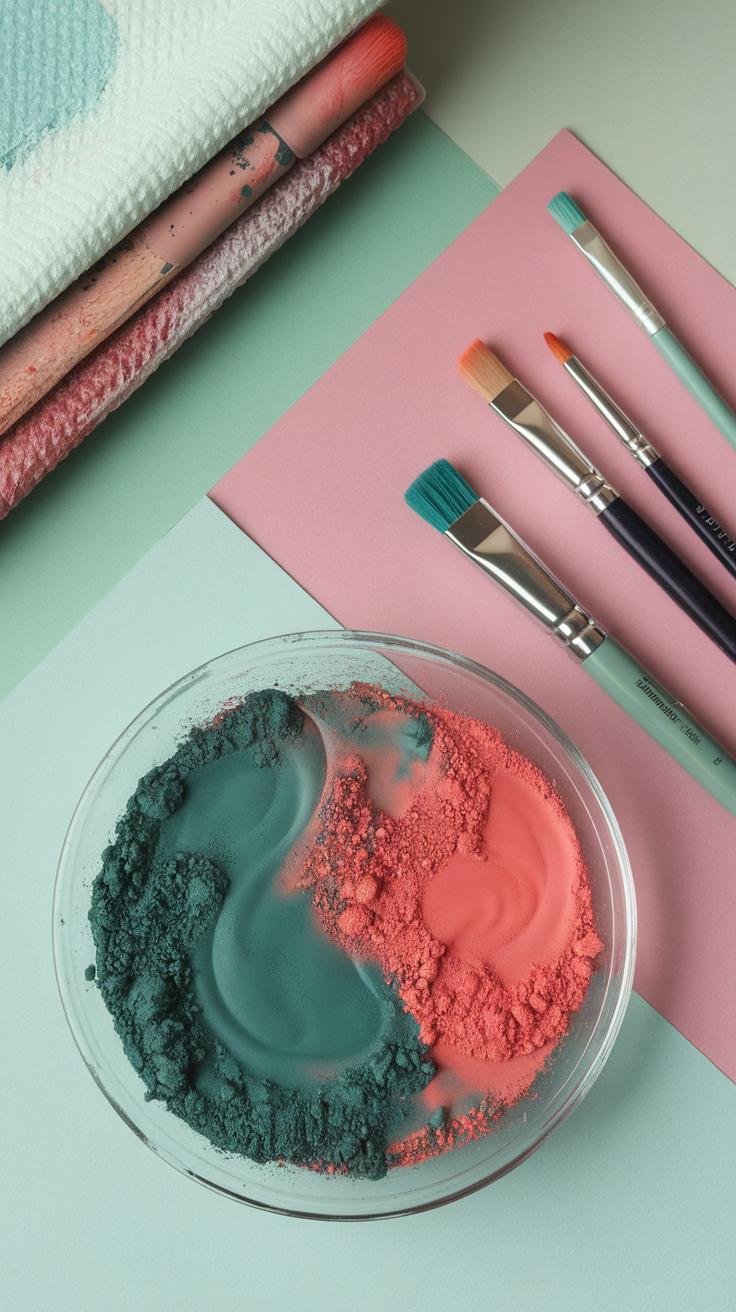
Choosing Your Materials
Not all watercolor papers are the same. Rough textured paper adds grainy effects that suit furry cat coats. Smooth papers work well for sharp details like eyes and paws. Cold-pressed paper strikes a balance between texture and smoothness, making it a popular choice for cat artwork.
Pigments in tubes offer stronger colors you can dilute with water. Pan palettes are convenient and keep colors fresh. Pick pigments with a good lightfast rating to ensure your playful cats stay vivid over time.

Brush size and shape affect your strokes. Round brushes provide precision for fur and facial features. Flat brushes help with background washes or larger areas. Using the right brush means you can switch easily between playful details and loose strokes.
The Role of Water in Watercolor
Water changes how pigment moves and looks on paper. More water creates lighter, transparent colors; less water results in richer, saturated hues. Learning to balance water lets you suggest soft cat fur or bright eyes with just one stroke.
Water also influences pigment flow. Wet-on-wet painting spreads colors softly, great for smooth fur blends. Wet-on-dry keeps edges sharp, ideal for defining a cat’s whiskers or paw pads.
Controlling water means controlling your painting’s mood. Do you want soft, dreamy shapes? Add more water. Prefer sharp, playful details? Use less water and quick brushwork. Experimenting with water brings energy and life to your cat portraits.
Capturing Cat Anatomy and Movement

Understanding cat anatomy helps you bring life to your watercolor paintings. Cats have a flexible spine and lithe muscles that let them move with grace and speed. When you notice how their muscles stretch and contract, you can show the flow of motion in your work.
Pay attention to the rhythm in a cat’s movements. Do their legs extend fully when they leap? Does their tail balance their body during a playful twist? These small details add realism. Observing cats in different light and angles improves your ability to depict depth and form.
How often do you watch a cat simply play or stretch? Try capturing those moments to make your paintings lively and believable. Movements are never stiff; they change constantly. Capturing energy and emotion will make your cat watercolor dynamic and true to life.
Studying Cat Forms
Cats have specific body shapes that shape their character. Their slender but strong limbs, defined shoulder blades, and flowing fur lines guide your brush. Watch how muscles shift under the skin during movement. This shows strength and flexibility.
Eyes are another important feature. They convey mood and direction. The fur’s direction also follows body curves and impacts light reflection. Notice the way fur clumps or shines when the cat turns or stretches. This gives texture and volume to your painting.

Spend time sketching body parts separately to understand their forms. Look at reference photos or, better yet, your own pet. How does the fur layer overlap at joints? How does muscle tension change when a cat crouches or pounces? These observations will improve your realism.
Sketching Playful Poses
Quick sketches help you capture a cat’s energy before it slips away. Use short, light pencil strokes to trace movement. Focus on gesture lines — the flow of the spine, tail, and limbs.
Practice timing your sketches. Try drawing a cat over one or two minutes to freeze its pose. This trains you to identify key shapes and keep a fresh, lively line.
Try drawing several sketches of the same pose from different angles. This prepares your watercolor composition with confidence and clarity. How can you show momentum or balance in your painting with just a few lines? Sketching often helps you find answers.
Layering Techniques to Build Depth


Watercolor painting relies on transparency, which makes layering essential for creating depth in your cat portraits. Start by applying light washes, then slowly build up colors with careful layering. Each layer sits on top of the previous one, adding richness without hiding what lies beneath.
When you layer, allow each wash to dry before applying the next to avoid muddying colors. Use diluted paint early on to keep the delicate translucence intact. Thin layers let light pass through, creating a natural glow that strengthens your painting’s sense of depth. Are you noticing how shadows and highlights come alive with this method?
Limit the thickness of each layer so that colors remain luminous. This process demands patience but results in a dimensional image of your cat. Through layering, you can simulate the softness of fur and subtle shadow shifts on a playful pose. What happens when you pause between layers and observe how your colors interact?
Starting with Light Washes
Begin your watercolor cat painting with gentle, light washes to outline its basic forms. Dilute your paint with plenty of water to create faint tones that map out the cat’s body and shadows.
Focus on capturing broad shapes rather than details at this stage. These initial washes define where light and shadow rest on your subject. For example, a light gray wash under the chin can show soft shadow without overpowering the composition.

By applying thin washes, you keep the paper’s texture visible, which helps your painting breathe and stay fresh. Do you see how these subtle touches set a foundation that supports later layers?
Adding Successive Layers
After your first washes dry, add new layers with a bit more pigment to enhance color depth. Building colors in stages lets you control values and develop the texture of the fur gradually.
Monitor drying times carefully. Applying another layer too soon can cause colors to bleed unpredictably. You want clean, deliberate edges where appropriate, especially around defining features like eyes or paws.
Try using small, varied brush strokes in these darker layers to suggest fur direction and density. Each pass enriches the painting’s dimension and helps bring your cat’s playful personality forward. How does adjusting the transparency of layers impact the mood in your work?
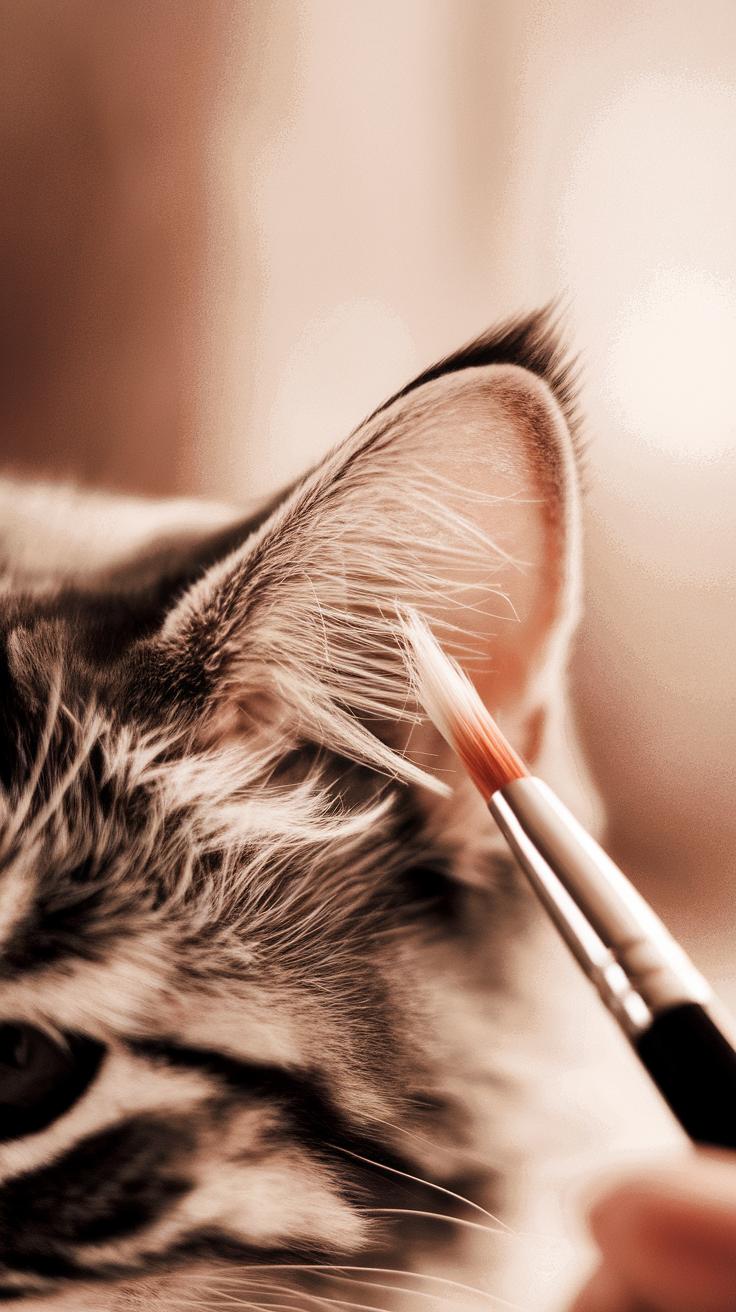
Creating Fur Texture with Brushwork

To give your cat paintings realistic fur, you must focus on how you apply your brush strokes. Different types of fur require different techniques. Coarse fur looks very different from soft, fluffy fur. Your brush choice will change the effect greatly. Flat brushes made of stiff bristles help mimic rough fur, while soft round brushes suit smooth fur better.
Brush direction should always follow the way the fur naturally grows. Painting strokes that flow with the contours of the cat’s body adds shape and movement. You can use techniques like dry brushing, stippling, and lifting paint to enhance texture. Dry brushing builds texture with rough, scratchy lines, while stippling adds small dots of color for a soft effect. Lifting helps create contrast by making some parts lighter.
Ask yourself which part of the cat you want to highlight. Is the fur short on the face or long and fluffy on the body? Your brushwork will reflect those choices. Experiment with different strokes and brushes to find the texture that fits your vision and makes your painting come alive.
Dry Brush Technique
Dry brushing uses a brush with very little water. The paint looks patchy and rough on dry paper, perfect for coarse or short fur. Load your brush with pigment, then dab most of the water off on a paper towel before painting. This technique leaves a scratchy texture with broken color lines.
Try dry brushing on the edges of the cat’s ears or around whiskers, where fur is shorter and spikier. Use quick, short strokes that follow the fur’s growth direction to suggest individual hairs without painting every detail. It can add a realistic touch without overworking the area. Dry brushing also works well for darker fur when you want subtle roughness without full opacity.

How can you control the amount of dryness? Watch how the paint skips over textured paper. When it grabs the paper surface unevenly, you get genuine fur textures that look natural and not forced. Give your brush a few light taps to keep the strokes fresh and lively.
Lifting Paint for Highlights
Lifting paint means removing some color to create highlights that make fur appear lighter and more dimensional. Use a clean, damp brush or a small piece of tissue to gently blot or pull paint off the paper after you’ve applied it. This technique brightens areas where light hits the fur.
Focus on places where cat fur naturally catches light, such as the top of the head, cheeks, or along the spine. Lifted highlights can also suggest softness, like the fuzzy edges of a kitten’s coat. Work gradually by lifting a little paint at a time to avoid removing too much color.
This method shines when you blend it with layering techniques for depth. After you lift paint, let the paper dry and apply a thin wash over it to soften edges. Can you imagine how those subtle bright spots add realism by breaking up flat color fields? Lifting offers you a way to refine texture without repainting or losing transparency.
Expressing Playfulness Through Color and Form
Using color and brush strokes to show a cat’s playful spirit invites you to look beyond precision. Selecting lively colors brings energy to your painting and mirrors a cat’s curious nature. Think about how different shades reflect lightness or mischief in a cat’s movement. Mixing bright oranges, soft blues, or fresh greens can create an exciting visual story without stealing the focus from the cat itself.
Your brushwork can make your cat leap off the paper. Quick, flowing strokes suggest motion and fun. You might apply shapes that are loose, not rigid, to mimic a cat’s unpredictable play. Achieving the right balance between lifelike form and expressive freedom challenges you to capture a cat’s essence, not just its appearance.
What details or moments will you emphasize to invite viewers into your cat’s playful world? Think about how each color choice and stroke carries a bit of your own experience with cats at play. Bringing this energy to life through watercolor engages both artist and viewer in a shared moment of lightheartedness.
Choosing Vibrant Color Palettes
Choosing colors is key to showing a cat’s liveliness. Pick hues that highlight a cat’s natural charm without overwhelming your painting. Colors like warm yellows or bright pinks can add a sense of fun but use them sparingly to keep balance.
Consider how colors interact with each other on the paper. Combining cool and warm tones can show shifts in light and mood. For example, a dash of turquoise near a cat’s eyes can create a sparkle of curiosity. Test your palette beforehand to avoid dull or clashing results.
How does your choice of colors affect the feeling of movement? Can subtle changes in shade make the scene feel more inviting? Allow your palette to reflect the personality of your subject, not just the scene’s reality.
Using Dynamic Brushstrokes
Dynamic brushstrokes bring your cat painting to life. Use varied pressure and speed to create lines that feel alive and playful. Quick, flicking motions can express a cat’s sudden pounce or swift tail swish. You might also experiment with looping strokes to suggest whiskers or tail twitches.
Blocky shapes mixed with fine details help show both weight and agility. Avoid overworking shapes, letting some strokes stay loose and spontaneous. This gives your painting a fresh, animated quality.
Which moments of your cat’s movement will you capture with brushwork? Focus on the energy behind the motion rather than exact anatomy. By doing this, you invite viewers to feel the liveliness and joy that play brings to a cat’s world.
Mixing Colors and Using Pigments Efficiently
Color Mixing Basics
Matching cat coat colors starts with knowing your basic colors. Use red, blue, and yellow to create secondary colors like green, orange, and purple. For a tabby cat’s striped fur, mix yellow and brown by adding a bit of red and blue to get warm tones. To create black, combine equal parts of blue and red with a touch of yellow instead of using pure black paint. For white areas, leave the paper blank or use diluted paint to keep transparency.
Pay attention to subtle hues in the fur. Sometimes adding a small amount of complementary color, like a tiny blue in orange, stops colors from looking flat. Can you spot soft greys or muted browns in your subject? Try mixing those with a bit of blue or green instead of black to keep the colors lively.
Pigment Preservation Tips
Watercolor lets you build shapes with transparent layers. Apply thin washes to save pigment and maintain brightness. Avoid painting over the same spot repeatedly; overworking dulls colors and damages paper. Instead, layer colors gently, allowing each to dry before adding the next.
When working on fur, use glazing techniques to deepen shades without muddying the paint. Save your pigment by mixing enough color for a session rather than constantly remixing. Are you leaving white spaces to let light shine through? This preserves vibrancy without using extra pigment. Proper water control also helps you stretch your paint further while keeping colors fresh.
Adding Details with Fine Brushes
Using fine brushes allows you to add sharp details that bring your cat painting to life. Small round brushes with a pointed tip work best for delicate features like eyes, whiskers, and fur strands. The key lies in timing—paint details when the base layers are dry. Wet washes can easily blur fine lines.
Hold your brush close to the tip to control stroke width. Thin, confident lines create whiskers and fur texture without smudging colors underneath. Practice steady hand movements by sketching simple lines on scrap paper first. If you hesitate, your lines might look uneven or shaky.
Fine brushes help you define essential elements without overpowering the natural flow of watercolor. Are you paying attention to when your layers dry before adding detail? Controlling timing improves precision and sharpness. Keep your paint slightly diluted to avoid thick blobs that can ruin subtle fur patterns.
Painting Eyes to Convey Expression
Cat eyes express mood and character. Start with a small wash of the iris color, leaving some white space for catchlights. Catchlights are small white reflections that give the eye its sparkle. Place them near the pupil where light naturally hits.
Add a thin dark line to define the iris edge and pupil shape. Use a tiny brush to create subtle shadows around the eye’s shape, enhancing depth. Avoid heavy outlines; soft edges mimic natural fur around the eye.
Are your eyes communicating curiosity, playfulness, or calmness? Adjust the shape and size of the pupil and position of catchlights to change expression. Small changes here affect the entire painting’s mood.
Rendering Whiskers and Fine Lines
Whiskers need to look light and delicate. Use a clean, dry fine brush with slightly thinned paint for the thinnest lines. Painting whiskers last, after all washes dry, prevents smudging the base coat.
Draw whiskers with quick, confident strokes, starting from the base near the nose outward. Avoid going over wet or tacky layers—wait for complete drying first. This keeps sharpness crisp.
For fur strands, practice layering fine strokes in the direction of hair growth. Use a fine liner brush and a mix like burnt sienna or gray for natural hair tones. How often do you pause to check if your lines disturb your base washes? Patience ensures delicate whiskers stay visible and realistic.
Correcting Mistakes and Enhancing the Composition
When you spot a mistake in your cat watercolor painting, don’t rush to cover it. Use lifting and blotting techniques to gently remove unwanted paint. Soak a clean brush in plain water, then softly rub the area you want to fix. Use a paper towel or sponge to blot away the lifted color carefully. Avoid scrubbing hard; the paper can tear or become rough. This method works well to lighten dark spots or fix stray brush marks.
To deepen colors or change hues, try glazing by layering transparent washes after the paper dries. This shapes your cat’s form without disturbing earlier layers. Can blending more layers add depth or detail?
Composition often needs tiny tweaks. Add small shapes or subtle shadows to guide the viewer’s eyes across the painting. If an element feels crowded, consider erasing or reducing it to create space and balance. Could a little shifting improve your cat’s pose or the playfulness of the scene?
Removing or adjusting background parts helps keep focus on your cat and avoids distractions. Use light washes to blend edges smoothly back into the page. Adjusting compositional flow can make your painting more lively and engaging.
Lifting and Blotting Errors
Fixing mistakes starts by lifting paint carefully. Wet the spot with a clean brush loaded with water. Let the water sit briefly to soften the paint. Then, take a blotting tool like a tissue or sponge and press gently on the wet area. The paint lifts without scrubbing, preserving your paper.
It’s best to test this on a scrap piece first. Some pigments stain more and need extra care. Blotting works well on fresh paint and can lighten areas that seem too dark. Patience is key—work slowly in small sections. Have you tried this method on your cat’s fur to fix unwanted shadows?
If the paint does not lift enough, repeat the wetting and blotting process gently. Avoid over-wetting as it might cause paper buckling. Use a paper towel to absorb excess moisture after blotting. This simple action keeps your paper in good shape and your painting clean.
Adjusting Composition Harmoniously
Good composition keeps the viewer’s eye moving naturally through your painting. If your cat seems too centered or the background feels empty, try adding small, playful elements like a toy or a patch of grass. These can balance the picture without stealing focus.
Removing details that crowd your cat’s face or body helps maintain clarity. For example, if too many whiskers overlap, lighten or erase a few to make the eyes clearer. Think about where you want your viewer’s gaze to stop.
Sometimes shifting a shadow or highlight slightly changes the mood and leads the eye better. Ask yourself if every element adds to the story of your playful cat. Can the composition be simplified or made more exciting by removing or adding parts?
Use shapes and empty spaces intentionally. Negative space often helps your cat stand out. Try sketching adjustments lightly before repainting. This process gives you control over the painting’s rhythm and helps you create a lively final image.
Presenting and Caring for Your Cat Watercolor Art

Proper drying is key to keeping your cat watercolor painting looking its best. Once you finish the artwork, lay it flat between clean sheets of blotting paper or paper towels. Place a lightweight board or a book on top to keep the paper flat while it dries. This prevents warping or buckling caused by moisture. Make sure the drying area is well-ventilated, but avoid direct sunlight, which can fade your colors.
After drying, consider flattening the paper further by gently pressing it under heavier books for a few days. Avoid humid areas, as moisture can lead to mold or paper damage. When it comes time to store your paintings, use acid-free folders or sleeves to protect them. Keep your artworks in a cool, dry place to maintain their quality over time.
Drying and Flattening Techniques
Smooth, flat paper ensures your cat painting looks crisp and professional. Once you finish, avoid handling the wet surface to prevent smudging. Use absorbent paper above and below the painting and place a flat weight on top. Weights should be light enough to avoid indentations but heavy enough to stop curling.
Do not prop your artwork up vertically until fully dry. This often causes the paper to warp. If your painting still warps, dampen a clean sheet of watercolor paper, sandwich your painting between the two sheets, and press them flat with books. This can help reverse some buckling.
Framing and Display Tips
Choose a frame that supports your watercolor’s size and style. Use acid-free mats to create space between the glass and your painting. This stops condensation and prevents paint from sticking. Opt for glass or acrylic with UV protection to shield colors from fading.
Consider where you’ll hang your cat artwork. Avoid direct sunlight and humid spots like kitchens or bathrooms. A well-lit hallway or cozy reading nook works well. Frame multiple playful cat pieces together for a gallery effect. How could your space benefit from the warmth and charm of your cat watercolors?
Conclusions
The art of cat watercolor painting combines technical skill and creative expression. Through practice, you gain control over water and pigment, enabling you to depict cats with lively brushstrokes and nuanced color layers. The techniques discussed allow you to render fur textures, playful poses, and expressive eyes that captivate viewers. Each stroke contributes to a painting that feels both spontaneous and thoughtfully crafted.
By focusing on watercolor’s strengths—transparency, softness, and fluidity—you bring the joyful energy of cats into your art. Experimenting with these painting methods will refine your style and provide satisfying results. Keep exploring new approaches and questions about how water and pigment interact in your work. Your journey in cat watercolor painting promises ongoing discovery and creative fulfillment.