Detailed vs. Easy Eye Drawing Approaches
Eye drawing is a fundamental skill in art that helps bring portraits and characters to life. This article covers the topic of Eye Drawing Tutorials Versus Easy Eye Drawing Techniques For Beginners. It highlights the differences and benefits of both approaches. Whether you want detailed lessons or quick methods, understanding these options will help you improve your eye drawing skills.
We will discuss how structured tutorials offer depth and precision, while easy techniques provide fast, approachable ways for beginners to get started. By exploring both, you can find the path that suits your style and pace. This guide aims to support your artistic growth with practical tips and examples.
Eye Drawing Tutorials
Eye drawing tutorials are incredibly useful for beginners. They guide you step-by-step, breaking down complicated shapes into manageable parts. You might start with basic outlines and learn how to position the iris and pupil correctly. Many tutorials also cover shading and highlight placement to give the eye depth and life.
Following tutorials can build your confidence, making something as complex as an eye feel less intimidating. They often show how to capture different eye angles and expressions, which can be surprisingly tricky without guidance. For example, tutorials may teach you how to draw a three-quarter view eye, which changes perspective dramatically.
One helpful tip from some tutorials is focusing first on the eye’s structure—the eyelids, lash line, and tear duct—before adding detail. That helps ensure everything is proportionate. Also, tutorials often stress that eyes aren’t perfectly symmetrical, so embracing slight irregularities can make your drawings more realistic.
Overall, tutorials serve as a practical foundation. You get to watch and mimic techniques stepwise, which can be easier than working entirely from imagination at the start. Still, your unique interpretation will evolve as you practice beyond tutorial boundaries.
What Detailed Tutorials Offer

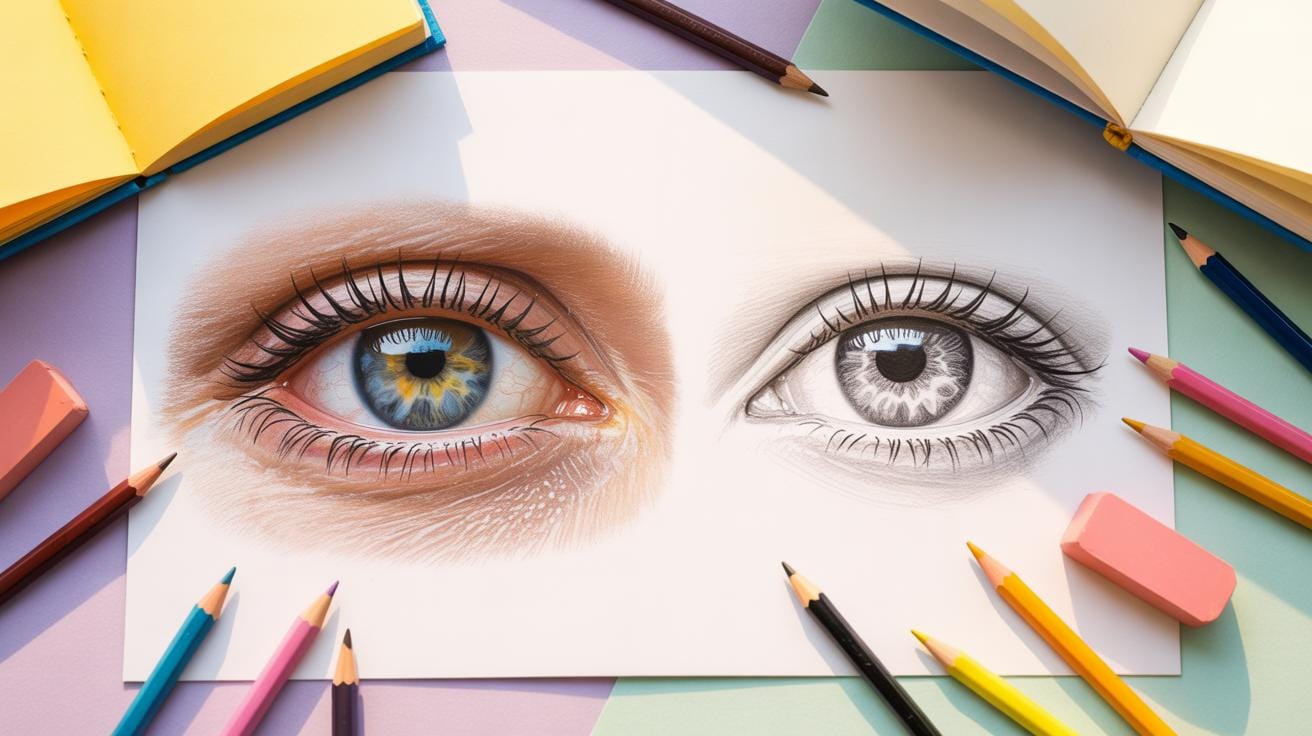
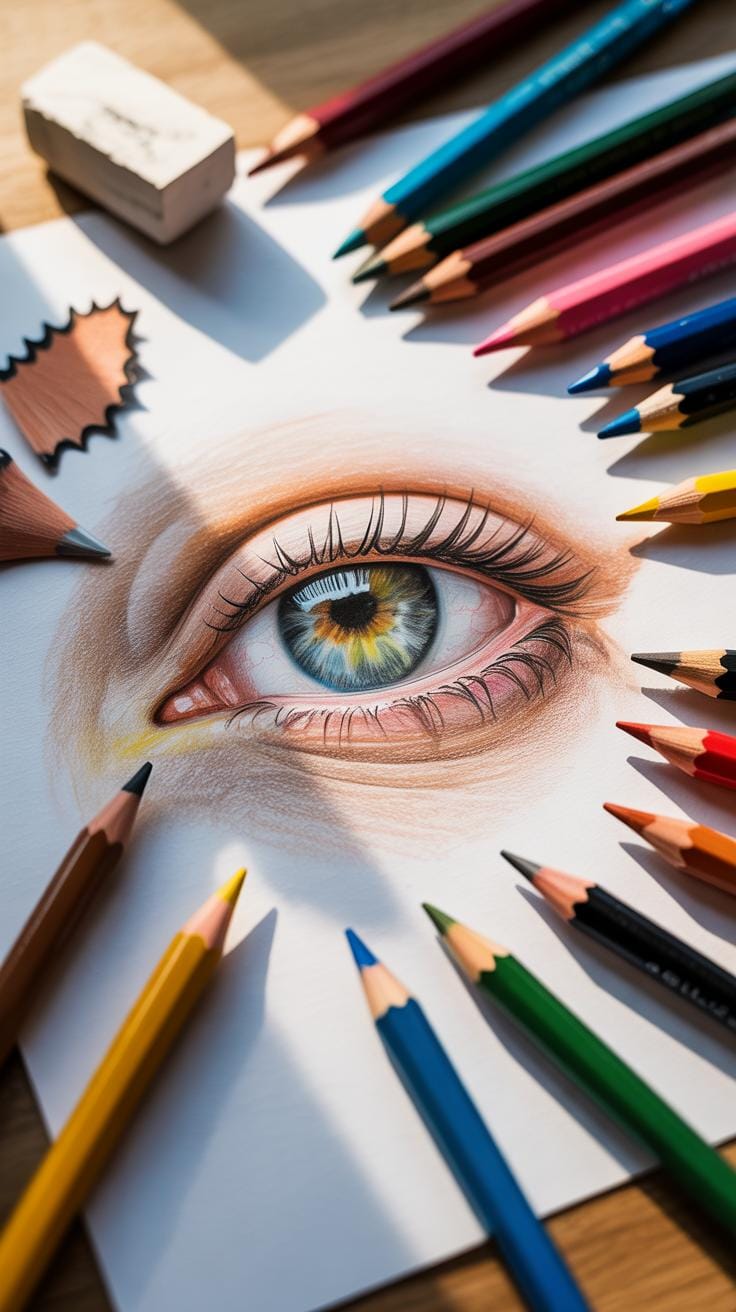
Detailed eye drawing tutorials often come with step-by-step guides that carefully break down each stage of the drawing process. These instructions don’t just tell you where to draw lines but explain why certain shapes or lines matter. For example, many tutorials emphasize shading techniques that allow you to capture the subtle shadows around the eyeball or reflections in the cornea. It’s not just about adding a shadow but learning how light behaves around the eye’s curves.
These tutorials also tend to focus a lot on anatomy and proportion. Instead of guessing the eye’s shape, you’ll learn about the parts—like the iris, pupil, eyelids, and tear ducts—and how these relate to one another. Using references, whether photos or anatomical drawings, helps guide your hand so you can achieve better realism. And while this may feel slower or more technical, the payoff is artwork that captures the eye’s complexity and expressiveness more convincingly.
Anatomy And Proportion Lessons

A core part of detailed tutorials is teaching you proper eye anatomy and how to keep proportions realistic. They often highlight features like the curvature of the eyeball, the thickness of the eyelids, and the position of eyelashes. Many tutorials explain how the iris isn’t a perfect circle because it’s seen through the curved cornea. You’ll also encounter breakdowns of different forms such as the upper and lower eyelids and how the tear duct slightly alters the eye’s shape. These lessons might seem a bit tedious, but understanding these tiny details is crucial for lifelike results.
Shading And Texture Techniques
When it comes to shading, tutorials go beyond simple shadows and highlights. They explore layering shades to mimic the eye’s moisture and texture—often surprising beginners with how subtle and varied these patterns can be. You’ll often find exercises in building up shadows around the sclera and using lighter strokes or blending tools to give the iris a sense of depth and sparkle. Adding textures like tiny veins or the slight reflection on the eye’s surface can make all the difference between a flat drawing and a captivating, lifelike gaze.
How Easy Techniques Help Beginners

Eye drawing tutorials often start by breaking down the eye into simple shapes. Beginners can begin with ovals, circles, and straight lines to map out the basic structure. For example, sketching an oval for the eyeball, then adding a curved line for the eyelid helps keep things manageable. These shapes serve as a foundation, making the complex eye less intimidating.
Next, quick sketch methods encourage loosening up. Rather than aiming for perfect lines immediately, starting with light, fluid strokes allows you to adjust proportions without stress. This approach can feel freeing if you sometimes get stuck trying to draw rigidly.

Shading is where many beginners hesitate, but easy shading tips take the fear out of it. Using soft pencils or smudge tools to lightly shade areas, like the iris and the shadow under the eyelid, creates a sense of depth without requiring expert skills. Even simple crosshatching or gradient shading can add volume.
These easy techniques don’t just help you produce a decent eye quickly; their real power lies in building your confidence. When you see steady progress from simple steps and repeated practice, it encourages you to keep drawing. So, rather than waiting for mastery, embracing these beginner-friendly methods nurtures growth by making every attempt manageable and rewarding.
Which Approach To Choose

Choosing between detailed eye drawing tutorials and simpler, easy techniques isn’t always straightforward. It really depends on where you are with your art, what you want to achieve, and how much time you can invest. For beginners, easy techniques often feel less intimidating. They offer quick wins and basic skills without overwhelming details. But advanced artists might find the slower, detailed tutorials more rewarding—they dig into anatomy, shading, and subtle nuances that make drawings almost lifelike.
Think about your goals carefully—are you aiming for speed or precision? Casual sketches or polished portraits? The tutorial’s pace and depth should match your preferred drawing style. For example, if you want to capture expressions fast for comic work, simpler methods might suit you better. If you crave realism and texture, detailed tutorials can’t be skipped.

Here’s a quick rundown that might help you decide:
- Detailed Tutorials
– Pros: Deep understanding, improved precision, great for realistic styles
– Cons: Time-consuming, can be frustrating for quick learning - Easy Techniques
– Pros: Fast results, less intimidating, good for practice and fun
– Cons: Might miss finer details, less depth in learning anatomy
Reflect on how much time you’ve got and how much you want to push your skills. Sometimes starting simple isn’t giving up—it’s building a foundation. Other times, jumping into detailed tutorials could jumpstart your growth if you feel ready. What’s your current pace? What draws your attention more: the big picture or the little specifics? These questions can steer your choice more than any rule.
Steps To Start Eye Drawing
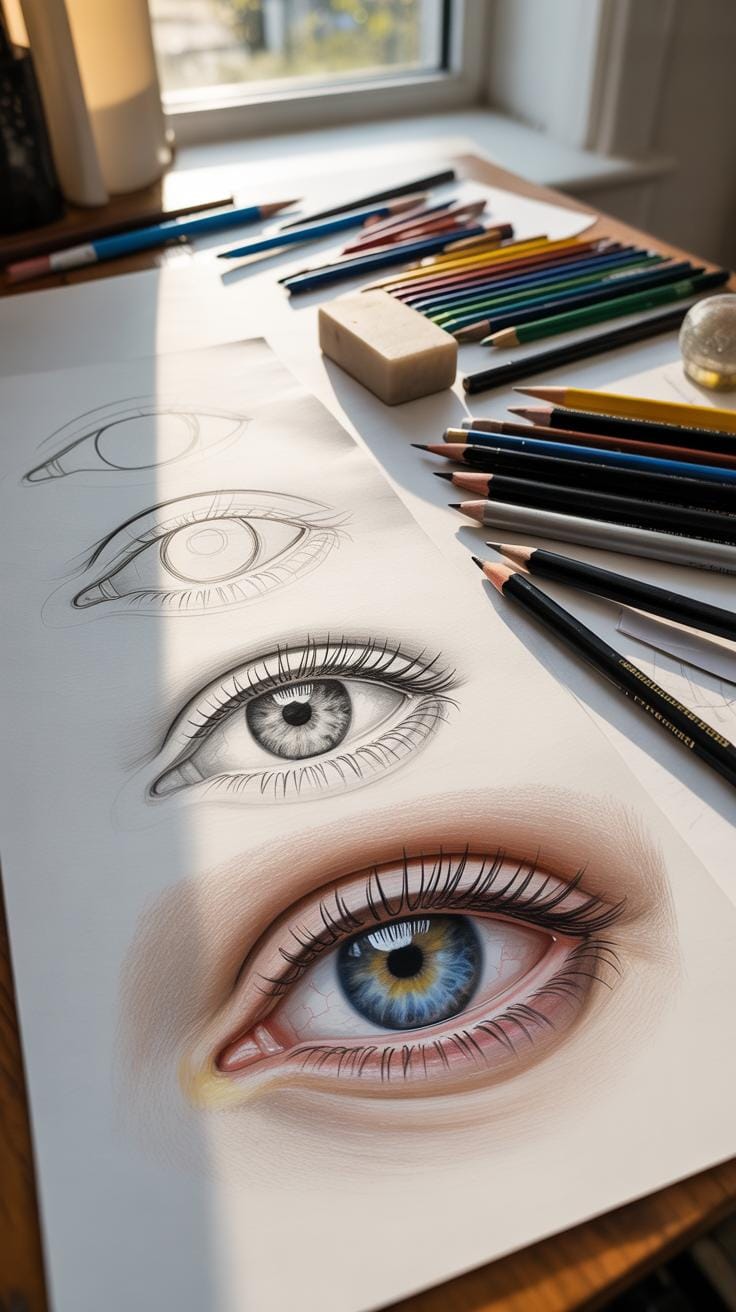
Before you start, gather your materials carefully. You’ll need various pencils—ranging from hard (H) to soft (B)—a good eraser, and smooth paper suited for fine shading. Preparing your workspace with sufficient light and a clean surface also matters more than you might think.
Begin with a light sketch outlining the basic shape of the eye. Think of it as a simple almond or an oval but don’t rely solely on geometric shapes; eyes vary a lot, so feel free to adjust the proportions as you go. Next, lightly draw the iris and pupil inside, paying attention to how much white space remains visible.
After nailing the outline, move to shading. Start shading the iris with gentle strokes, layering to create depth slowly rather than over-darkening in one go. Shade the whites of the eyes subtly—they aren’t usually pure white as shadows and reflections play a part. Consider the eyelids and lashes last; don’t rush these details. They can transform your drawing dramatically.

Finally, examine your work from a short distance. Add highlights in the pupil to mimic the moist, reflective surface. Use your eraser for tiny corrections or to bring out brightness. The finishing touches usually make or break a drawing, so take your time here.
Eye Drawing Tutorials
Eye drawing tutorials can be a real help, especially when you’re just starting out. They break down the process into manageable steps, which takes some of the mystery out of drawing eyes—a subject that many find tricky. It’s tempting to try rushing through with quick sketches, but tutorials encourage patience and observation, which often leads to better results.
Many tutorials focus on the anatomy of the eye, showing how the eyelids, iris, pupil, and surrounding skin fit together. Understanding these parts can stop your eyes from looking flat or unnatural.
One thing that caught me off guard in tutorials was how much they emphasize looking at references—photos or even your own eyes. It turns out that relying solely on imagination often leads to unrealistic shapes and misplaced details. A good tutorial encourages you to pause and observe rather than just copy blindly.
Some tutorials introduce common mistakes, like overdoing eyelashes or ignoring light reflection, and suggest simple fixes. For example, not every eyelash should be drawn separately; grouping them in clumps looks more natural.

If you’ve found your eyes look fake or awkward, trying out a well-reviewed tutorial might be worth the time. But be wary: following one blindly won’t magically fix everything. Combining what you learn with your own experimentation often works best.
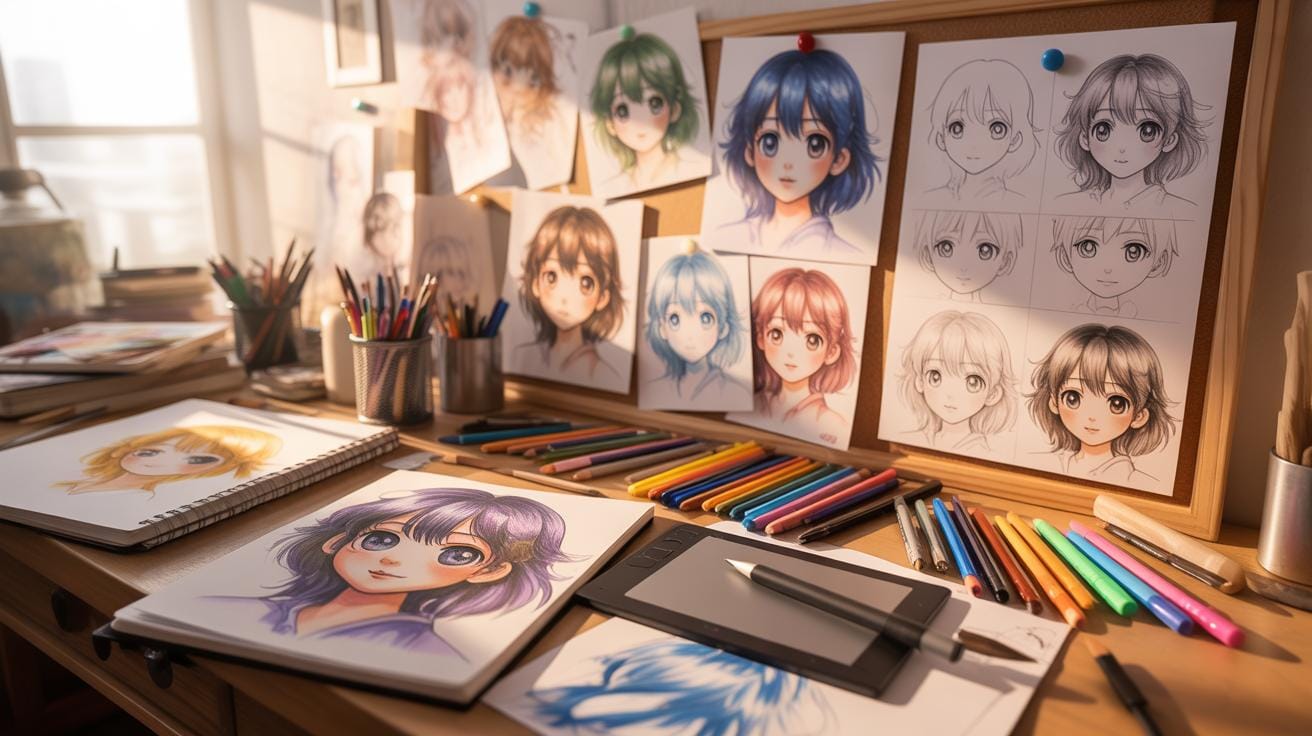
Eye Drawing Examples To Copy
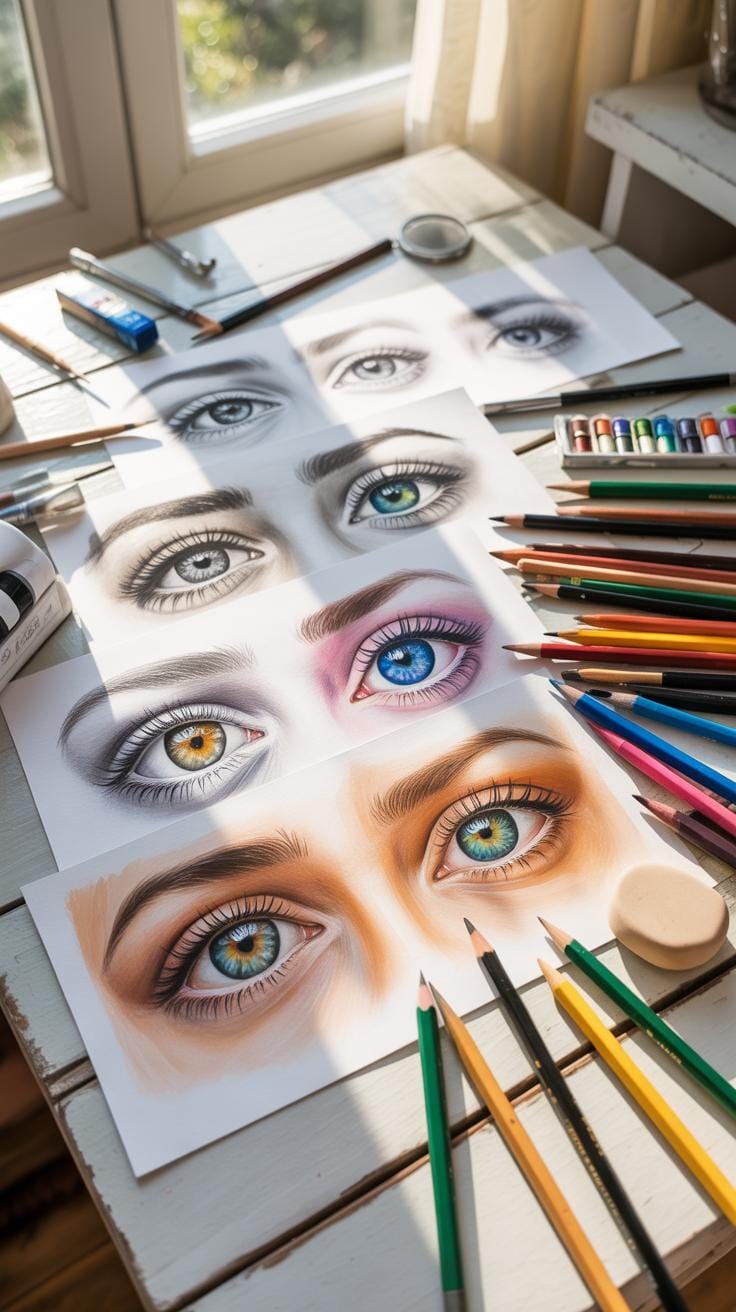
When practicing eye drawing, copying different examples can really sharpen your skills. Consider drawing round eyes, which are full and circular—perfect for capturing surprise or innocence. Almond-shaped eyes have a tapered, slightly pointed look at the corners, often lending a more mature or mysterious feeling. Closed eyes, though simple at first, offer a great way to practice subtle line work and can express calm or sleepiness.
Expressions are where eyes really come alive. Try sketching eyes showing happiness with slight upward curves on the eyelids or sadness with a drooped lower eyelid. Anger might show tight, angled brows and narrowed eyes. Each expression shifts the shape and structure—giving you a chance to study nuance.
It’s worth experimenting with varied styles and techniques. I found, for instance, that copying eyes with different emotions helps my hand understand muscle tension around the eye. So, pick some eyes that evoke a feeling and try imitating the shape, shadows, and highlights. Small practice sessions like these can gradually build your eye drawing confidence.
Eye Drawing Tutorials
Eye drawing tutorials serve as guided pathways to mastering the complexities of the human eye. They often break down the process into manageable steps, helping you understand details like the shape of the iris, the eyelids, and the subtle reflections within the pupil.

Many tutorials focus not just on anatomy but on capturing expression, which is key to making eyes come alive in your drawings. Different artists emphasize various techniques, so trying multiple tutorials might reveal which approach clicks with your style.
Sometimes, tutorials offer more than pictorial instructions—they provide insights into materials to use or shortcuts to shading, helping beginners avoid common pitfalls. Curious, you might find a surprisingly simple way to render eyelashes or the wet shine on the eyeball that you hadn’t thought about before.
However, it’s worth remembering that tutorials are starting points. They guide but don’t guarantee instant mastery. Your eye will improve by adapting these lessons to your own pace and experimenting beyond what’s shown. So, don’t hesitate to tweak techniques or combine tips from different artists to develop your unique eye drawing style.
Conclusions
Both eye drawing tutorials and easy techniques have unique benefits. Tutorials offer detailed guidance for accuracy and realism. They help develop skills progressively with clear instructions and practice steps. On the other hand, easy techniques are accessible and quick, perfect for beginners who want to start drawing eyes without feeling overwhelmed.
Choosing the right approach depends on your goals and preferences. You may combine both methods to enhance your learning experience. Consistent practice and patience are key to improvement. Use the insights shared here to decide your next step and enjoy the creative process of drawing eyes.


