Introduction
Epoxy resin wood projects combine the beauty of natural wood with the strength and clarity of epoxy resin. This guide helps you understand the materials, techniques, and steps to create stunning wood projects from start to finish. Whether you’re making furniture, art pieces, or functional items, epoxy resin adds both protection and visual appeal.
You will learn about choosing the right wood, mixing and applying epoxy resin, and finishing your projects with care. Each step is explained simply with practical tips to help you achieve success in your woodworking adventures.
What is Epoxy Resin and How Does it Work with Wood
Epoxy resin is a type of polymer made up of molecules containing epoxide groups, which are highly reactive parts that allow the resin to link tightly with other chemicals. When you mix epoxy resin with a hardener, a chemical reaction starts—this is called curing. During curing, the resin transforms from a liquid to a hard, solid material. This change involves forming strong molecular bonds that create a durable thermoset plastic, resistant to changes in heat or solvents. The hardener ratio is critical; too much or too little can slow or stop the curing. It feels a bit like chemistry meets craftsmanship.
Why use epoxy resin with wood? For starters, epoxy penetrates wood pores, bonding deeply rather than just sitting on the surface. This creates woodworking projects that don’t just look good but hold up well over time. The resin’s waterproof nature seals wood, preventing moisture damage that often causes warping or rot, which is a big deal if you want your piece to last. Plus, the cured epoxy is tough, resisting scratches and impacts better than wood alone. While it adds protection, it also enhances wood’s natural beauty with a glass-like gloss and remarkable clarity. It’s like giving your project a second skin—strong and shiny.
Choosing the Right Wood for Epoxy Resin Projects
Wood Grain and Texture Impact on Epoxy Projects
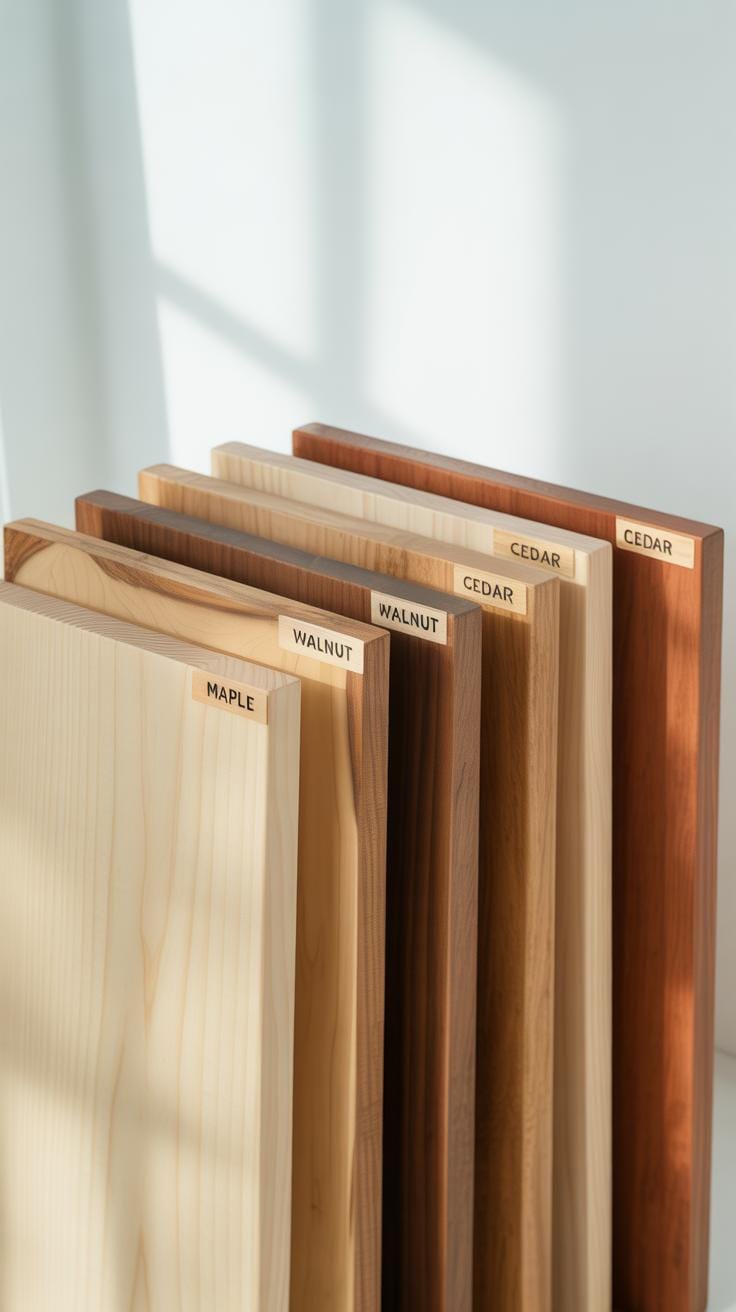
Picking the right wood means thinking about the grain and how resin interacts with it. Grain direction can either guide or resist the resin flow, influencing how well it settles into cracks and knots. Straight grains often let resin sit smoothly on the surface, while wavy or irregular grains may trap resin more, creating interesting patterns but sometimes uneven finishes.

For example, oak tends to have a prominent grain that holds resin nicely, filling in its natural pores. Walnut and maple offer smoother, tighter grains that give a more polished look once the resin sets. Each wood brings out a different vibe, so your choice depends on whether you want the resin to stand out or blend in subtly.
Preparing Wood Surfaces Before Applying Resin
Before pouring resin, your wood needs careful prep. Sanding down the surface to a fine grit—usually between 220 and 320—removes rough parts and opens the wood’s pores for better adhesion. But you don’t want to over-sand; too smooth, and the resin might not grip as well.
Moisture is another key factor. Wood with too much moisture can lead to bubbles or poor curing. A moisture meter helps here—ideally, your wood should be below 10% moisture content. Wiping the surface clean of dust, oils, or debris is simple but crucial; any leftover particles can cause bubbles or adhesion issues. Sometimes I’ve forgotten this step and had to redo the pour, which is just frustrating.
Also, defects like cracks or knots aren’t just flaws; they’re invitations for resin. Resin fills them beautifully, stabilizing the wood while adding visual contrast. While some cracks might need stabilizing with glue or clamps first, I’ve found that many can be left open for resin to work its magic. Just watch your resin level closely, so it doesn’t overflow or underfill those gaps.
Tools and Materials Needed for Epoxy Resin Wood Projects

When you’re about to start an epoxy resin wood project, having the right tools and materials at hand can make a big difference. First on the list is your epoxy resin kit—these usually come with resin and hardener. Make sure it suits the scale of your project because the mixing ratios matter a lot.
Other basics include mixing containers—clear is better to see the mixture’s consistency—and disposable stirring sticks. Brushes or foam applicators help with spreading resin over surfaces or filling small gaps.
Sandpaper in various grits is needed to smooth the wood before and after resin application. A few measuring cups with clear markings help you get the exact resin-to-hardener ratio. Oh, and don’t forget gloves; resin can stick stubbornly to your skin.
Protective gear isn’t just gloves. Think about goggles and a respirator mask to guard against fumes. You’ll also need a well-ventilated, dust-free workspace. Dust can ruin your glossy finish, and resin fumes can cause headaches or worse if you’re careless.
It sounds like a lot, but beginners should focus on: epoxy kit, mixing containers, gloves, sandpaper, and a clean workspace. You really don’t need to go overboard right away. Starting simple lets you get a feel for the process without stressing about every tool under the sun.

Setting up your workspace somewhere flat and stable is crucial. I once tried mixing resin on an uneven surface—big mistake. Spills everywhere and uneven curing followed. So, prepare that space well.
One last thought—have paper towels or rags nearby for quick cleanups, and think about how you’ll dispose of resin waste. Safety and tidiness go hand in hand here. Would you rather deal with sticky residue on your hands or a clean project area?
Mixing and Applying Epoxy Resin Correctly
Step-by-Step Mixing Process
Measuring epoxy resin and hardener accurately is crucial. Most kits specify a ratio—often 1:1 or 2:1—but it varies, so check yours carefully. Even small mistakes here can ruin your project, so don’t rush it. Use separate, clean measuring cups for each component. Pour slowly to avoid spills or confusion.
Once measured, combine the resin and hardener in a clean container. Stir gently but thoroughly for at least two to three minutes. Scrape the sides and bottom often to mix all layers evenly—unfinished mixing leads to sticky spots later. Resist the urge to stir aggressively; it adds bubbles you’ll have to deal with later.
Common errors include mixing less than recommended or guessing the ratio. This leads to improper curing—wet or tacky surfaces that never harden. Give yourself the time to do this step right. Sometimes, patience is the best tool.
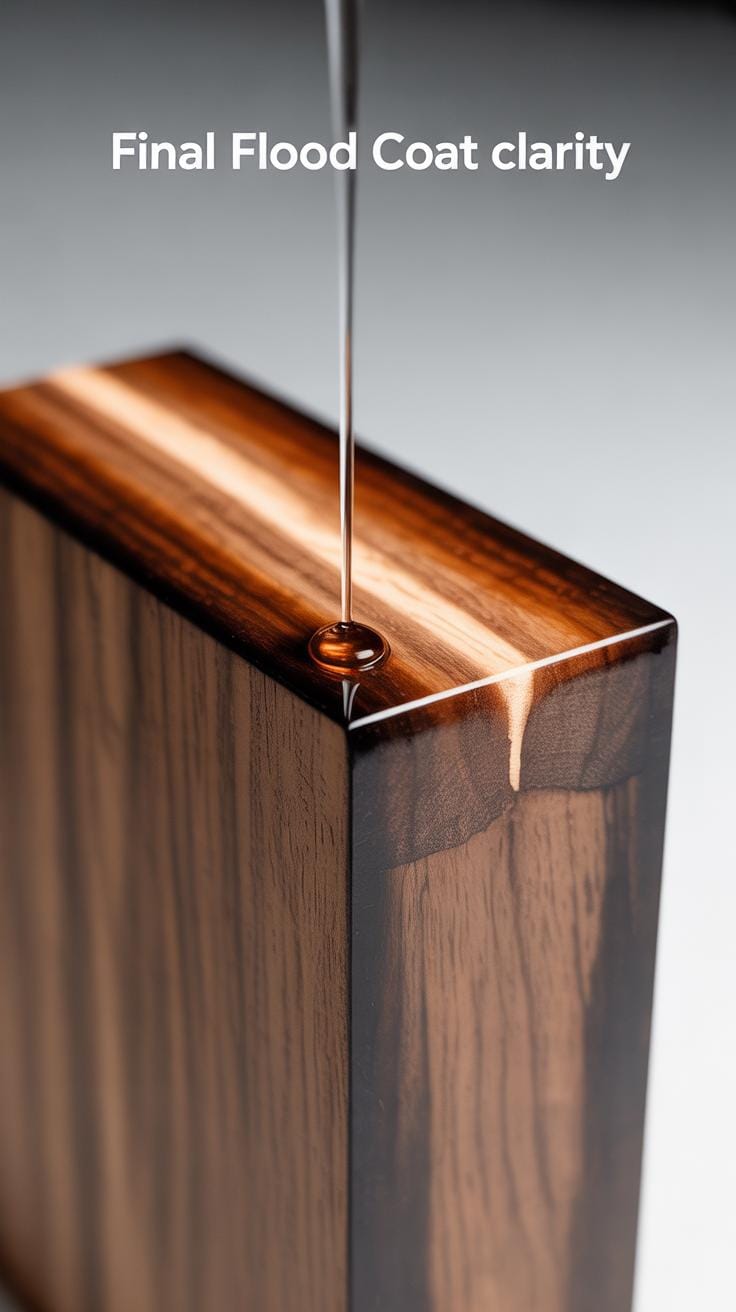
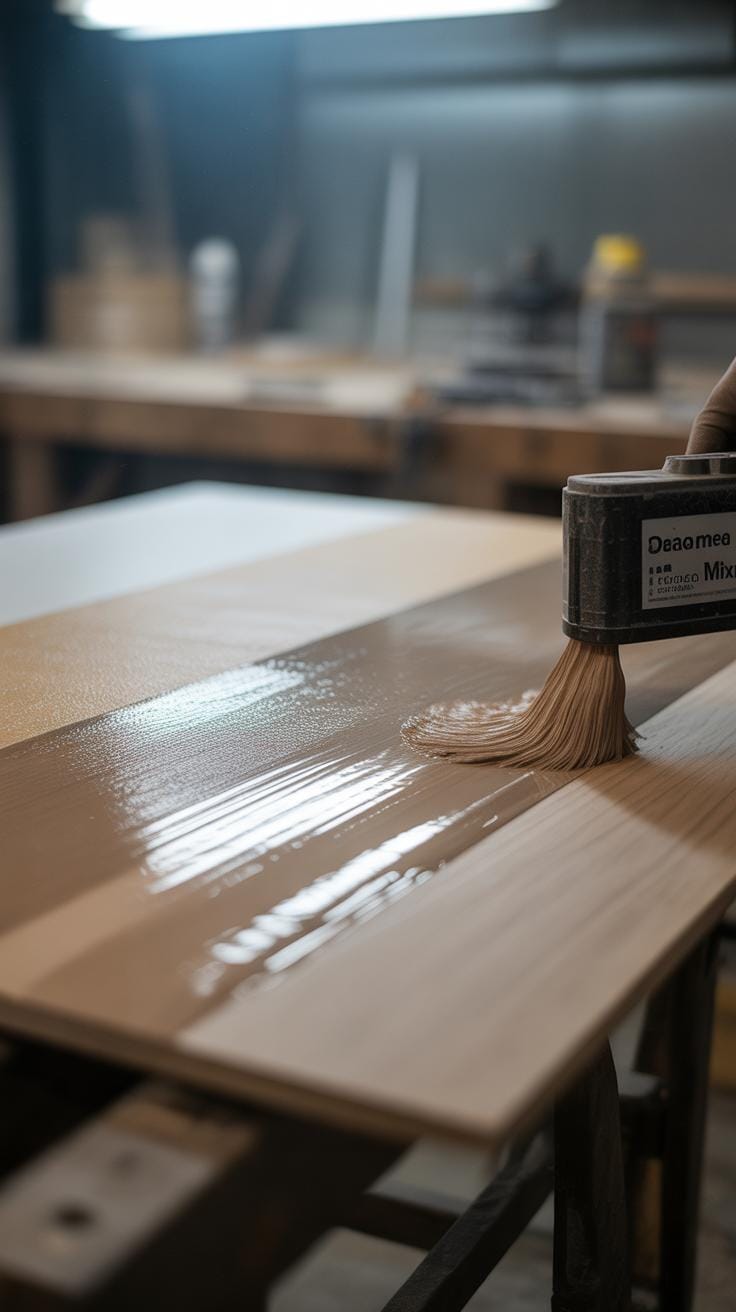
Applying Resin to Wood Surfaces
Pouring epoxy resin onto wood is simple, but controlling how it flows takes practice. Start by pouring slowly in the center, then use a brush or spreader to move the resin outward. The goal is to cover the surface evenly without over-piling it.
To get a smooth finish, watch how resin pools and spreads. Tilt the piece gently if you need to help the resin reach edges or fill gaps. If you pour too fast, resin can run off or get uneven thicknesses. Go slow, and remember you can always add a second coat.
One trick I’ve found helpful is using a heat gun or a small torch to gently pass over the surface right after pouring. The warmth encourages trapped bubbles to rise and pop. Don’t overdo it—too much heat can burn or discolor the resin. Just a few passes, enough to see bubbles vanish, work best.
Applying epoxy resin requires focus but also some flexibility. You might not get perfect coverage right away—and that’s okay. But keep an eye on flow, bubbles, and curing behavior. Each pour is a chance to learn and improve.
Filling Cracks Voids and Creating River Tables

Techniques for Filling and Sealing Imperfections
When you come across cracks, knots, or voids in wood, epoxy resin can be your best friend to fill and seal these imperfections. But before diving in, make sure the area is clean and dry. Dust or loose debris can trap bubbles or cause the resin to not bond well. Sometimes, a quick vacuum or compressed air blast helps clear out all the little bits hiding inside.
Next, you might want to seal the edges around your crack with a thin layer of resin or a special barrier so the pour doesn’t leak or follow unwanted paths. Applying resin slowly and layer by layer is crucial, especially for deeper voids. Pouring too much resin at once often traps air bubbles. Using a heat gun or torch lightly over the surface can gently coax those bubbles to the surface. If you rush this, you’ll likely trap air, meaning more sanding and patching later.
Patience turns out to be key here. Let the first layer cure before adding more if necessary. Throughout my projects, I found that rushing this stage rarely pays off. Taking the time to build up the resin and carefully monitor each step avoids frustrating flaws down the road.
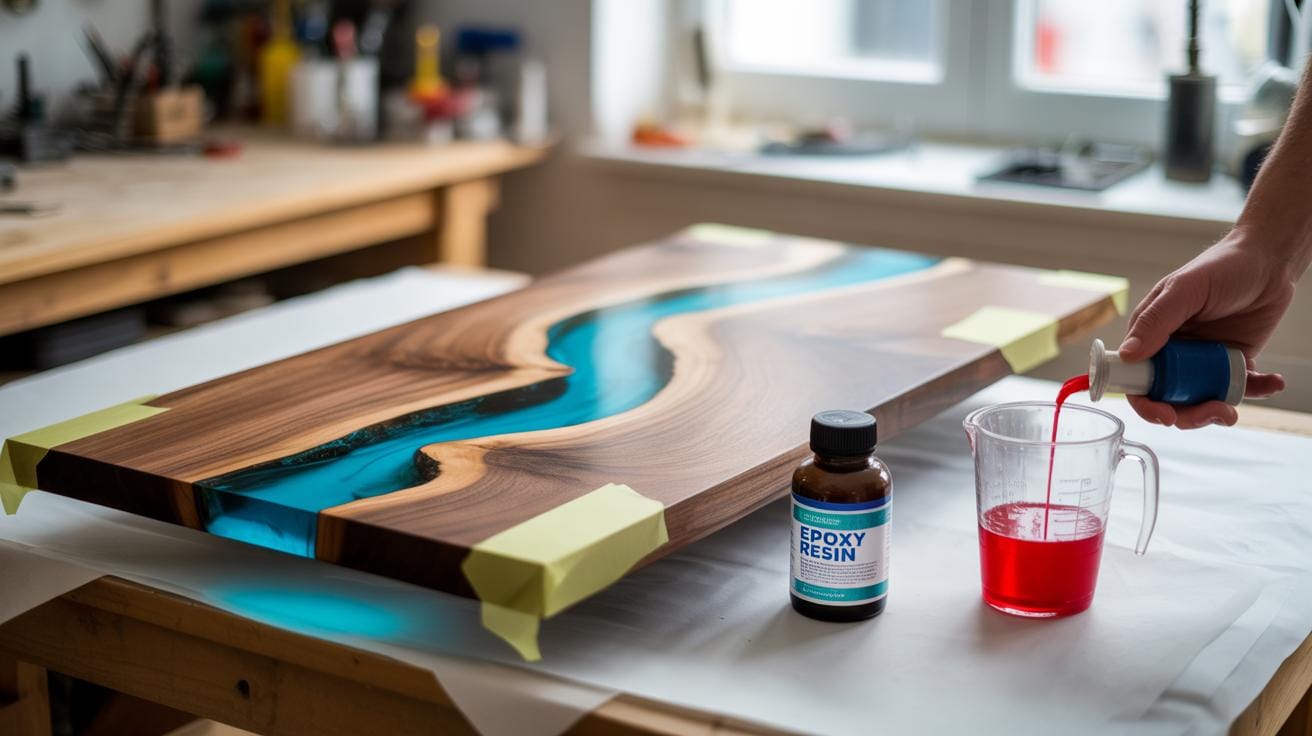
How to Make a River Table with Epoxy Resin
River tables blend wood and resin in a way that is striking yet requires careful planning. To start, select two wood slabs with natural edges that face each other but leave a space—this is your “river.” Before assembling, build a mold to hold everything together during the resin pour. You can use melamine boards or plastic sheets sealed with tape and hot glue to prevent leaks; nothing worse than a sticky mess.
Securing the slabs firmly in the mold is essential. Any movement during pouring causes gaps or uneven resin surfaces. I usually clamp or wedge the pieces in place before mixing the resin. Once mixed, pour slowly into the gap between the slabs, allowing the resin to flow naturally. If you want to add pigments or effects, mix those in before pouring.
Then comes the wait. The curing time depends on your resin’s brand and temperature, but watch out for dust settling on the surface. Covering the mold loosely with a clean box or plastic sheet does wonders to keep the resin clean as it hardens.
Creating river tables definitely needs practice. Sometimes the resin doesn’t fill every nook perfectly, or tiny bubbles sneak in despite every effort. Still, these imperfections often add character—unless you want absolute smoothness, then sanding and finishing come next.
Sanding and Finishing Your Epoxy Resin Wood Project

Sanding Steps to Remove Imperfections
Once your epoxy resin is fully cured, smoothing the surface is your next step. Start with a coarse grit sandpaper, somewhere around 120, to knock down any bumps or uneven spots. This might seem rough at first, but you really need that initial abrasion to tackle bigger imperfections. Then, gradually move to finer grits—220, 400, maybe even 600—to refine the surface. You’ll notice how the resin and wood blend more naturally as you progress.
Water sanding is a game changer when you reach the fine grits. Keeping the surface wet reduces dust and prevents the sandpaper from clogging. It also helps reveal tiny scratches, so you know where to focus. I’ve found that patience here pays off; rushing makes the finish look cloudy or streaked. When you feel brave, add a final polish with a buffing compound or even some ultra-fine grit sandpaper, like 1500 to 2000. That’s when the surface really shines—or at least, comes close to what you’d hope for.
Applying Finishes to Enhance Appearance
Choosing the right finish after sanding depends on what you want from your project. Oils, waxes, or extra resin coats each bring something different. Oil finishes offer warmth and highlight the wood grain but leave the resin glossy, which can feel a bit uneven visually. Waxes add a subtle sheen and protect against minor scratches, but they usually require frequent reapplication.

If you think the piece needs more protection, applying another thin layer of epoxy resin can seal everything well. Just keep in mind that extra coat might alter the look slightly, sometimes bringing out tiny bubbles or a haze if you’re not careful. Always test finishes on a hidden part first, since some oils or waxes don’t play nicely with resin and could cause cloudy patches.
Applying finishes safely means good ventilation and gloves—yes, sometimes it’s a hassle, but it protects you. Spread oils or waxes thinly with a soft cloth. Let each layer dry fully before deciding if another is necessary. And don’t rush polishing; it’s tempting, but too much friction can heat the resin and cause softening or marks.
Remember, the finishing step isn’t just about shine. It’s about enhancing durability and feeling that sense of completion. You’ll know when it’s ready—you’ll touch it and think, “Okay, this works.”
Common Challenges and How to Avoid Them

Working with epoxy resin and wood can sometimes feel like a bit of a gamble. You might end up with bubbles trapped inside or notice uneven curing that throws off the whole look. Bubbles especially tend to pop up when mixing resin or pouring it, and if you’re not careful, dust can settle on the surface during curing, leaving imperfections that bother you later.
Dealing with Bubbles and Uneven Surfaces

One straightforward trick to get rid of bubbles is using heat—like a small kitchen torch or a heat gun held at a distance. You don’t need to be a pro; just wave it gently over the resin surface after pouring. The heat helps bubbles rise and break quickly. Sometimes, just a lighter can do the job if you’re careful.
To stop dust from ruining your finish, consider covering your project with a simple tent made from a clean cardboard box or a plastic container. Even a large plastic bin flipped upside down can work. Keeping the space clean and dust-free during curing makes a surprising difference, too, so maybe tidy up beforehand. It might seem obvious, but it’s easy to overlook in the excitement.
Preventing Discoloration and Adhesion Failures
Yellowing resin is one of the most frustrating things. It usually happens if you expose the cured resin to too much UV light or use a resin not formulated to resist yellowing. Picking a “UV stable” resin can cut down on this significantly. Still, even the best resins can yellow slightly over years, so don’t expect perfection forever.
Bonding your resin well to the wood surface matters a lot, too. The wood should be dry and clean with no dust or oils. I’ve found that lightly sanding the wood surface before pouring helps the resin stick better. Skipping this step can lead to resin peeling or uneven adhesion. Strange, because the resin looks pretty sticky at first, but without a good grip, it can fail later on. Sometimes, sealing porous wood with a thin resin layer before the main pour can help avoid air bubbles and adhesion issues too.
Creative Ideas and Projects to Try
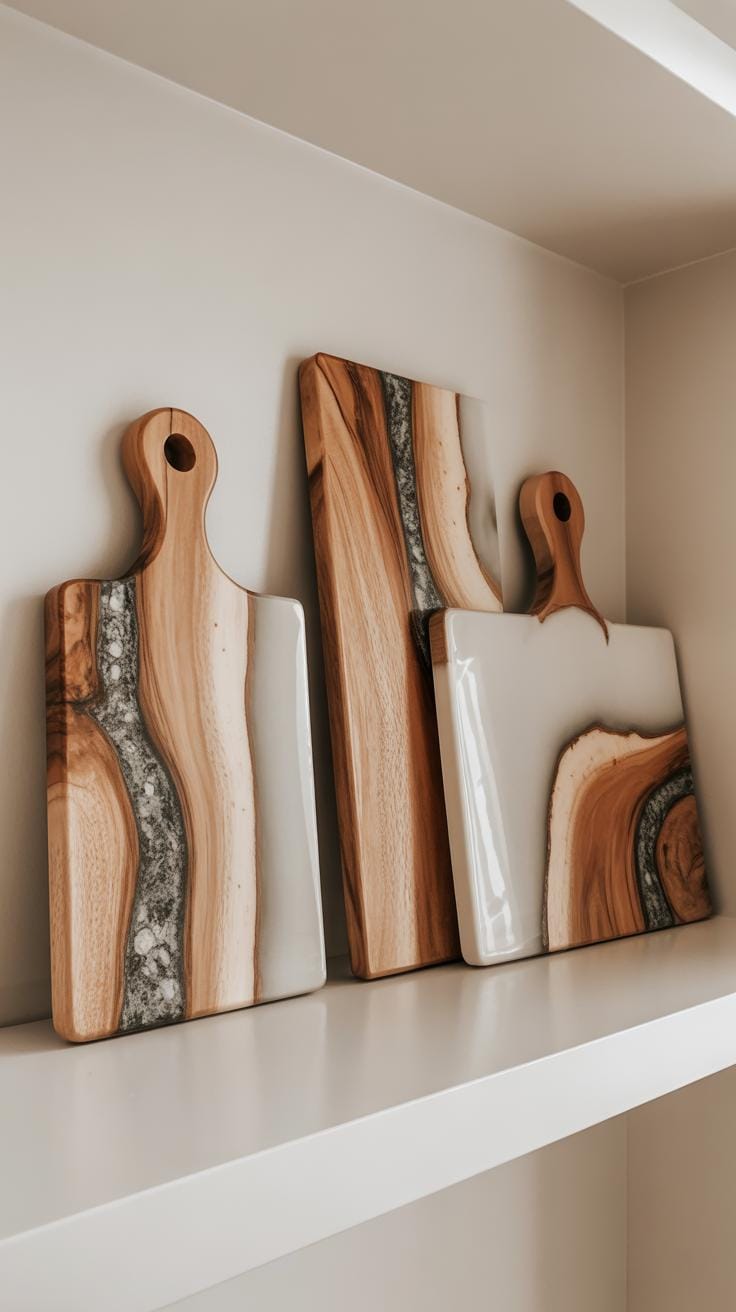
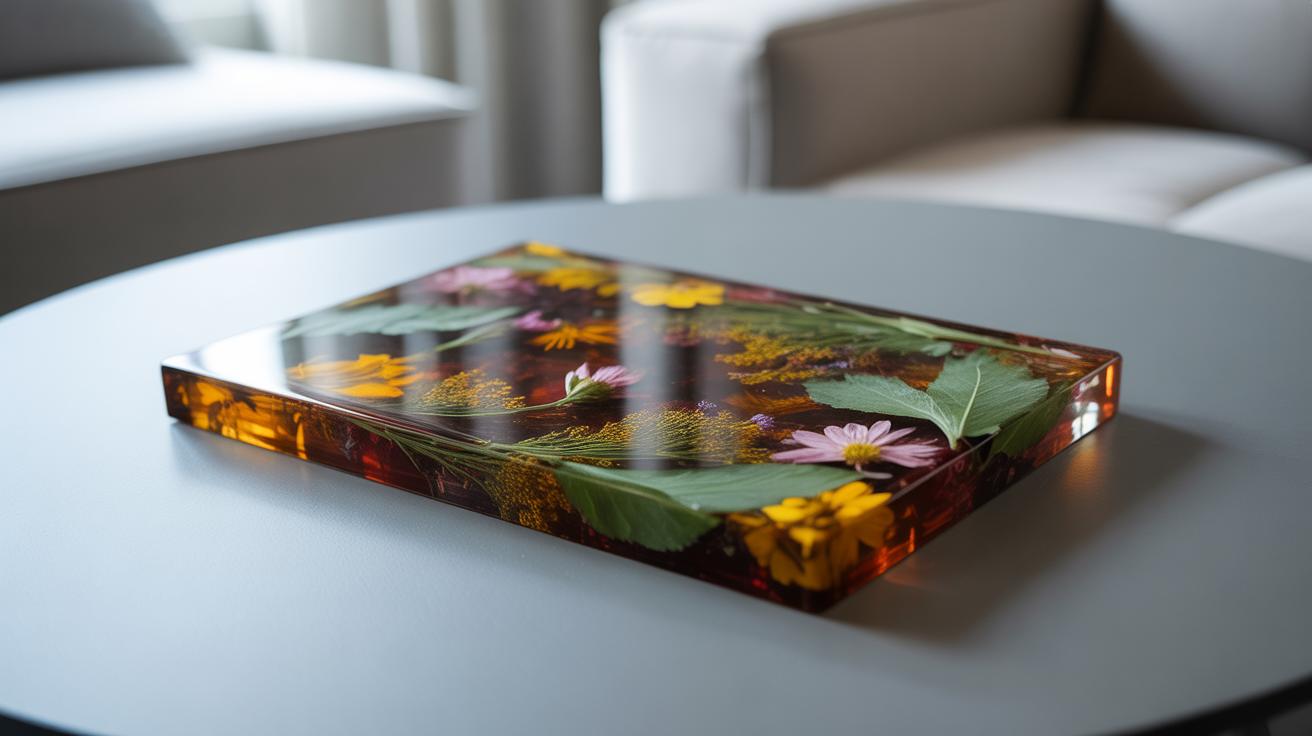
If you’re looking to start with epoxy resin and wood, there’s a range of projects that let you experiment while creating something useful or beautiful. Cutting boards are a classic choice. The resin fills cracks or knots in the wood, making each piece unique and stable. Coasters are another favorite—small, manageable, and rewarding, plus they don’t require a ton of materials or time.
Small tables give you a chance to play with larger designs—think epoxy rivers running through split wood slabs. Jewelry, like pendants or earrings, introduces a different scale and allows for more artful uses of color and texture. If you want something decorative, artistic wall panels let you combine wood grains and resin patterns, turning raw materials into an eye-catching piece.
Simple Beginner Projects
Starting simple is key with epoxy resin. Coasters are probably the easiest to try—they take little resin, cure fast, and are forgiving with minor bubbles or dust. Think about floating small objects, like pressed flowers or tiny stones, inside the resin for texture and interest.
Another good beginner project: small trays or platters. They build your confidence with mixing, pouring, and leveling resin, without overwhelming you. These projects teach you to seal wood edges so resin doesn’t leak—a fundamental skill that you’ll need later.
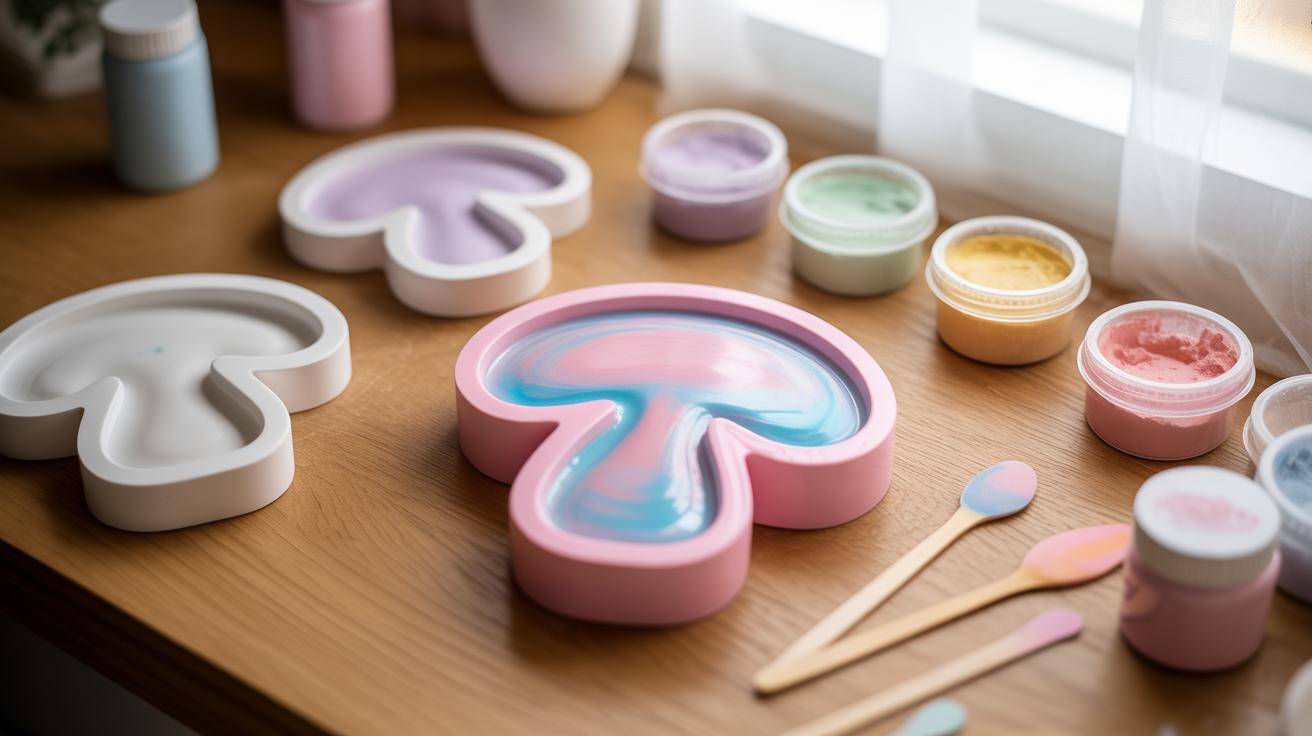
Experimenting with resin coloring here is safe. You get quick visual feedback on how much pigment or dye to add before moving to bigger works.
Advanced Artistic Creations
Once you’re comfortable, you might try combining wood and resin in more complex ways. One popular advanced project is the “river table,” where a wood slab splits down the middle, and the gap gets filled with tinted or clear resin. This involves precise measuring, sealing, and multiple pours to avoid bubbles and ensure a smooth finish.
Another intriguing idea involves embedding objects—like coins, shells, or metal pieces—inside deep resin layers to create depth and story. You can play with layered colors too, pouring resin in stages to build a three-dimensional effect. It’s a slower process, requiring patience and planning.
Some artists create geometric or abstract resin inlays on wood furniture surfaces, combining paints, powders, and even glow-in-the-dark pigments. These projects blur the line between woodworking and fine art, making pieces that feel personal and complex.
What project will you try first? Or maybe you’re ready to push further—mixing craft and creativity in entirely new ways?
Conclusions
Working with epoxy resin and wood opens many possibilities for creative and durable projects. By following the right steps and understanding the materials, you can produce beautiful items that last. Practice and patience improve your skills and the quality of your work.
Now that you know the process from start to finish, you can start planning your own epoxy resin wood projects. Explore different designs and techniques, and enjoy creating pieces that combine natural wood with the unique finish of epoxy resin.


