Bringing the Sea Serpent to Life in Color Pencil
The sea serpent has fascinated people for centuries as a legendary sea creature that appears in various mythologies around the world. From ancient Mesopotamian stories to Scandinavian legends, the sea serpent embodies mystery and fear lurking in the depths of the ocean. This article explores the rich history of the sea serpent myth and guides you on how to bring this fascinating creature to life through color pencil art.
Color pencil art offers a unique way to depict the sea serpent with vivid colors and fine details. Whether you are an experienced artist or a beginner, this guide will walk you through the essential steps and techniques to create a striking image of the sea serpent. Let’s dive into the world of myth and creativity to artistically revive this legendary creature.
The Origins and Myths of the Sea Serpent
Sea Serpents in Ancient Cultures
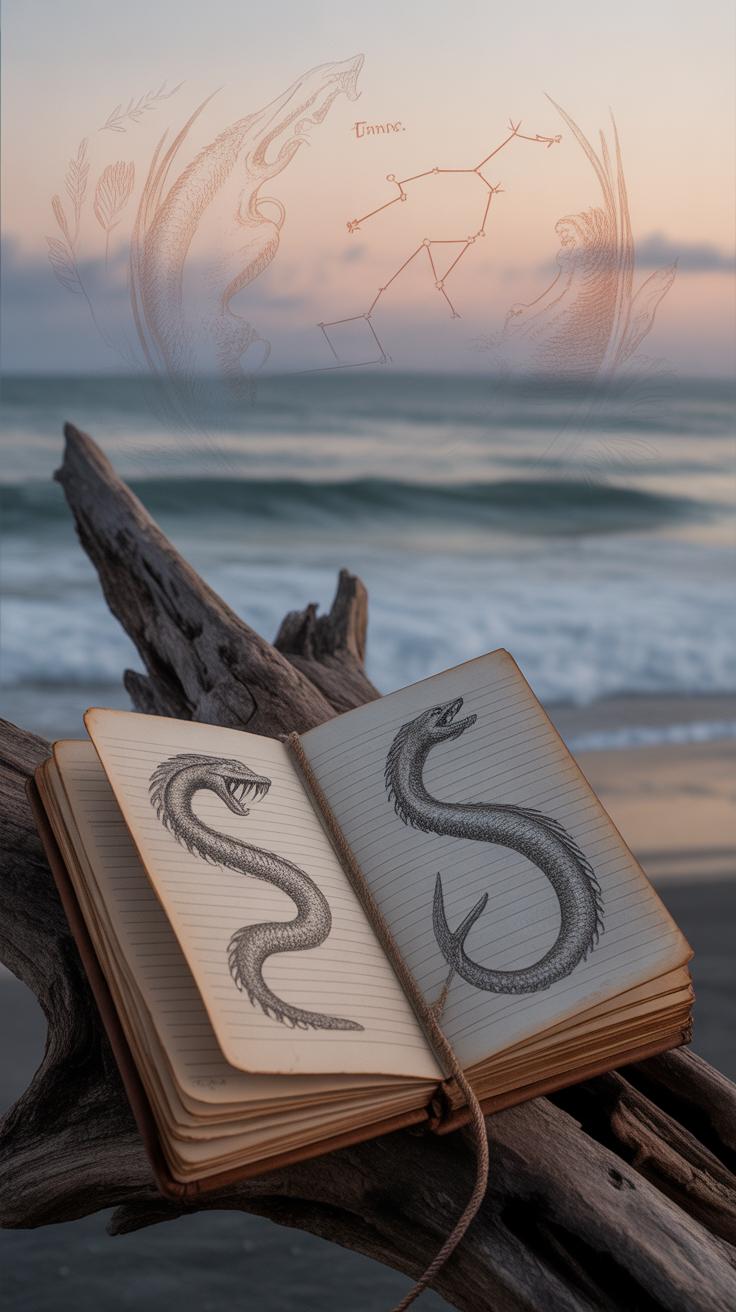
The sea serpent myth shows up in a surprising number of ancient stories, spreading across very different cultures. You can trace its roots way back to early Mesopotamia, where the chaotic ocean goddess Tiamat takes the form of a massive sea dragon or serpent. She embodies the chaotic waters that collide with order, and her image almost always combines serpentine coils with monstrous features, a blend that stuck in many minds.
Then there’s Leviathan, from biblical texts—more of a vast sea monster than a simple serpent but with many serpentine traits. It’s often described as a twisting, powerful creature of the deep, something almost impossible to subdue. In Norse myth, Jörmungandr circles the world’s oceans, a vast serpent so huge it bites its own tail. This image captures a different feeling—an endless, cyclical force lurking beneath the waves.
What strikes me is how these sea serpents are not just monsters but also symbols of the unknown and uncontrollable aspects of the sea. Each culture has its own spin, blending fear with fascination.
Legends from the Sea
Maritime lore is peppered with stories of sea serpents causing shipwrecks or being spotted by sailors. One old tale tells of a sea serpent rising beside a 19th-century whaling ship, its scaly back shimmering in the sun, leaving the crew unsure if it was real or a shared hallucination during their long, lonely voyage. Another story from the North Atlantic speaks of a giant serpent circling islands, whose presence warns fishermen of impending storms.
Historical sightings, though often dismissed today, fueled imaginations and nautical caution. What fascinates me is that these stories weren’t always just warnings — sometimes they sparked a strange kind of hope or reverence, as if seeing such a creature connected sailors to something larger than themselves.
Questioning the origins and the meanings behind such stories reminds us that myths serve different needs: to explain, to warn, to awe. A sea serpent might mean danger to one person, mystery to another, or something else entirely to someone else.
What Makes a Sea Serpent Unique

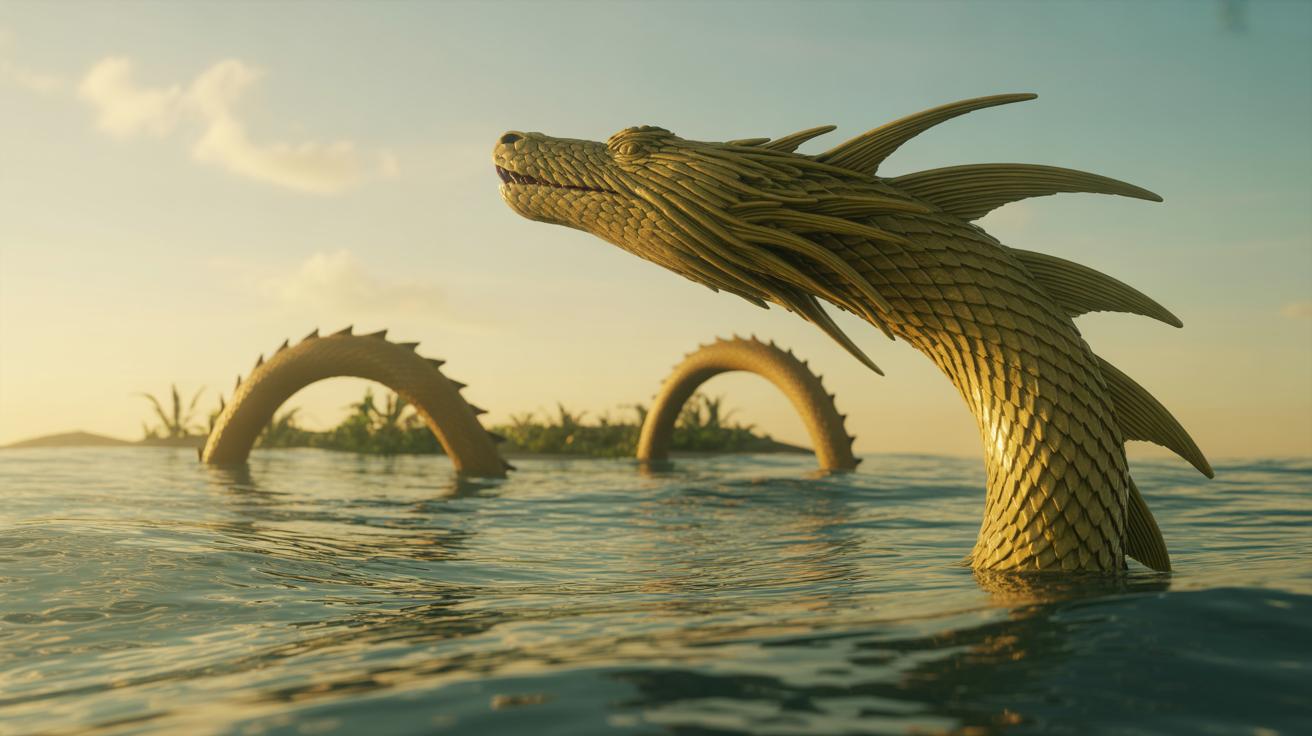
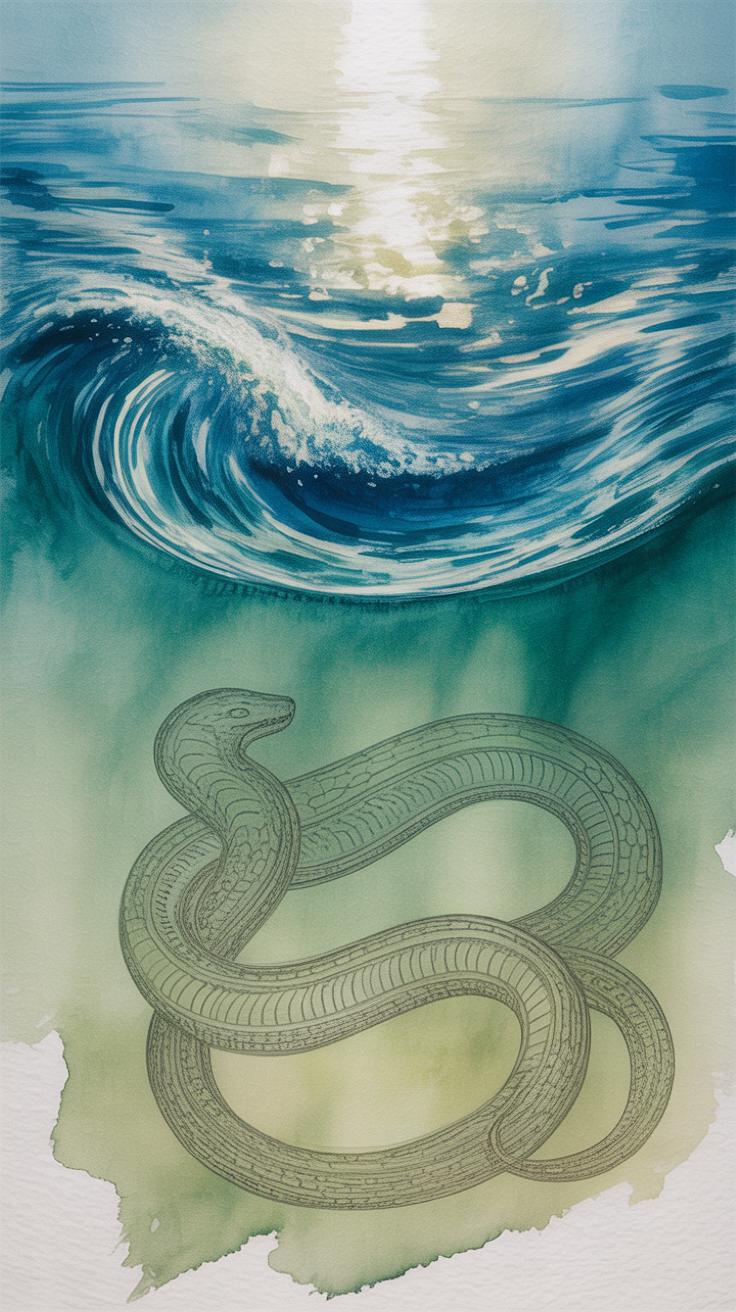
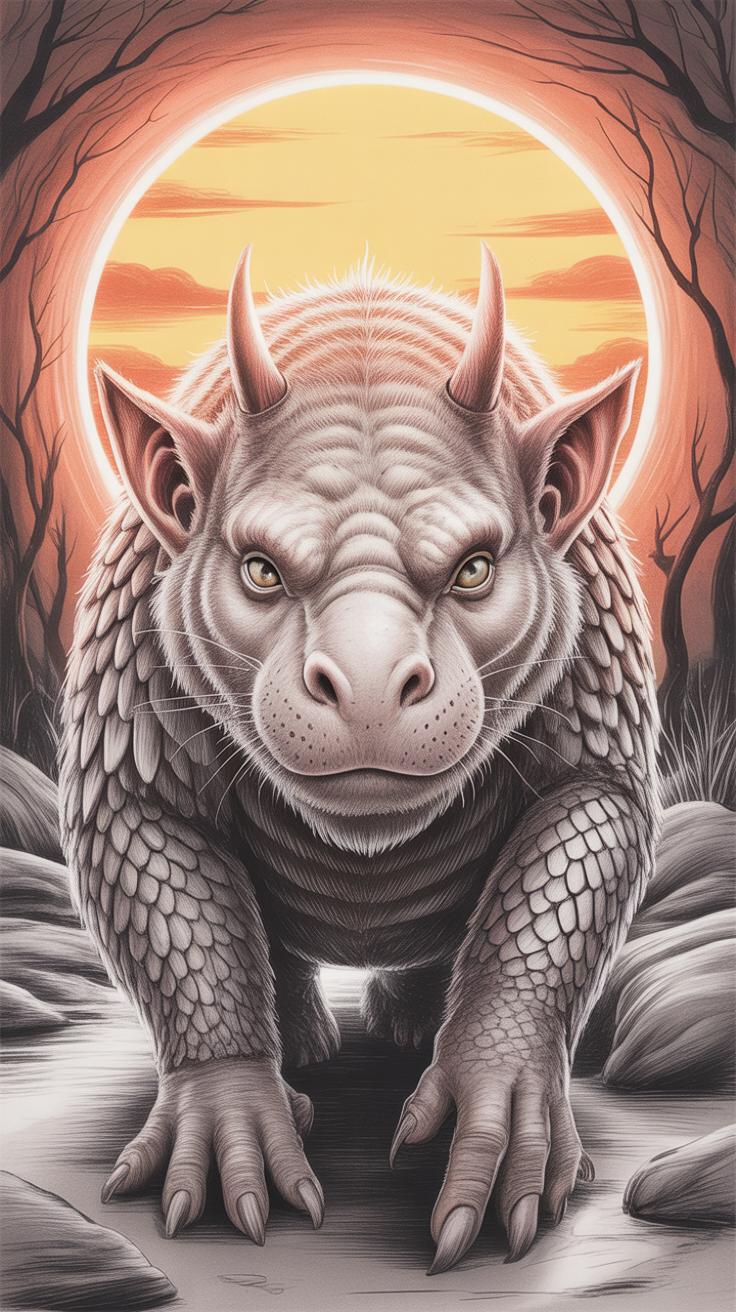
When thinking about sea serpents, their size and shape tend to leave a lasting impression. Most tales describe them as massive, sometimes stretching hundreds of feet long. Imagine a creature that can coil around entire ships or disappear beneath waves only to reemerge minutes later—there’s a sense of awe there. Their bodies often resemble elongated snakes or eels, yet sometimes their forms blend traits from dragons or fish, making them ambiguous. This fluid shape offers artists plenty of freedom, I think, to play with curves and flow. You might choose a sleek, streamlined body or one with bulkier segments to hint at power beneath the surface.
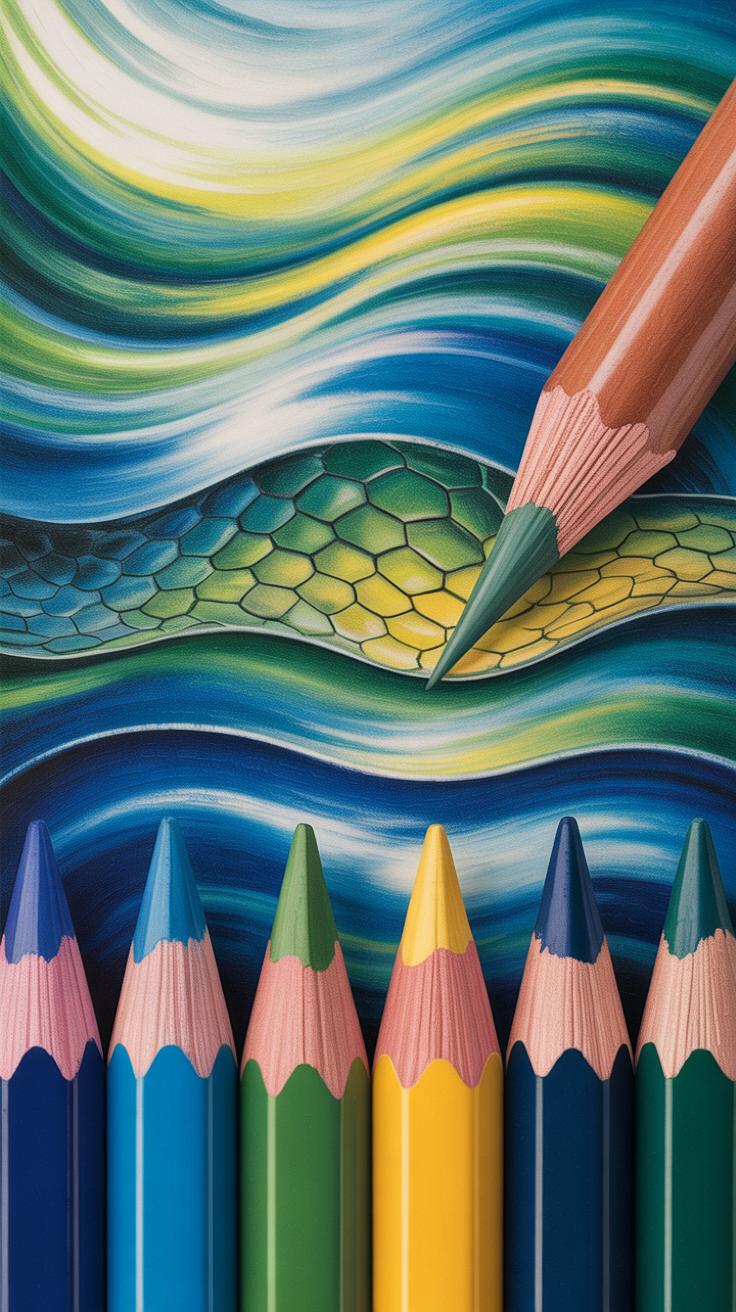
As for special features, sea serpents rarely appear bland. Their scales are usually depicted as large and overlapping, often shimmering—perfect for capturing light with colored pencils. Some stories mention bioluminescence or iridescence, which you could suggest with careful layering or subtle highlights. Eyes stand out too: glowing, intense, or sometimes eerily calm, inviting the viewer to wonder about the creature’s intelligence or mood. And then there’s movement—serpents twist through water with a smooth, hypnotic grace. Conveying that rhythm in your drawing might mean focusing on gentle curves, a sense of flow, or even splashing waves that react to their presence. It’s these details—scale textures, expressive eyes, fluid motion—that really bring a sea serpent to life on your paper.
Gathering Materials for Your Color Pencil Art
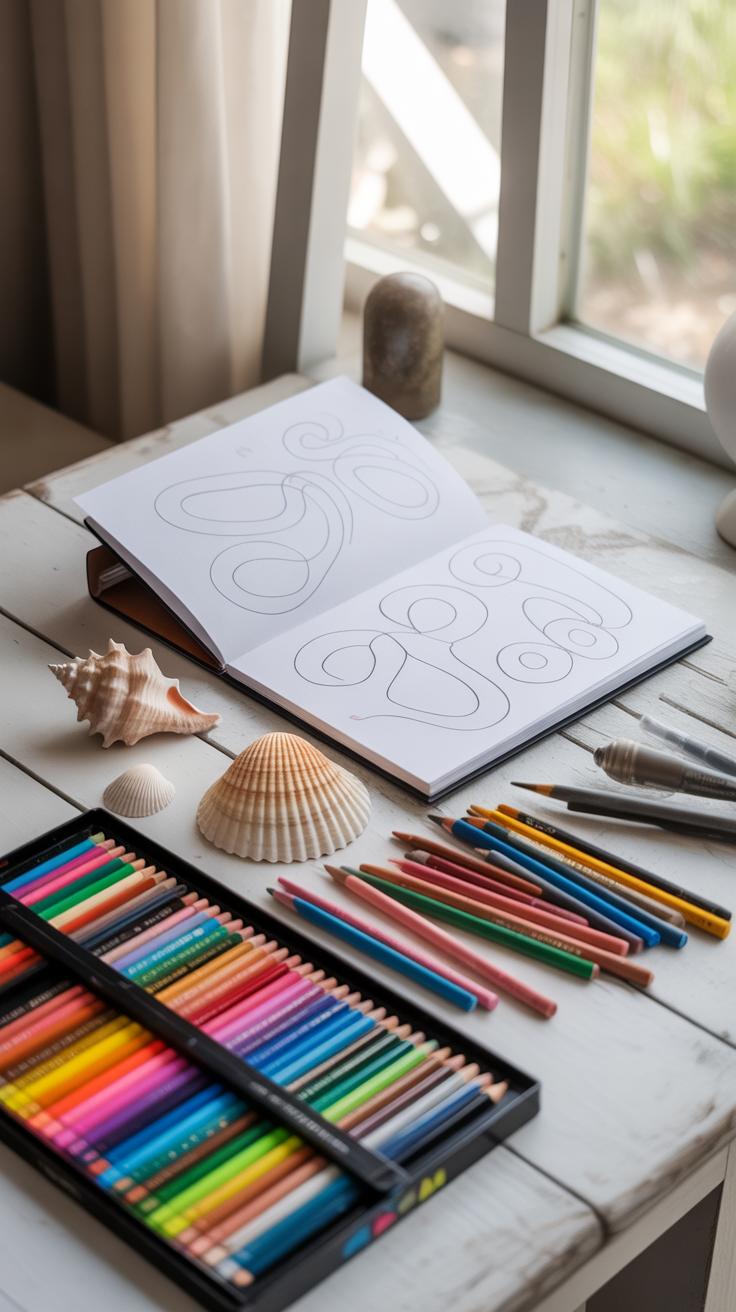
When it comes to bringing a sea serpent to life with colored pencils, the materials you choose make a bigger difference than you might expect. Not every pencil will capture the subtle scales or the wet, slippery sheen of a mythical creature from the deep. So, what exactly should you gather before starting?
Choosing the Right Pencils
Colored pencils come in several grades, mostly divided into wax-based and oil-based types. Wax-based ones are softer and blend well, but they can get a bit waxy and build up on the paper. Oil-based pencils tend to hold a sharper point longer and lay down color more evenly. For detailed sea serpent art, with fine lines on scales or delicate shading, pencils with a harder lead, like Prismacolor Verithin, can be helpful for outlines. But to layer and blend rich tones like ocean blues or murky greens, softer pencils like Prismacolor Premier or Faber-Castell Polychromos are often preferred. I’ve noticed the softer pencils make layering easier but require patience not to smudge.
It’s a bit of a balancing act: hard leads for precision, soft leads for smooth color transitions. Personally, I lean towards owning a mix—so whenever I want crisp details or rich blending, I’m covered.
Paper and Tools
The paper choice influences everything. You want a surface with enough tooth (texture) to hold multiple layers of color but not too rough that it breaks your pencil tips or leaves too grainy a finish. A heavyweight, acid-free colored pencil paper or Bristol board designed for dry media generally works well. Papers with a slight texture create a nice grip, which helps when layering colors, but if you prefer a super smooth finish, smoother Bristol papers can also do the trick.
Other tools you might want: a high-quality eraser—not a gum eraser—work better here for lifting colored pencils without damaging the paper. Kneaded erasers are great for lightening areas gradually. And the sharpener? A good handheld or mechanical sharpener that sharpens evenly is worth the investment. Dull pencils mean less control, which you don’t really want when drawing the thin, curling shapes of a sea serpent’s body.
Sometimes, even unexpected helpers like blending stumps or colorless blenders can add that extra depth to scales or waves. It’s okay to experiment and find what fits your style best, especially when dealing with mythical creatures that are partly imagination, partly folklore.
Sketching Your Sea Serpent
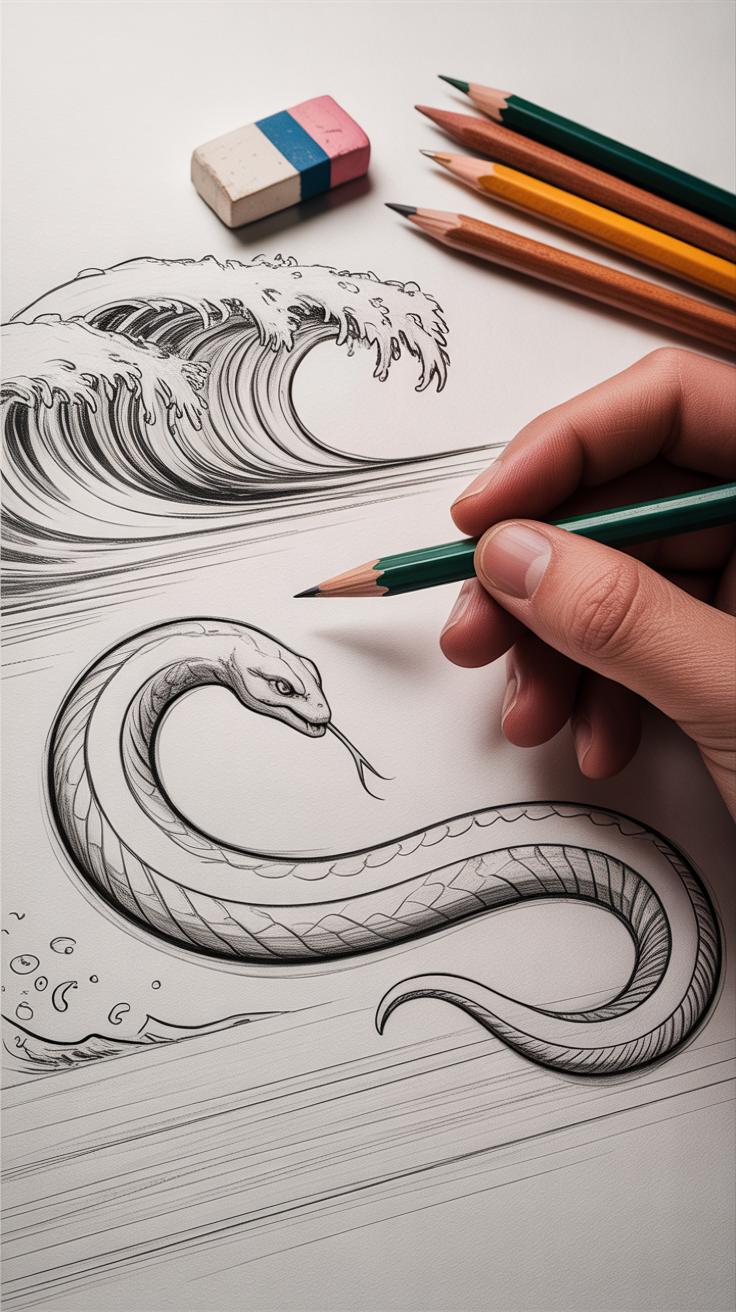

Starting your sea serpent sketch can feel a bit daunting. You want it to look alive but are unsure where to begin. It helps to break the creature down into basic shapes first—think circles, ovals, and gentle curves. These form the skeleton of your serpent’s body and decide its pose without getting tangled in details right away.
For example, you might use an elongated oval for the torso and a series of smaller circles or ovals connected by flowing lines for the neck and tail. These shapes don’t have to be perfect—actually, slight irregularities often give the sketch more character. Ask yourself: Is the serpent rising from the water? Coiling? Or maybe lurking beneath the waves? Position those shapes to capture that mood.
Once you’re comfortable with the basic outline, it’s time to refine the sketch. Start by sketching the head and facial features—eyes, fierce or mysterious, define the personality here. The jawline can be subtle or angular depending on your vision. Add early details like the nostrils or hints of teeth if you want a hint of menace.
Scales can be tricky and, frankly, time-consuming. Rather than drawing every single scale, mark scale patterns lightly to indicate rough texture. Focus on areas where scales might catch light or curve around the body, such as near joints or the crest of a spine. Scales near the head and tail can be smaller and more delicate, while those on the body can be larger and overlapping.
Don’t let this step get too overwhelming. The idea is to build a foundation—you can always adjust proportions and details as you move forward. After all, the sea serpent is a mythical creature; you have some freedom to decide how it really looks. What kind of expression would your sea serpent have? Fierce, calm, or perhaps almost ghost-like? Let these questions guide your choices with shapes and details.
Coloring Techniques for Realistic Effects
Bringing your sea serpent sketch to life means more than just filling spaces with color. It requires a certain patience with layering—building color slowly, bit by bit, to coax out depth and richness. Start with light, gentle strokes using your pencils. Don’t rush to fully saturate an area. Instead, let multiple layers gradually intensify the hues.
For example, if your serpent has greenish scales, start with a pale green base. Then add darker greens, maybe hints of blue or even subtle yellows where light might catch. This slow accumulation prevents colors from looking flat or dull. You might find some areas needing more pressure, others less. It’s a fine balance, often found through trial.
Blending plays a crucial role once you have your layers down. Use a lighter pencil or even a blending stump to soften harsh transitions between shades. The trick isn’t always smoothing everything out completely. Sometimes, leaving a bit of texture can mimic the rough, scaly skin of the beast.
Shading completes the illusion of form. Think about where your light source is and add shadows accordingly. Darken creases, undersides of scales, or places where overlaps occur. These shadows don’t have to be pitch black—rather, subtle gradations will do. Curiously, sometimes too much blending removes the “life” from the texture, so approach it with care.
- Start gently with light layers and build up colors slowly.
- Use complementary colors in layers to add complexity.
- Blend softly but retain textural hints; don’t over-smooth.
- Shadows should define form without overwhelming details.
Ultimately, you’ll find your own rhythm between layering and blending. Maybe try different pencils or papers to see how they respond. Where do you think your sea serpent needs more depth? Are certain scales catching the light differently? These questions guide your shading choices and really push the piece beyond mere coloring.
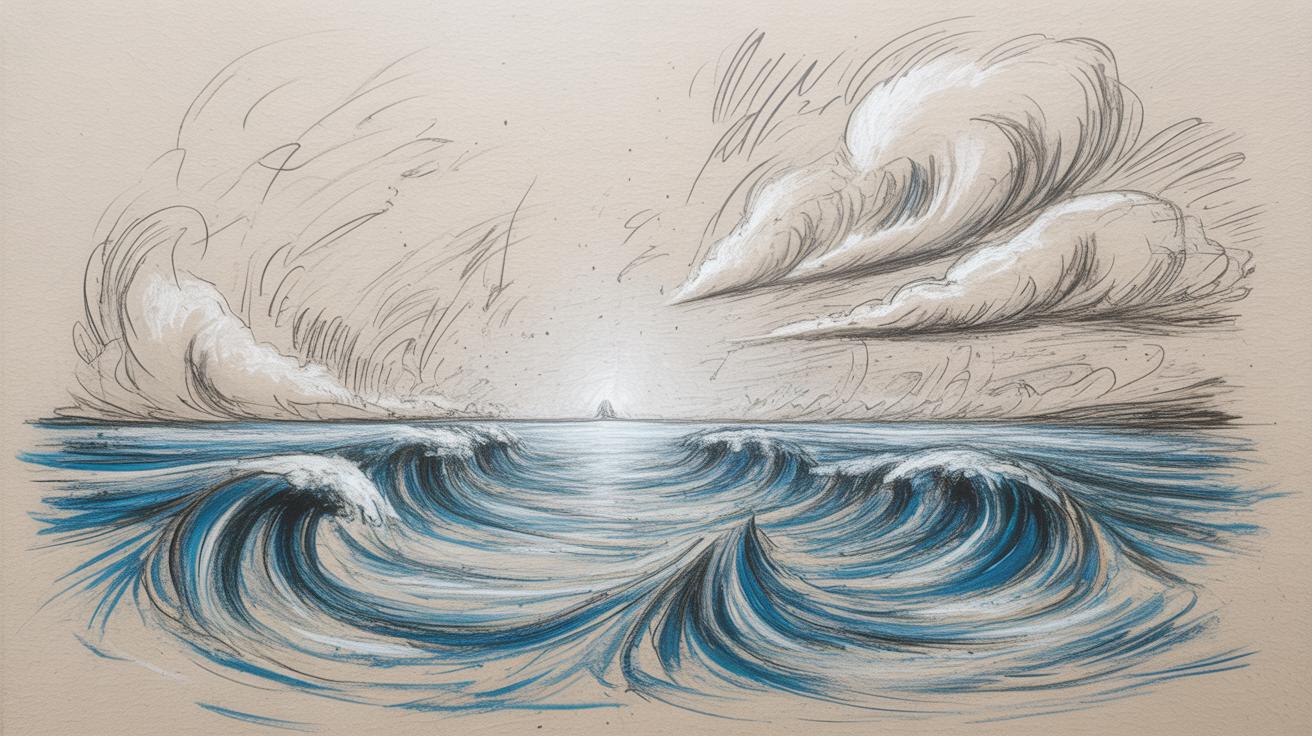
Adding Water and Ocean Effects
Bringing the sea serpent into its watery home means capturing the nature of water itself. With color pencils, water can appear tricky—it’s transparent but reflective, fluid but solid on the page. Start by layering subtle blues and greens, building up soft gradients that hint at depth yet don’t overpower the serpent’s form. Try not to overwork the surface; instead, use light, uneven strokes to suggest ripples and faint currents. Sometimes, less pressure creates that natural-looking, flowing feel.
To make waves feel alive, work with curved lines around the serpent’s body—these shapes imply movement without spelling everything out. Darker shades beneath the serpent can suggest shadows or submerged parts, adding weight to the creature as if it truly disturbs the ocean. Glimpses of white or very pale blue give the illusion of foam and breaking water, but avoid rigid shapes—they rarely look natural.
Reflecting light on water calls for sharp contrasts—bright highlights next to darker tones—but placement matters. Imagine where the light hits first. You might blend a little yellow or pale orange where the sun kisses the waves. You could try lifting pigment gently with a blending stump or eraser to mimic flickers on the surface. These methods aren’t exact science; they need a bit of feeling out and trial.
Movement is key to suggesting that the serpent isn’t just still. Overlapping strokes and varying pressure can give waves energy. Maybe the serpent’s tail cuts through the water in one spot, while gentle ripples spread elsewhere, telling a story of motion. Don’t be afraid to exaggerate some parts—the sense of flow often beats accuracy when it comes to making your image compelling.
Final Touches and Enhancements
Highlights and Details
At this stage, your sea serpent begins to take on a life of its own. Small highlights can really push the image beyond flatness. Think about where light naturally hits the creature’s scales—maybe along the ridge of its back or around the eyes. Use a sharp white pencil or a light cream shade to add tiny dots or thin lines that suggest moisture or shimmer.
Don’t overdo it, though—too many highlights can make the drawing look unnatural. Try to be selective. Sometimes less is more. Perhaps just a few scattered reflections will make those textured scales seem wet or slippery, without flattening the depth you’ve carefully built.
Also, focus on the serpent’s eyes and teeth. A crisp, clean white highlight in the pupil or a glint on the sharp fangs can bring out a sense of realism and intensity that grabs attention.
Cleaning Up
After you’ve laid down highlights, take a moment to clean the workspace—erasing stray marks here and there sharpens the overall presentation. Use a fine-tip eraser or a precision kneaded eraser to gently remove smudges and unwanted pencil dust. You might find lingering shadows from early sketch lines or little smears troubling your composition.
Refining your lines is equally crucial. Go back with a sharp colored pencil—matching the base colors—to reshape any fuzzy edges or blurred outlines. Sometimes, a slightly sharper contour can improve the perception of depth or make certain features, like the serpent’s curling tail or fins, stand out better.
It’s almost meditative, really—the process of cleaning and finalizing. You may notice new flaws or ideas pop up during this step. That’s okay. The artwork evolves even in these final moments. Give yourself permission to tweak a bit more if something feels off. After all, these last touches can transform a good drawing into one that feels truly alive.
Sharing and Preserving Your Artwork
Protecting Your Drawing
Keeping your color pencil piece safe can feel a bit tricky, especially since those pigments sit on the surface rather than soaking in. One simple step is to use a fixative spray, but be cautious—it can change how the colors look if overapplied, so test it first on a scrap paper if you can. Storing your artwork flat, away from direct sunlight and humidity, also goes a long way. You might want to place a clean sheet of glassine paper over it or keep it inside a portfolio folder. I once found that even the simple act of framing under glass made a huge difference in preserving the vibrancy.
Remember that any surface abrasion is your enemy. Avoid touching the drawing directly with bare hands; skin oils can dull your work or even attract dust.
Showcasing Your Work
When it comes to sharing, capturing your sea serpent art digitally needs some care. Natural light near a window usually works best. Try to photograph at an angle to reduce glare, though that can sometimes flatten the texture. People often overlook how texture plays into color pencil art, but it adds life, especially with something as scaly or slimy as a sea serpent.
For physical displays, framing offers neat protection and makes your work stand out. Choosing a mat that complements the colors of your serpent can guide the viewer’s eye right where you want it. When sharing online, consider posting the high-res photo alongside close-ups of details like eyes, fins, or scales. Communities and friends often appreciate seeing the effort behind the strokes—you might be surprised at the feedback or even inspiration it sparks in others.
Conclusions
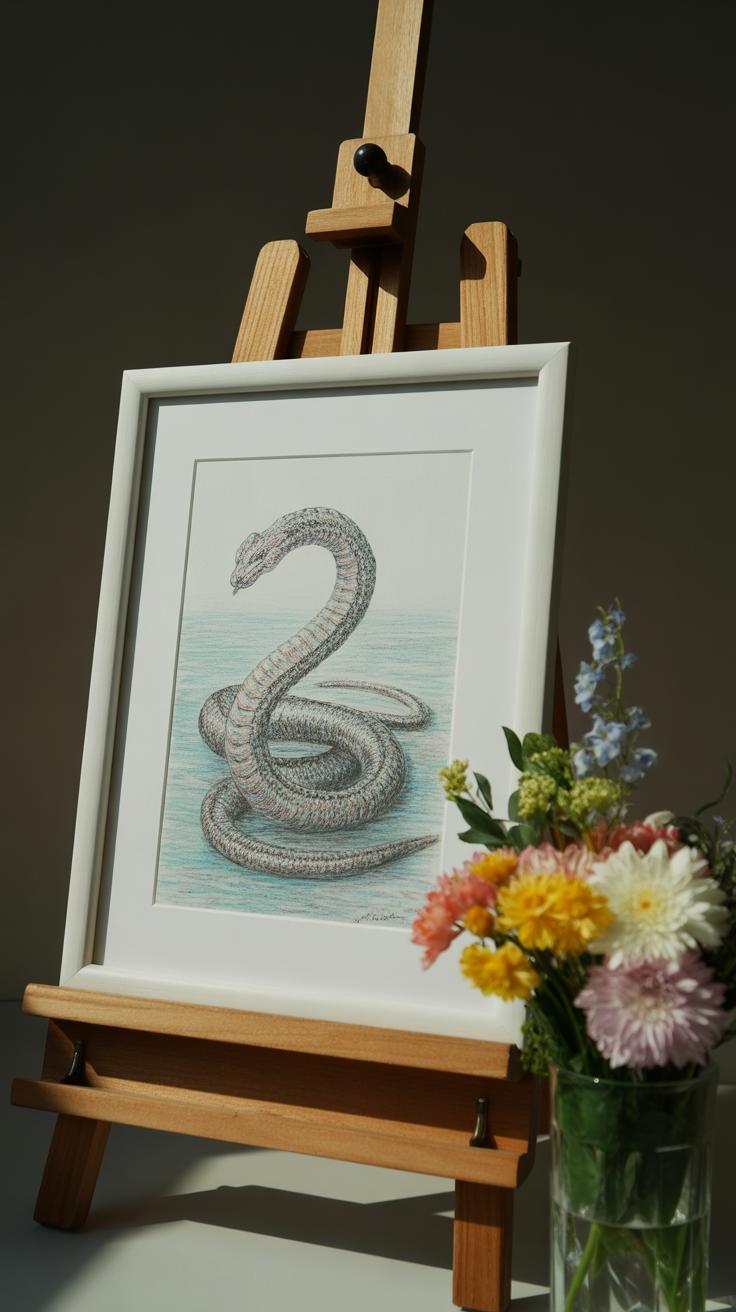
Creating a color pencil artwork of the sea serpent connects you to centuries of mythology and storytelling. Understanding the background of the sea serpent adds depth to your art and makes your depiction more meaningful. Through careful attention to details such as scales, colors, and the sea environment, your drawing will capture the essence of the myth.
Your artistic journey does not have to stop here. Experiment with different color pencil techniques and study other sea creatures for inspiration. The legendary sea serpent can be a starting point to explore your creativity and improve your skills. Now, you have the knowledge and tools to bring this ancient myth to life in your own colorful artwork.


