Fundamental Watercolor Techniques for Every Artist
Watercolor painting has a long history and unique qualities that make it special. It involves pigments suspended in a water-based solution and applied mainly on watercolor paper. This type of painting offers transparency and vibrant colors that can change with water amounts. Your understanding of watercolor techniques is crucial for creating effective and beautiful artwork. Knowing how to manipulate pigments, water, and paper opens up many possibilities.
This article focuses on essential watercolor techniques every artist should know. It covers how to prepare your materials, control water and color, and use specific strokes. You will find practical instructions and tips to improve your skills. Whether you are a beginner or looking to refine your craft, these techniques form the foundation for solid watercolor painting. Developing these skills can help you express your vision clearly and beautifully.
Understanding Watercolor Materials
Watercolor materials shape the results you get in your paintings. Pigments come in many forms and qualities. Choosing the right paper and brushes plays a key role in how your art looks and feels on the page.
Watercolors use pigments suspended in a water-soluble binder. The pigment’s quality affects how vibrant and transparent your colors appear. Pigments vary by lightfastness, granulation, and staining ability. These traits influence how your work holds up over time and how it behaves on paper.

Watercolor paper needs to absorb water without buckling too much. It comes in weights and textures that change how paint flows and dries. Your choice affects blending, layering, and the final texture of your painting.
Brushes come in different shapes and hairs. The type of brush you use decides how easily you can paint fine details or broad washes. Your tools directly affect control and expression.
Investing in quality materials pays off. They give you better control and consistent results. Have you noticed how cheap paper tears or colors fade? Choosing well prepares you for success as you practice your skills.
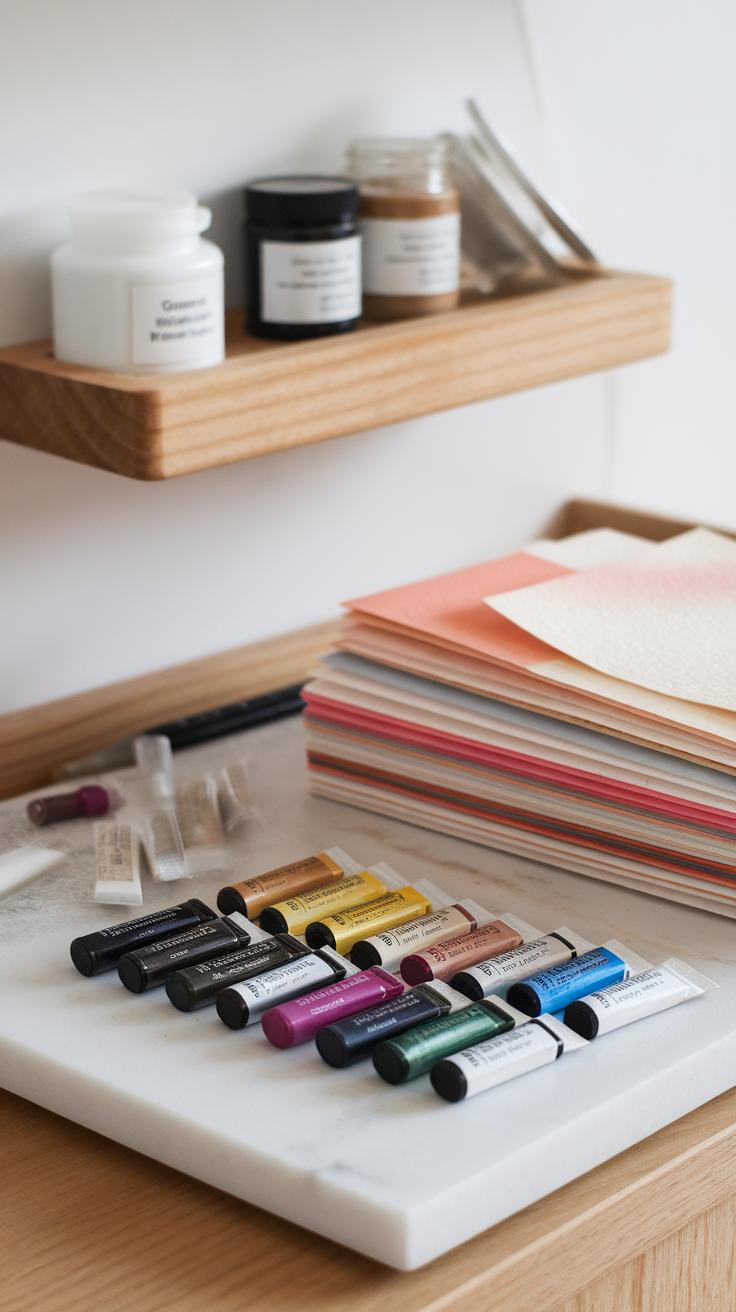
Types of Watercolors and Pigments
Watercolors come in two main grades: student and professional. Student-grade paints have fewer pigments and more fillers. This makes their colors less intense and less transparent. Professional-grade paints use pure pigments. They offer stronger color and better lightfastness to resist fading.
You’ll find watercolors in tubes or pans. Tube paints come fresh and moist. They offer intense color straight from the container. Pans have dried paint shaped in small wells. They need to be activated with water before use and dry faster during painting.

Choosing pigments affects how your colors work together. Some pigments are naturally transparent, letting light shine through. Others are opaque and cover underlying layers. Knowing pigment traits helps you predict your painting’s final look.
Which pigment qualities matter most to you? Transparency can create glow, while opacity offers solid coverage. Understanding these differences helps you pick paints that fit your style and projects.
Choosing the Right Paper and Brushes
Watercolor paper comes in three main textures: cold-pressed, hot-pressed, and rough. Cold-pressed paper has a slightly textured surface that holds water well. It suits most painting styles. Hot-pressed paper is smooth, ideal for fine detail work and illustration. Rough paper has a bumpy texture that creates interesting brush effects.
Paper weight matters too. Heavier paper (like 140 lb or higher) handles more water without warping. Lighter paper may wrinkle and limit your layering techniques.
Brushes differ by shape and hair type. Round brushes hold a pointed tip for lines and details. Flat brushes cover large areas and create sharp edges. Filbert brushes combine round and flat shapes for varied strokes.

Natural hairs like sable hold water and paint well but cost more. Synthetic brushes are affordable and durable but may not hold paint as long. Your brush choice affects stroke control and texture application. Do you prefer crisp lines or soft washes? Picking the right brush supports your preferred techniques.
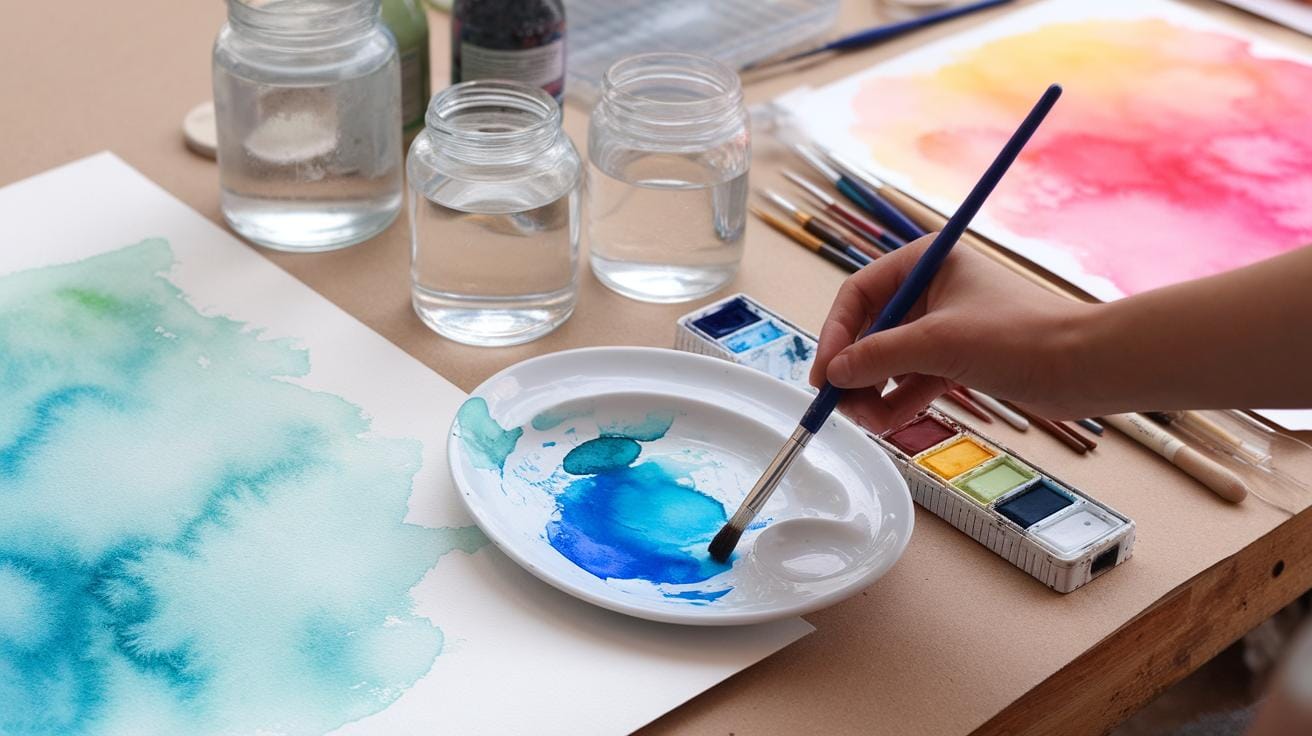
Preparing Your Workspace and Materials
Setting up your watercolor workspace is key to staying focused while painting. Choose a well-lit area, preferably near a window with natural light, to see colors clearly as you work. Arrange your materials within easy reach so you avoid interruptions during your creative flow.
Keep your brushes, water containers, and palettes organized to save time. Use separate jars for clean and dirty water to avoid muddy colors. Place your palette at a comfortable angle to mix colors easily without spilling.
Maintain your brushes during painting by rinsing them frequently and blotting on a cloth to control water amount. This keeps bristles shaped and ready for delicate strokes. Clean your brushes well after each session to preserve their lifespan.

How does your current setup affect your painting experience? Small changes in your workspace can improve comfort and make every brushstroke count.
Organizing Your Supplies
Organize your brushes by size and type to find the right one quickly. Use a cup or brush holder that keeps bristles upright and safe. Place water containers close but not above your palette to avoid accidental spills.
Keep a small cloth or paper towel nearby to dry brushes quickly between color changes. Arrange your palette so you can mix colors in an order that makes sense to you, such as primaries on one side and mixed colors on the other.
Try dedicating a space for finished washes and drying art to prevent smudges. This simple order saves interruptions and lets you focus on painting rather than hunting for tools or cleaning messes.
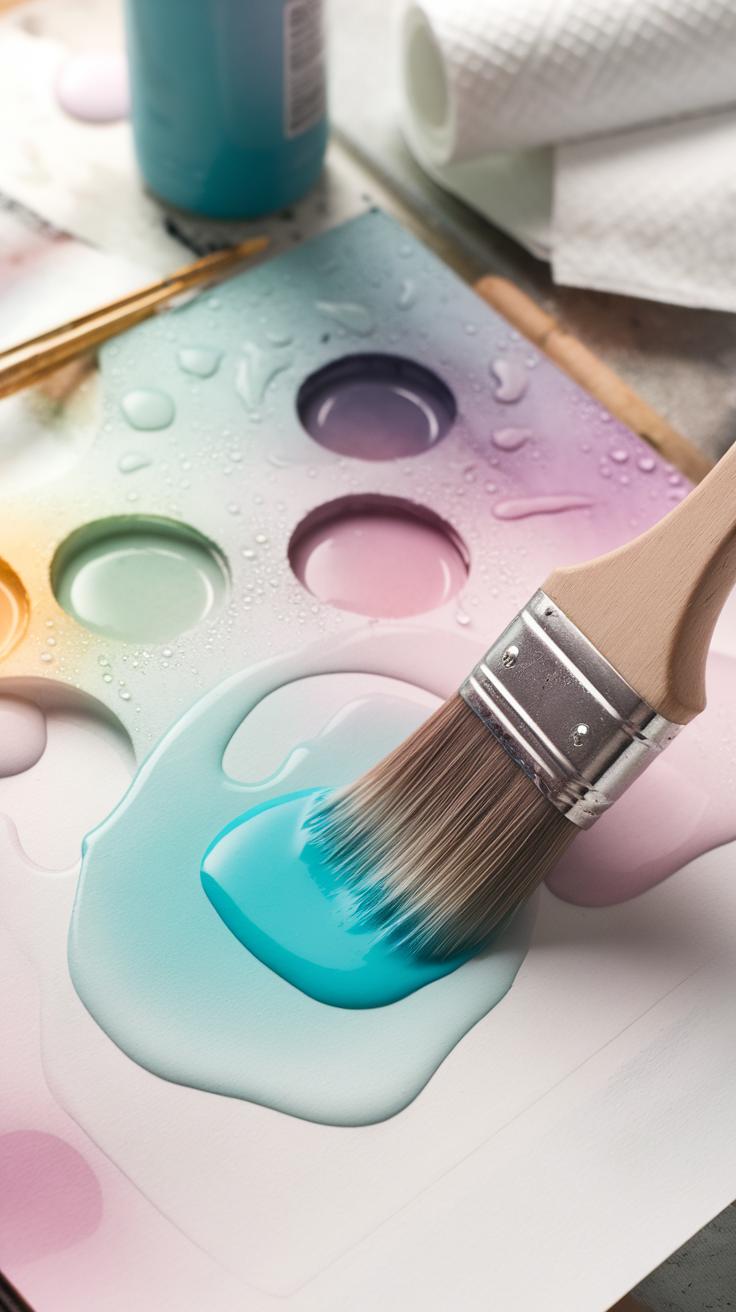
Mixing Colors Properly
Start with clean water and a dry palette for clear color mixing. Place primary colors—red, blue, and yellow—on your palette with enough space between them. This helps keep colors bright when mixing.

Mix secondary colors like green, orange, and purple by blending two primaries in small amounts first. Adjust ratios slowly to avoid muddy tones. Rinse your brush thoroughly when switching between colors to maintain purity.
Avoid mixing all colors together on your palette. Instead, mix small batches and test on scrap paper. Notice how adding water affects the intensity. How often do you stop to check your mixed color before applying it?
Controlling Water and Paint Flow
Managing the amount of water and paint on your brush and paper plays a key role in watercolor art. Water affects how transparent your colors appear. More water results in lighter, see-through washes, while less water produces deeper, richer hues.
Water also controls the softness or sharpness of edges. When paint meets a lot of water on paper, it blooms and spreads, creating soft, blurred edges. Using less water or painting on dry paper keeps edges clear and defined.

Water influences how colors blend. Wet surfaces allow paints to merge smoothly, forming natural gradients. On drier surfaces, colors stay more separate, letting you build layers step-by-step.
Ask yourself: How much water does my brush hold right now? Is my paper wet or dry? These questions will guide your control over flow and effects. Practicing this balance will help you turn your ideas into precise or fluid watercolor expressions.
Wet-on-Wet Technique
Applying wet paint on wet paper creates soft edges and smooth color transitions. Your paint will flow freely, blending seamlessly as colors meet. This technique suits backgrounds, skies, and organic shapes where hard edges are unnecessary.
You can start by dampening your paper with a clean brush or spray bottle. Then add paint while the surface is still wet. Watch how the colors mingle without fully mixing, creating delicate gradients and gentle shifts.
Try this when you want a loose, dreamy feel. It saves time since you work quickly without waiting for drying. The wet-on-wet technique allows spontaneity, but requires some control to avoid muddy colors. Have you experimented with how much water produces the softest transitions without losing vibrancy?
Wet-on-Dry Technique

Applying wet paint on dry paper gives sharp edges and precise shapes. The paint won’t spread as much, so your brushstroke stays defined. This method is great for adding details, patterns, or layering colors.
Because the paper is dry, each new layer can be added independently without blending instantly. It lets you build complexity and depth by painting over previous washes after they dry.
Use wet-on-dry for subjects needing structure and clarity, like buildings, facial features, or fine textures. Ask yourself: How crisp do I want this line? Would a sharper edge enhance the form? Learning to switch between wet-on-wet and wet-on-dry gives you control over both softness and precision in your painting.
Creating Texture and Effects
Texture adds depth and interest to your watercolor paintings. You can change how paint looks by applying different techniques that alter the surface and flow of your colors. Dry brushing uses a brush with very little water to create rough, broken strokes. This makes it perfect for fine details like tree bark or blades of grass.

Lifting paint means removing color while it’s still wet or even when dried. You can do this by blotting with a dry brush, sponge, or tissue to reveal lighter areas below. This technique helps create highlights or correct mistakes. Another way to add texture is by sprinkling salt onto wet paint. Salt absorbs water and pigment, producing natural speckled patterns that mimic stone, snow, or grainy surfaces.
Try using each method separately to see how they change your painting. Which textures grab your attention more? How could combining them enhance the mood of your artwork?
Dry Brush Technique
Dry brushing occurs when you load your brush with pigment but use almost no water. This allows the brush to skip across the paper, leaving rough, streaky marks. You must use a stiff-bristled brush or a flat brush for best results.
This technique is useful for painting hard textures like wooden surfaces or coarse grass. The uneven distribution of pigment replicates how these materials catch light in real life. You can build layers of dry brush strokes to intensify the effect or create shadows.
Practice by dragging a dry brush over a textured or rough paper surface. Notice how the paint clings to raised parts of the paper. What objects in your subject would benefit from this effect? Dry brushing can bring more realism to your work with small, controlled strokes.
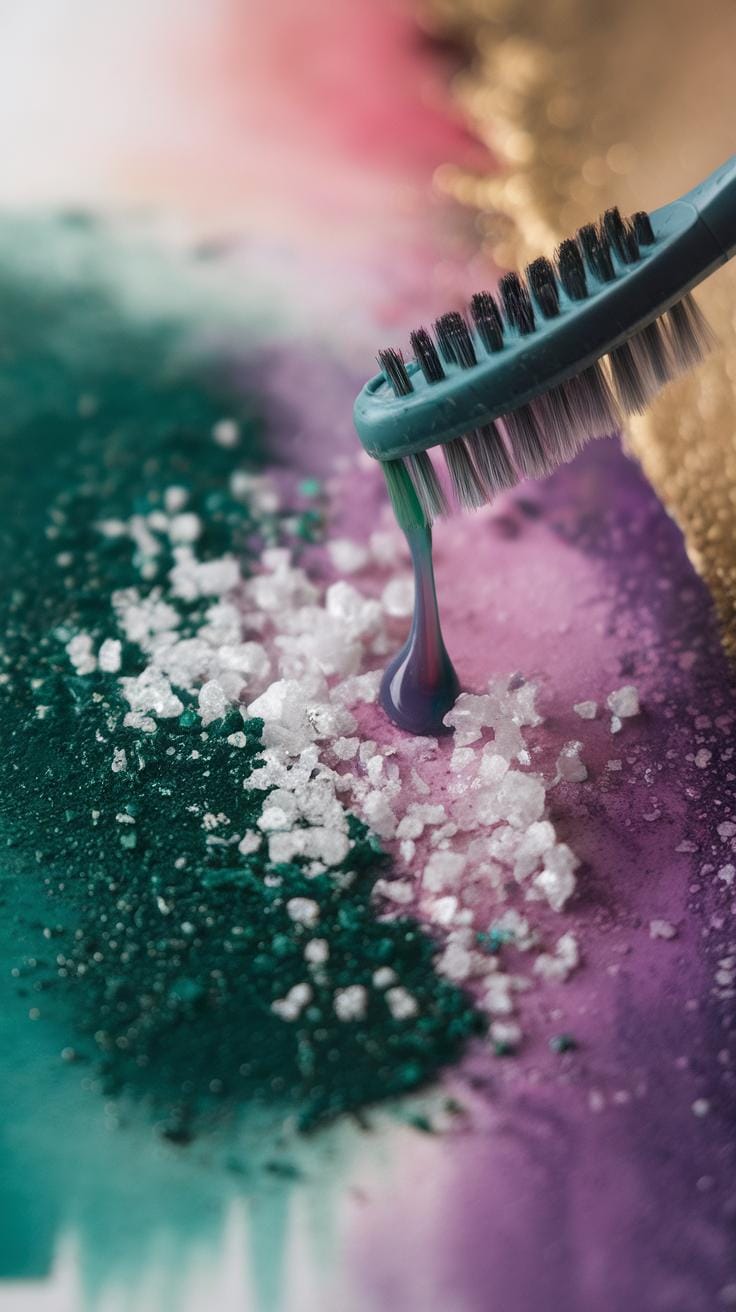
Lifting and Using Salt
Lifting paint involves removing some pigment from your paper after applying paint. Use a clean, damp brush or a paper towel to gently lift color. This technique works well for creating subtle highlights or fixing areas that are too dark.
Salt adds a unique texture by soaking up water and pigment unevenly on a wet surface. Sprinkle coarse or table salt while paint is still wet. As the salt absorbs moisture, it leaves behind light, speckled spots that look natural and random.
Both techniques add dimension without repainting. Experiment lifting with different brush sizes or pressure to see how much pigment you can remove. Try different types and amounts of salt to find the look you like. How could these effects improve the overall feel of your next painting?
Layering and Glazing Techniques
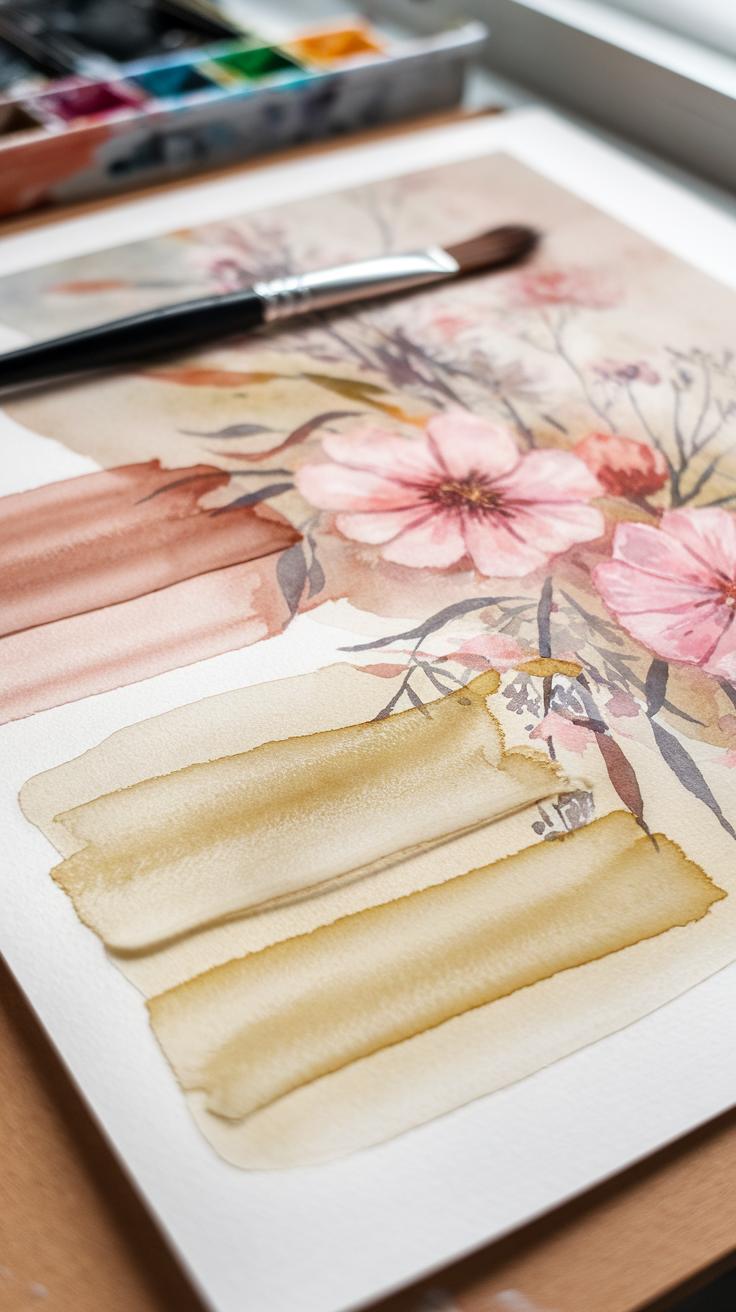
Layering in watercolor means building depth by applying several transparent washes one on top of another. Each layer adds richness and detail without covering what’s underneath. This technique lets you shape your painting gradually, creating a sense of volume and light.
Glazing uses thin, transparent color layers to adjust what’s already painted. Adding a glaze can change the tone or color temperature without losing the clarity of earlier layers. This keeps colors bright and avoids mixing them too much on your paper.
When you glaze over dry paint, you control the intensity and mood of your work. Have you tried adjusting a shadow just by adding a subtle glaze? It can change a flat spot into a lively one, adding complexity with very little effort.
Applying Transparent Layers
Start by letting your first wash dry completely before adding more layers. This drying step prevents colors from blending unintentionally. Use thin washes of paint, watered down enough to remain transparent.
Apply each layer carefully and wait for it to dry before the next one. This process helps you build tone and shadow gradually, giving your painting depth without harsh edges.
Think of these layers as steps in a recipe. Each one should enhance what came before without overpowering it. Have you noticed how adding a layer can make colors glow more than a single thick coat?
Avoiding Color Mud
Color mud happens when transparent colors mix on the paper and lose their brightness. To avoid this, keep your brush clean between layers. Also, wait until the previous wash is fully dry before applying the next.
Mix your paint with care, limiting the number of colors mixed at once. Too many pigments combined can produce dull tones. Stick to simple mixes for clearer results.
Managing drying time is key. Are you rushing to add the next layer before the last one is dry? Patience here protects your painting’s brightness and clarity. Clear colors come from careful layering and good timing.
Mastering Brush Strokes and Control

Using different brush strokes helps you create shapes and forms that bring your watercolor paintings to life. Each stroke holds meaning, whether it builds texture or defines an outline. Learning how to control your brush allows you to switch easily between smooth curves and sharp lines, giving your artwork precision and flow.
Try to think of your brush as an extension of your hand. How much pressure you apply changes the stroke’s thickness, and the angle affects its direction. Practicing different strokes lets you use this knowledge to depict petals, leaves, or the softness of a cloud. Focus on deliberate, confident movements rather than rushing through your lines.
What forms do you want to capture in your painting? Using brush strokes intentionally can help make those shapes clearer, more natural, and expressive. Control isn’t about limiting creativity; it’s about shaping your vision clearly on paper. With steady practice, you’ll gain control without losing fluidity, balancing precision with movement.
Basic Brush Strokes
Start by mastering a few key strokes that form the foundation of watercolor painting. Straight lines are vital for edges and structural elements. Curves help suggest roundness and flow, perfect for drawing waves or rolling hills. Dots can add texture or depict highlights like dew drops or stars.
Each stroke serves a purpose. For example, a quick, wide curve can suggest a leaf, while a steady straight line may represent a tree trunk. Practicing these basic strokes repeatedly builds muscle memory, so you can use them freely in your compositions.
Try mixing strokes in one area. What does a combination of dots and curves communicate? Which stroke works best to show shadow without harsh lines? Understanding these basic moves gives you tools to shape your ideas effectively.
Improving Brush Control
Improving your brush control starts with steadying your hand. Place your forearm or pinky lightly on the paper for better stability when making fine lines. Slow down your movements, focusing on smooth transitions between strokes. Practice pressure control by pressing down firmly for thick lines and gently for thin ones.
Try simple exercises like drawing parallel lines, circles, or swirls without lifting your brush. Use water and pigment to experiment with how pressure changes color intensity and stroke weight. This builds your ability to vary line qualities while maintaining fluency.
Ask yourself: How does changing speed or angle affect the stroke’s character? When does a shaky line add interest, and when does it distract? Constant practice and mindful observation improve your hand’s sensitivity and control, key steps toward mastering expressive watercolor brushwork.
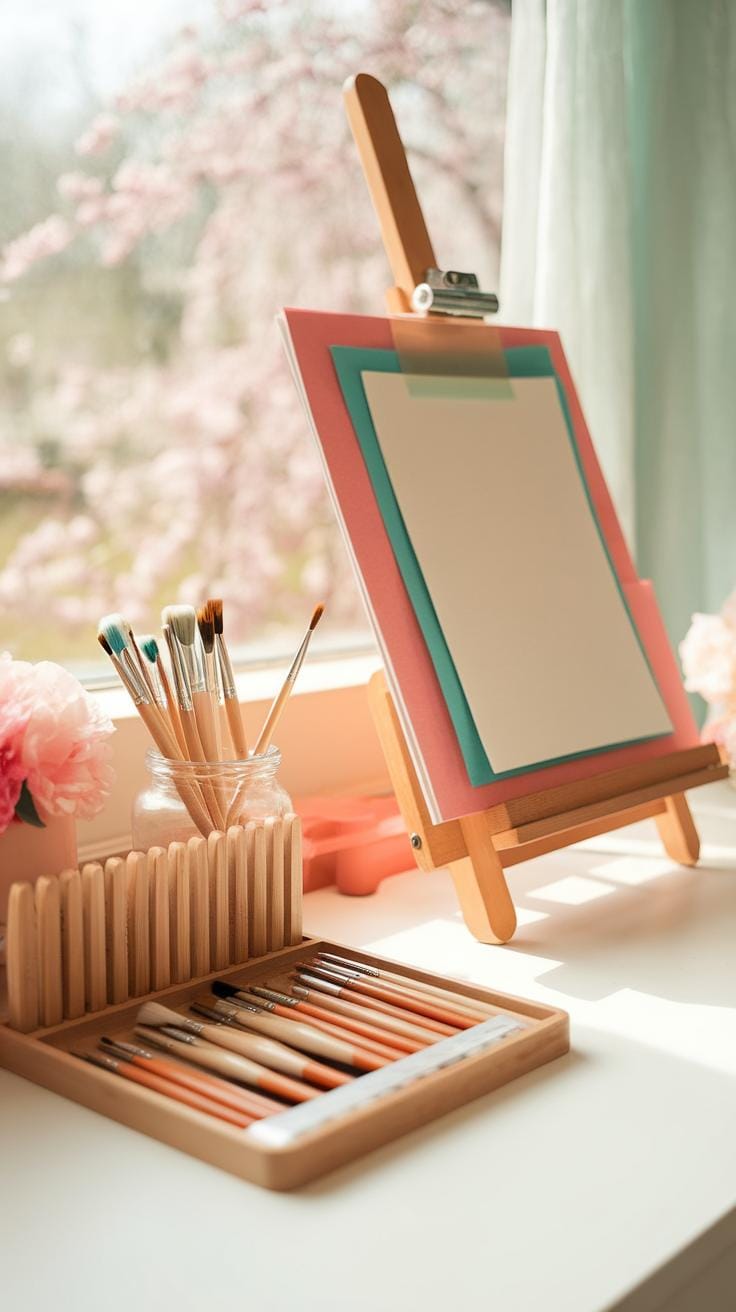
Planning Your Composition
Watercolor paintings depend heavily on solid planning. When you plan your composition, you set a clear path for your work, reducing guesswork. Starting with preliminary sketches helps you arrange shapes and forms on your paper. These sketches let you test ideas quickly without wasting paint or time.
Value studies show you how light and dark areas will balance in your painting. This planning avoids surprises during coloring and ensures your image has depth. Color tests work like experiments. Mixing small amounts of paint helps you pick the right hues before committing to large areas on your paper.
Have you ever faced frustration from colors not matching or parts of your painting feeling off? Taking time to sketch and test can solve these problems early. Planning your composition is not a step to skip; it is a practical way to organize your artwork and improve your final piece.
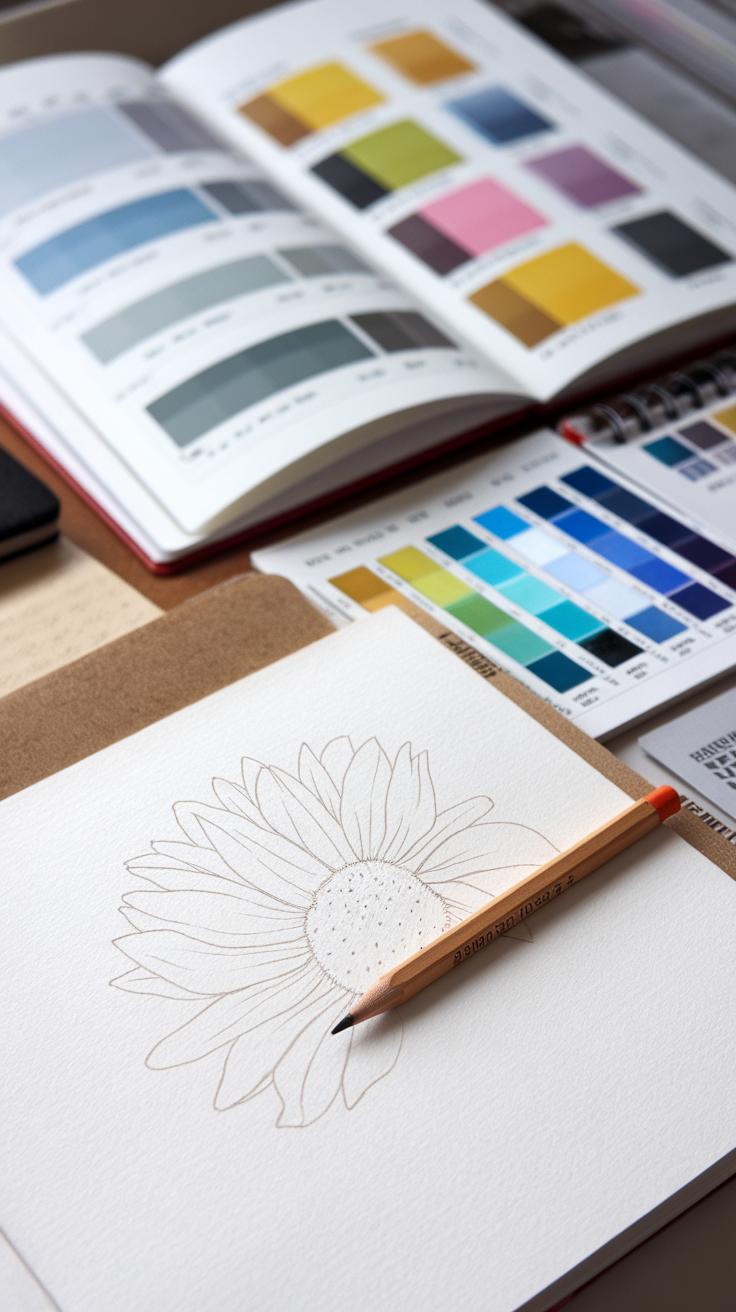
Sketching and Layout
Light pencil sketches are your roadmap. Use a hard pencil to draw faint lines that mark where objects go. These lines won’t block the transparent nature of watercolor, so your colors stay clear and bright.
Focus on basic shapes and proportions. Avoid heavy strokes that show through paint. Keeping sketches simple lets you adjust layouts easily. You control your space without fighting with the paper or paint.
Think of your sketch as a guide rather than the finished drawing. It shapes your painting’s foundation while leaving room for the fluid effects unique to watercolor. Are your sketches clear enough to direct your brush but light enough to fade into the final work?
Testing Values and Colors
Mixing small test patches before painting helps you decide on your palette. Create swatches to see if colors work well together. This step prevents muddy colors or harsh contrasts in your final piece.
Tonal studies are small grayscale drawings. They show where your lights and darks sit, making sure your painting won’t be too flat or too busy. These tests reveal the best contrast level for your subject.
Ask yourself which colors bring out the mood you want. Does your palette create harmony or tension? Testing values and colors stops surprises mid-painting and gives you confidence to work boldly and freely once you start applying your brush to the paper.
Practicing and Improving Your Watercolor Skills
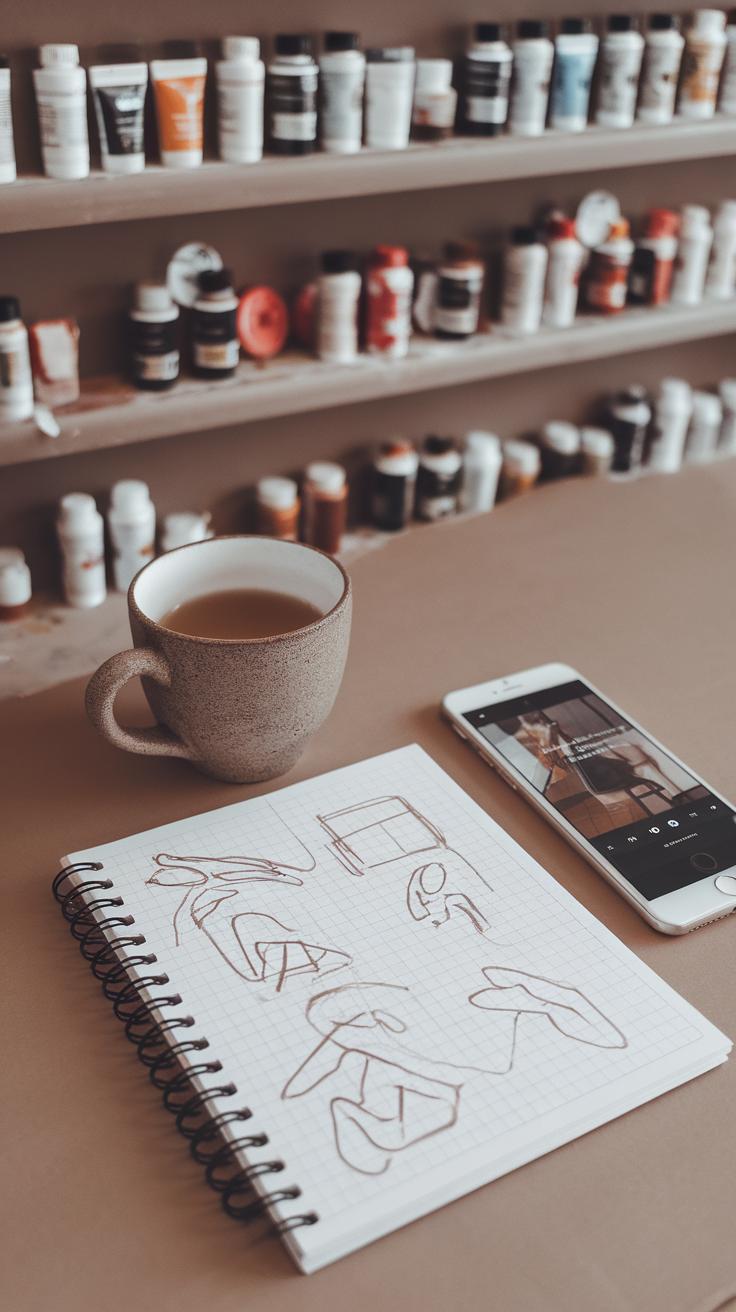
You improve your watercolor skills most by painting often and trying new things. Set a schedule that fits your life—whether it’s a few minutes daily or longer sessions once a week. Regular practice keeps your hand steady and your eye sharp.
Try challenging yourself with different subjects or materials. Use varied paper types, brushes, and paints to see how each changes your results. Testing new tools teaches flexibility and sparks creativity.
To overcome creative blocks, try simple exercises like painting a single color shape each day or copying a small part of a favorite painting. These focused tasks build confidence and keep you engaged.
Ask yourself what excites you about watercolor. Are you drawn to soft washes or detailed lines? Use your practice time to explore and answer these questions. Experimentation fuels growth and makes your art more personal.
Routine Practice Ideas
Choose a theme or technique for each week to guide your practice. For example, spend a week mastering wet-on-wet washes, then switch to dry brush techniques the next. This focus sharpens specific skills and builds variety.
Challenge yourself with daily prompts, such as painting a leaf, a simple portrait, or a small landscape. Even quick studies help improve observation and brush control. You can track progress by keeping a practice journal or photo log.
Try timed exercises to work faster and freer. Set a 10-minute limit to paint a small subject. This pushes you to capture essentials without overthinking.
Exploring Different Styles
Experiment with styles ranging from realism to abstraction to find what fits your voice. Painting realistic scenes sharpens detail work and color mixing. Abstract art loosens structure and encourages bold brushstrokes.
Copy works from different artists to understand their techniques. Then apply what you learn in your own style. Notice which approaches feel natural or enjoyable. Your favorite style will guide your creative expression.
Ask yourself, how does each style challenge you? Trying new styles often reveals hidden strengths and broadens your artistic range. This exploration makes your painting richer and more rewarding.
Conclusions
Mastering fundamental watercolor techniques will help you create more controlled and expressive paintings. Techniques like wet-on-wet or dry brushing allow for different effects that add depth and interest. Always think about how much water and pigment you use to make your desired look. Practicing these methods regularly will build confidence and skill in handling the medium.
Your success in watercolor depends on understanding and applying these basic techniques. Experiment often and observe how your materials react. This knowledge lets you solve problems and innovate in your work. Use these skills to capture your best ideas and communicate them fully in your art.


