
Introduction
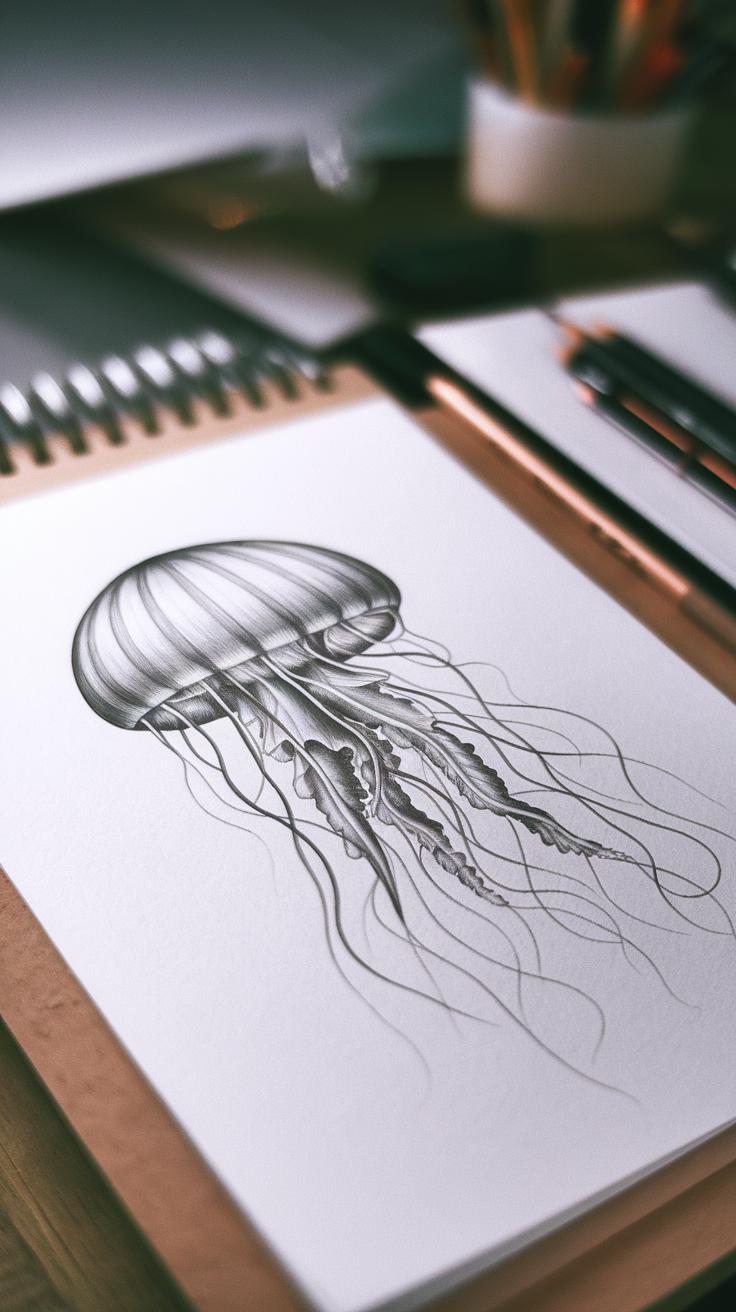
Jellyfish have fascinated people for centuries with their translucent bodies and graceful movements. Their unique shape and delicate features make them an interesting subject for artists. By learning how to sketch jellyfish, you can capture their beauty on paper. This article provides insight into effective techniques for creating detailed jellyfish drawings, suitable for artists of all experience levels.
Sketching allows you to break down complex forms into manageable parts, and jellyfish offer a perfect example. You will explore steps to enhance your drawing skills, including line work, shading, and adding texture. This guide will encourage you to observe jellyfish closely and translate their natural elegance onto your canvas using accessible methods.
Understanding Jellyfish Anatomy

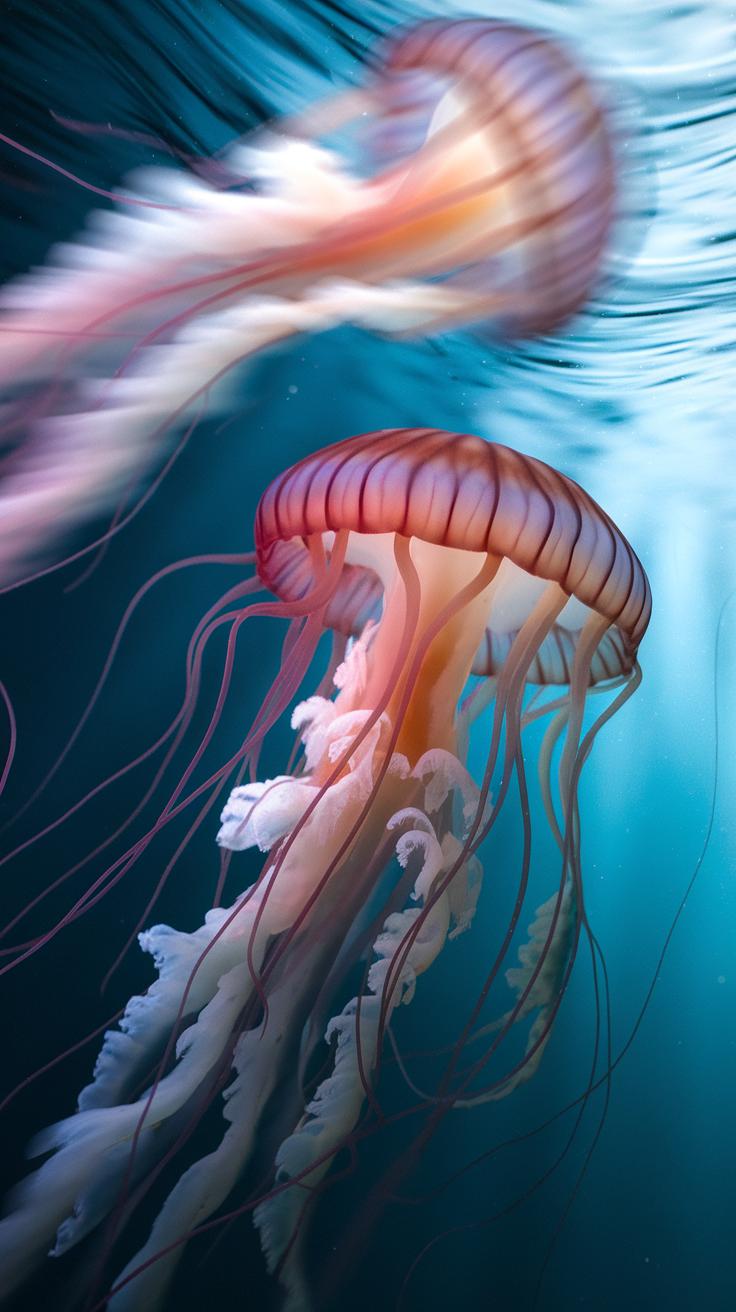
You must observe the jellyfish’s basic structure to capture its unique form. The bell, shaped like a dome or umbrella, forms the main body. It houses the mesoglea, a jelly-like substance that gives firmness without bones. From this bell, long tentacles flow downward. These tentacles vary in length and thickness, often trailing to catch prey.
The translucent quality of jellyfish is key to their delicate appearance. Their bodies partly allow light to pass through, creating soft, glowing effects. When you draw, consider how light interacts with these clear layers. Reflecting this translucence will make your sketch feel more lifelike and three-dimensional.

Watch how the bell and tentacles relate in size and flow. Their connection is smooth and seamless, helping the jellyfish move gracefully. How can you show these subtle transitions in your sketch? Focus on gentle curves and soft edges for a natural look.
Jellyfish Body Parts to Observe
The bell’s shape changes among species; some have smooth, round bells, while others display frilled or scalloped edges. Keep an eye on these variations—they influence the jellyfish’s character in your drawing. The mesoglea sits right beneath the surface of the bell and acts like a natural cushion, giving the jellyfish its squishy form.
When sketching, try to capture how light passes through the bell due to the mesoglea’s gel-like texture. It causes subtle changes in color tones and soft highlights. How can you represent the bell’s transparency without making it look flat? Use light shading and avoid harsh lines.
The tentacles connect directly to the bell rim. Their curves often mirror the bell’s shape but move more fluidly. Notice how they wave and overlap. This fluid connection helps you plan the flow and dynamic lines in your sketch.
Movement and Form
Jellyfish move with pulsating contractions of their bell. These rhythmic contractions push water to propel them forward. During each pulse, the bell changes shape—compressing and expanding like a gentle wave.
Capturing these movements in your drawing brings energy and realism. Try sketching multiple layers of a jellyfish’s bell at different pulse stages. This technique suggests motion and shows form changes over time.

Observe tentacles as they respond to movement. They don’t remain stiff but drift with water currents, bending and curling. Including this natural flow makes your sketch feel alive. How will you show this delicate motion with simple lines? Using loose, light strokes can help evoke softness and dynamism.
Selecting Your Sketching Materials

Your choice of materials shapes how well you capture the delicate form of a jellyfish. Using pencils with a range of hardness will help you create both fine lines and soft shading that suit the jellyfish’s translucent body. A common set includes pencils from 2H to 6B. The harder pencils like 2H are perfect for preliminary outlines, while softer ones like 4B or 6B help build depth and shadow.
Choosing the right paper affects your ability to show the jellyfish’s subtle textures. Smooth sketch pads support clean lines, while slightly textured paper allows better control for shading and blending. A medium-weight paper, around 80-100lb, balances durability with ease of use.
Select erasers that aid precision. A kneaded eraser lets you lift graphite gently without damaging the paper. A regular white vinyl eraser works well for stronger corrections. Having both types available will improve your control over light and shadow.
Basic Drawing Tools

Graphite pencils come in various grades to help you with different sketching tasks. Light pencils like 2H produce faint lines for initial shapes, while soft pencils like 6B create bold marks for details and shading. Try using a few grades to see which fits your style best. Mechanical pencils offer consistent lines but less shading flexibility.
Sketch pads designed specifically for graphite are best because they resist smudging and hold your marks clearly. Paper with a slight tooth works well for blending and layering tones. You might find pads labeled “drawing” or “sketching” at your local art store for a good balance of texture and weight.
For removing mistakes and adjusting highlights, keep a kneaded eraser and a white vinyl eraser within reach. Kneaded erasers deform to erase small areas without harsh scratching, keeping your jellyfish’s delicate light areas intact.
Optional Add-ons
Blending stumps help smooth out pencil strokes and create soft gradients in your jellyfish sketches. Use them to blur shadows or create the smooth bodies and flowing tentacles you want. They can be shaped for wide or narrow blending, adding subtleties to your shading.
Charcoal pencils offer darker, richer blacks that heighten contrast. They can be tricky but add texture and depth when paired with graphite. If you want to explore shadows and highlights more boldly, try charcoal alongside graphite.

Colored pencils can bring an extra dimension to your sketches. Use soft pastels or watercolor pencils to add transparent layers that echo the jellyfish’s natural translucence. Combining color with graphite offers a unique way to approach the ethereal quality you seek to capture.
Mastering Line Drawing Techniques

Line drawing forms the backbone of any jellyfish sketch. It helps you build the shape and movement before adding details. Lines guide your hand and keep your drawing balanced.
When drawing jellyfish, focus on creating smooth, flowing lines. These lines imitate the natural curves of the bell and the gentle waving of tentacles. Sharp or jagged lines can make the jellyfish look stiff, which breaks its delicate feel.
Practice slow, deliberate strokes to build confidence in your line work. Can you feel how the pencil moves to copy the jellyfish’s natural flow? Try drawing a single continuous line to represent a tentacle’s curve. This trains your hand to capture fluidity without lifting the pencil too much.

How does your line flow change when you speed up or slow down? Find a rhythm that matches the gentle pulse of a jellyfish’s movement. Holding your pencil lightly also helps create softer lines that blend with your sketch’s feel.
Outlining the Jellyfish Shape
Start by outlining the jellyfish’s bell. Use simple, curved lines that match the bell’s dome shape. Avoid overly complex shapes at this stage. Capture the roundness first, then adjust afterward.
Sketch tentacles with long, sweeping lines that flow outward from the bell. Avoid drawing straight lines for tentacles; instead, mimic their organic, twisting movement. This makes the tentacles seem alive and natural.
Try drawing each tentacle with a single stroke to maintain fluidity. Overlapping some tentacles adds depth and a natural look. Imagine how the jellyfish drifts and how its tentacles follow behind.
Ask yourself how each line can show motion. What direction would a tentacle bend if it floated in water? Use quick, loose sketches to capture these dynamic poses before settling on final lines.
Line Weight Variation
Changing your line thickness can turn a flat sketch into a vivid drawing. Thicker lines can indicate areas closer to the viewer or parts of the jellyfish with more mass. Thin lines work well for delicate tentacles and subtle details.

Try starting with light strokes to outline shapes. Then, use heavier strokes to emphasize curves or add shadow effect. This contrast creates dimension and helps parts of your drawing stand out.
Practice controlling your pencil pressure, from barely touching the paper to pressing firmly. How do different line weights change your perception of the jellyfish’s texture and form?
Experiment with layering lines too. Multiple thin lines close together can suggest transparency or softness. A mix of thick and thin lines gives your sketch a richer, textured feel, perfect for capturing jellyfish bodies.
Adding Depth with Shading
Shading transforms your jellyfish sketch from flat outlines into lifelike shapes. Using shading helps show the jellyfish’s round body and its unique see-through nature. When shading, focus on gradual changes in tone, which mimic the soft, translucent surfaces of jellyfish.

Work with light pressure to build smooth gradients. Start with a light layer and slowly add darker tones, especially where the bell curves away from the light source. This technique creates a sense of volume and depth. Avoid harsh lines in shaded areas to keep the softness your jellyfish needs.
Try blending tools like a blending stump or soft tissue to smooth pencil lines. Notice how tones melt into each other on a jellyfish bell. This practice helps you capture that gentle, watery look. Have you experimented with different shading pressures to reveal the jellyfish’s subtle form?
Shading the Bell
The bell is the jellyfish’s dome-shaped head, and shading here gives it that roundness. Use soft, circular strokes to apply shading that follows the curve of the bell. Keep shading lighter near the top where light hits directly and gradually darker near the edges for shadow.
Blend the shading carefully. Using a gentle swivel motion with a blending tool makes the surface look smooth, like the jellyfish’s skin. Adding tiny light spots can represent reflections that catch the viewer’s eye, making your bell look more realistic.
Challenge yourself to keep the shading subtle. What happens when you layer lighter tones before dark? This layering builds a natural transition without harsh edges, key for showing the jellyfish’s soft, floating form.
Creating Texture on Tentacles

Your jellyfish’s tentacles need a delicate touch to show their fine structure. Use fine shading with light pencil strokes to trace their long, thin shapes. Cross-hatching adds texture and depth, suggesting the slight roughness tentacles have without making them look stiff.
Try cross-hatching at different angles to give volume and movement. Keep the lines spaced apart to avoid a heavy look. The goal is to suggest fragility and thinness, making the tentacles seem almost weightless in your drawing.
Practice controlling how dark you make the shading on tentacles. Too much pressure will make them appear rigid. Can you spot details in real jellyfish tentacles that inspire these light, textured strokes for your sketch?
Capturing Light and Transparency

You can create a lifelike jellyfish sketch by carefully showing how light passes through the creature’s body. Look at the bell and tentacles to see where light hits and where it fades. These spots are where highlights should appear. Using an eraser to lift graphite can create sharp, bright highlights that suggest transparency. Try pressing gently to lift soft reflections or go deeper for stronger light effects. This technique helps make parts of the jellyfish seem almost see-through.
Layering shading step by step will add realism to your drawing. Start with light tones, then slowly build up darker layers. This gradual process gives your sketch a natural depth, as if light is moving inside the jellyfish’s bell. Focus on balancing shadows and light to show its translucent quality. What happens if you add too much dark shading? You lose the glowing effect, so test lightly and adjust carefully to keep the jellyfish looking alive.
Using Highlights to Show Transparency
To show transparency, place highlights on the jellyfish’s bell where light would pass directly through. Spotting small bright areas can make the bell look like glass. Tentacles look natural when you add tiny highlights along their edges or curves. Using a kneaded or precision eraser allows you to lift graphite without disturbing surrounding shading. This technique lifts pigment to form crisp highlights that catch the eye.
This step requires patience. Erasing too much or in the wrong place can flatten depth. Instead, work incrementally, repeatedly lifting small sections. Have you noticed how light changes when the tentacles twist? Mimic that by adjusting your highlights to follow the folds and bends.
Layering Shading for Realism
Build your shading gradually to enhance the jellyfish’s translucent feel. Begin with a light base layer covering the whole bell and tentacles. Add a second layer with a medium pencil to deepen shadows near the base or under the bell’s rim. The goal is to keep tones soft and blended, so the jellyfish looks like you can see through it.
Use soft pencil strokes and a blending tool for smooth transitions between light and dark. Apply extra layers carefully only in areas needing more depth. This process mirrors how the jellyfish’s body naturally filters light. Try stepping back often and ask yourself if the shading looks gradual and fluid. Does it mimic the jellyfish’s fragile glow? Adjust your layers until the right balance appears.
Incorporating Movement and Flow
Capturing the natural motion of a jellyfish brings life to your sketches. To achieve this, focus on the fluidity found in its bell and tentacles. Avoid rigid lines that make your drawing look stiff. Instead, follow the organic curves the jellyfish creates as it moves through water.
Consider how the bell pulses softly, expanding and contracting. Reflect this by using altered shapes and overlapping lines to suggest motion. Drawing smooth, flowing tentacles with variations in thickness adds depth and energy. You want your jellyfish to feel as if it’s drifting gently, not stuck on the page.
Ask yourself how water influences the jellyfish’s shape. Does the bell stretch more or does it fold? How do the tentacles twist and curl? Observing videos or real-life movement can guide your hand to better express these rhythms. Experiment often to find ways that best convey this subtle, continuous flow.
Sketching Tentacle Motion
You can bring tentacles to life by sketching curves that twist and loop naturally. Use lines of varying thickness—thicker near the base and thinner at the tips. This shows where the tentacles gain strength and where they taper off, mimicking their real movement in water.
Try making some tentacles overlap or cross each other. This adds depth and suggests that the tentacles are not static but drifting and reacting to underwater currents. Don’t be afraid to break smooth lines occasionally with slight bends or flicks—it creates the illusion of motion.
Observe how tentacles respond when a jellyfish propels itself. They trail behind or flow in waves. Replicating this helps your drawing feel less flat. Focus on fluid, rhythmic strokes that vary in pressure to simulate soft, flexible movement.
Expressing Bell Pulsation
The bell is the jellyfish’s engine. It expands and contracts to push water. In your sketch, illustrate this pulsing by distorting the bell’s shape slightly instead of drawing a perfect circle or dome.
Use overlapping lines to suggest layers or folds in the bell. Think about drawing the bell at different stages of movement—some sketches might show it slightly flattened, others more rounded. These subtle changes show energy.
Try adding soft curves or waves along the edge of the bell. These details reflect the bell’s rhythm. Instead of strict symmetry, allow your lines to vary to convey the natural, gentle beat of jellyfish motion. This approach helps your sketch feel dynamic and alive.
Developing Your Personal Style

Finding your own way to draw jellyfish helps your art stand out. Try different sketching methods to see which feel natural for you. Some artists use soft, flowing lines to capture lightness. Others prefer sharper, detailed marks for a realistic touch. Combining line work with shading gives you space to express your unique view.
How can you make your line art work with shading? Maybe gentle shading enhances the bell’s transparency while bold lines define its shape. Or thin, scattered lines bring out tentacle textures while soft shadows add depth. Mixing these approaches creates a fresh look that speaks through your pencil or pen.
Ask yourself: What part of the jellyfish draws your eye most? Use your style to highlight that. Your feel for lines and tones shapes the mood of your sketch. Experiment often and let your sketchbook reflect your growing voice in art.
Exploring Different Techniques
Try various ways of drawing jellyfish to find what suits you best. A minimalist style uses a few clear lines to suggest the jellyfish’s form. This can be quick and expressive choice. Detailed sketches show fine texture and intricate tentacles, giving a realistic effect.
Abstract approaches play with shape and flow, not just exact forms. You might emphasize loops or curves over accuracy. This lets you focus on the feeling rather than strict representation. How does each style change your view of the jellyfish?
Spend time on all styles. Notice which makes you excited to draw more. Your personal style may combine elements from each technique, shaping how your jellyfish stories come alive on paper.
Balancing Detail with Simplicity
Too much detail can overwhelm a jellyfish drawing. Focus on key features like the bell’s outline and the rhythm of tentacles. These parts carry most of the sketch’s impact. Avoid overworking small areas that don’t add meaning.
Simple sketches often communicate more. For example, a clean contour with subtle shading can suggest light passing through a bell without clutter. This balance keeps your sketch fresh and readable.
Ask yourself which details support your main idea and which distract. Leave some areas open to the viewer’s imagination. This way, your jellyfish sketch will hold attention without feeling heavy or busy.
Practice Exercises for Improvement

Refining your jellyfish drawing skills requires focused exercises that build control and accuracy. Simple, daily drills can strengthen your hand and eye coordination. Try tracing basic shapes like circles and curves on paper to improve your line quality. Pay attention to how steady your hand is and how confidently you draw curves that mimic a jellyfish’s bell and tentacles.
Speed sketches help you capture the jellyfish’s fluid motion without getting caught up in details. Set timers for one to five minutes and draw the jellyfish in that timeframe. How much form can you suggest quickly? With practice, you’ll notice which lines convey movement best, and you’ll learn to trust your instincts.
Observation is key. Spend moments looking closely at photos or videos of jellyfish. Ask yourself: Which lines define their shape? How do their tentacles flow? Then sketch what you see without worrying about perfection. These observation challenges will sharpen your ability to notice subtle differences and improve your visual memory for drawing.
Basic Shape and Line Practice
Begin each day by warming up with exercises focused on basic shapes and lines. Draw repeated circles, curves, and wavy lines to develop smooth motion in your strokes. Focus on controlling pressure to keep lines consistent. Try outlining jellyfish bells using simple oval shapes as your base. Practice these shapes slowly first, then speed up to challenge steadiness.
Track your progress by comparing early sketches to later ones. Are your lines cleaner and shapes more confident? Using shapes as building blocks teaches you to break down complex jellyfish forms into manageable parts. This habit will improve your sketches overall and provide a stronger foundation for adding details later.
Timed Sketch Challenges
Set a timer and force yourself to draw a jellyfish in short bursts, starting at one minute and gradually increasing to five minutes. This helps you learn which essential lines to include for capturing a jellyfish’s form effectively under pressure. Time constraints teach you to prioritize accuracy over detail and to develop speed without sacrificing shape recognition.
Try sketching different jellyfish poses within these limits. Can you show the bell’s curve and tentacles’ flow without lifting your pencil too much? After each timed drawing, reflect on what details you missed and what worked well. This exercise will build your ability to visualize and execute a jellyfish shape quickly while maintaining a sense of natural motion.
Conclusions
Drawing jellyfish presents a rewarding challenge. By focusing on basic techniques like line drawing and shading, you gain control over how to depict their shapes and textures. Attention to detail and practice improve your ability to render their fluid forms. Each sketch builds your confidence and understanding of their anatomy.
Applying the techniques discussed will help you develop your own style while drawing jellyfish. Whether for relaxation or improving your skills, these methods make the process approachable and enjoyable. You are now equipped to create jellyfish sketches that reflect their quiet beauty and graceful nature.


